Adobe’s AI technology Adobe Sensei has created new opportunity for the designers to make a selection of a prominent subject in an image with single click making it easy than ever before. Adobe has just released an update to Photoshop CC which includes the new tool ‘Select Subject that comes with Adobe Sensei AI technology. The best part about this tool-Select subject is that it is easy and simple to work with. Such As:

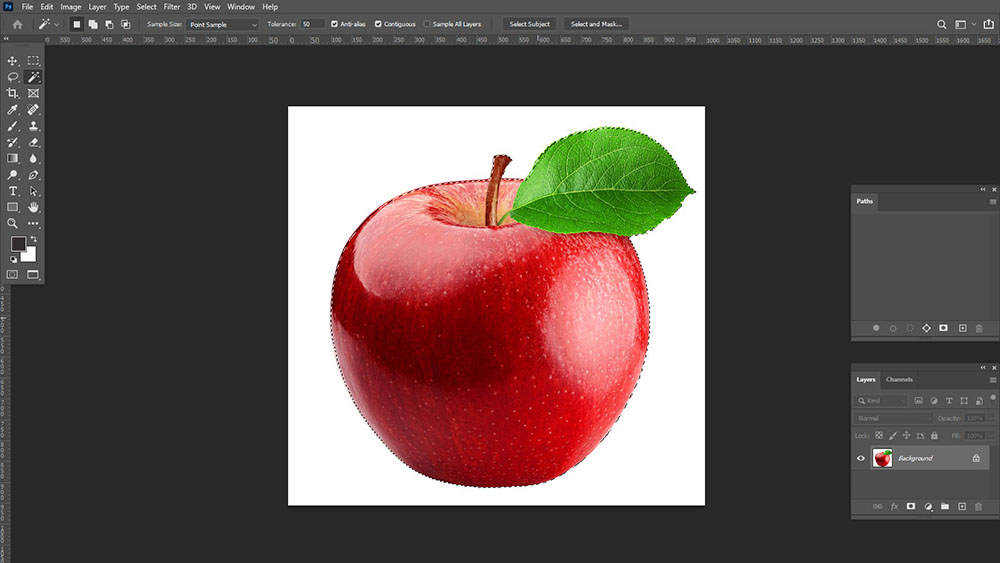

Suppose the subject of our photo is surrounded by a different background which we don’t want anymore, but want to create or select from it, then before we can place our subject into a completely new landscape, we will need to remove the background of the original image first and then put a new one .Background removal is a tricky art and requires more than just the eraser tool, but as people often say you don’t have to be a graphic design magician to learn the steps in Adobe Photoshop CC. So we can understand here two things are related to each other, which are removing the background and selecting the object for putting it with a new background.
First open your photo in Adobe Photoshop.
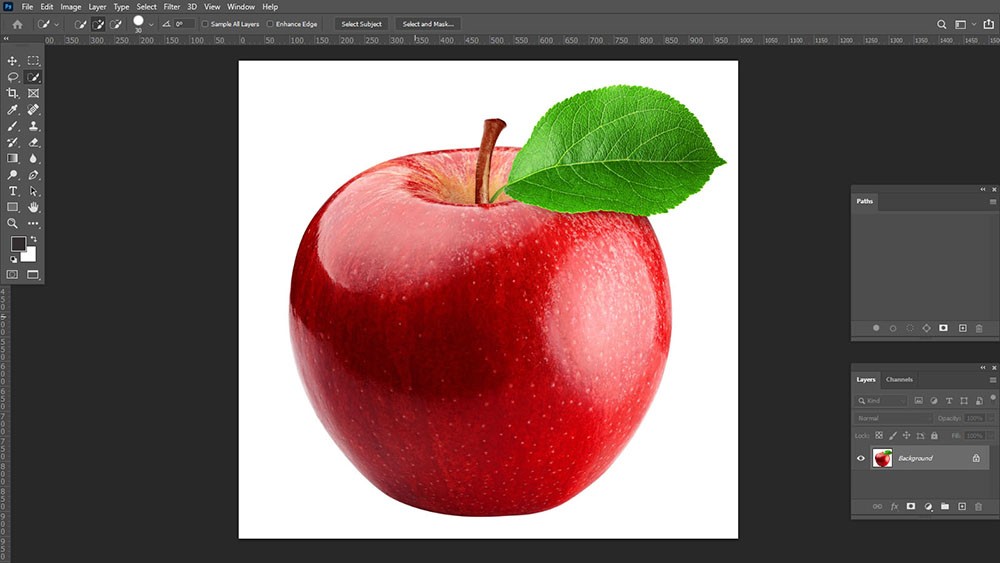
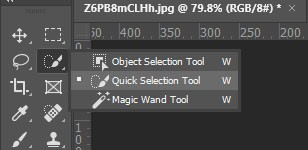
To remove the background, select the ‘Quick Selection Tool’ from the tools panel. The ‘Quick Selection Tool’ is the best tool for basic background removals.
After choosing the Quick Selection Tool, we may need to open the ‘Brush Picker’ under ‘Add to Selection’ section to increase or reduce the brush size depending on the size of the image
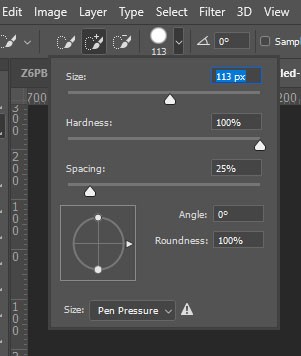
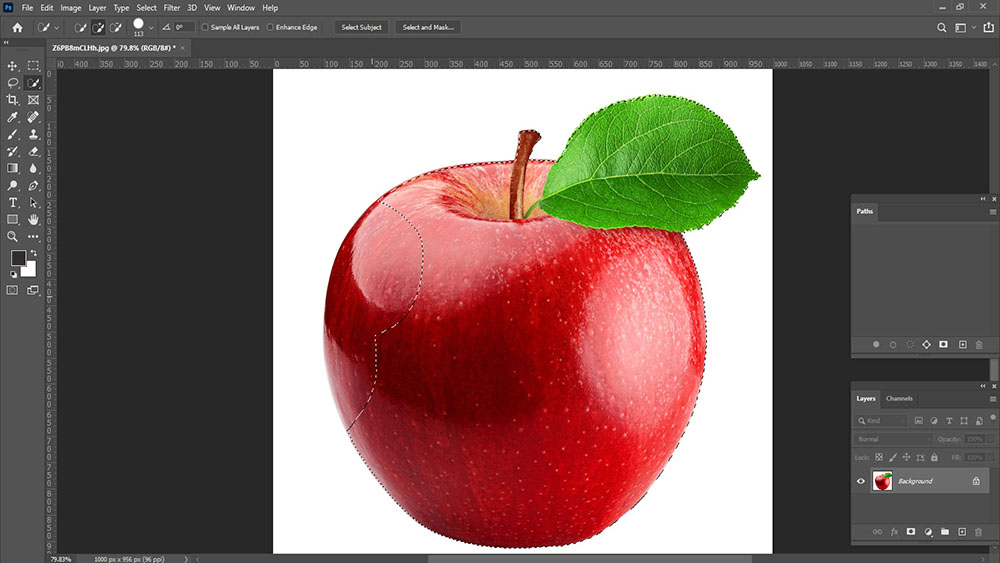
To select the area of your choice, click and drag the mouse on your unwanted background. The Selection content, commonly known as the group of marching ants will appear and grow as you click and drag. Now use them gradually around your subject adding to the selection as you go. Zoom-in closer to work tougher areas including both background and subject. Reducing brush to 1px can help capture the smallest details. This step means you are now done with your selection and need to move on for next step.
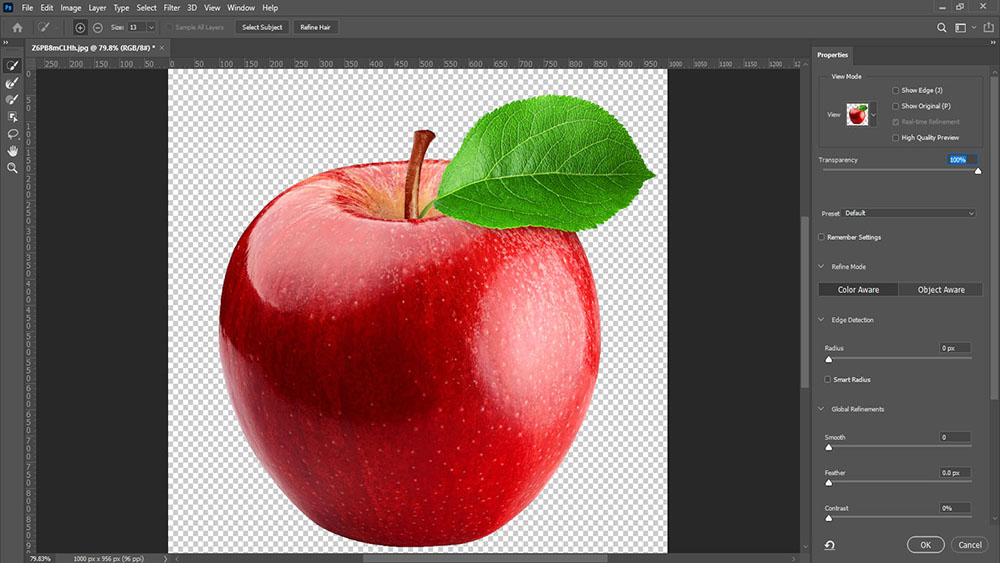
For next step, right click within the marching ants and select ‘Refine Edge’ from the pop-up menu. This can help you fine-tune your selection for even better results. To help seeing the edges which need most help, we can change the View Mode to ‘On White’ or any option that sharply contrasts with our selection. Increase the Smooth value slider to soften the jagged edges of your selection under Adjust Edge. We can also use adjust additional sliders, but making it smooth works best.
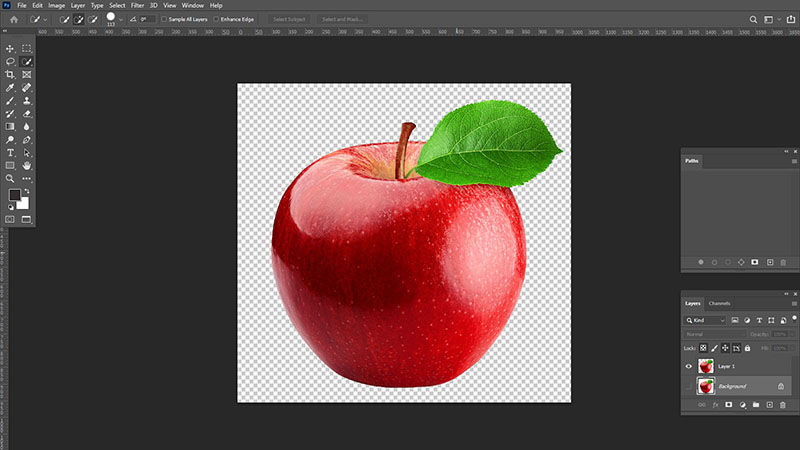
Now if you want to see the results, right-click within your selection and choose Layer Via Copy. The selection will assign a new layer- sans background, without having edited your original photo. Now we are about to create a new surrounding for our subject.
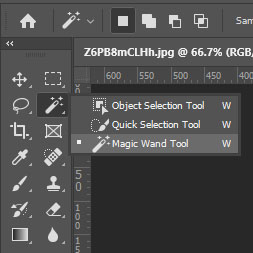
The Object Selection tool simplifies the process selecting a single object or part of an object in any image. Name any object within your image and you are good to go with this tool. You simply draw a rectangular region or a lasso around the object, the Object Selection tool automatically selects the object inside the defined region. The tool works better on well-defined objects than on regions.
Besides while working on selection subject and background removing, we can go for magic wand tool too. With the Image which has clear and solid background, the magic wand tool offers a quicker but better effect. This tool selects pixels based on the color and tone of your image. So when your target and your background clearly have solid differences, you may go for Magic Wand tool. This tool simply cut out the background and leaves the target image behind. Selection should depend on the complexity of the target versus background,

On the other hand Quick Selection Tool works best when there is clear and defined edge to what we want to select. Using this tool, you can drag a brush across an area. While using the tool, the ‘+’ will add any selection and the ‘-’ will remove any selection. Use ( [ ) and ( ] ) brackets to decrease and increase the brush size.