Photo-shop has so many filters by which you can create amazing photo looks. These types of effects are really useful for e-commerce business holders, Fashion Industry , image editing companies . Unsharp mask is one of them . With the help of unsharp mask you can sharp your image . It helps usto make the image more clear and perfect . Using this effect on your photo you can draw attention of your potential customer . You can run your business easily with the help of this unsharp mask effect .
What is Unsharp Mask Effect ?
Unsharp mask is a procedure by which you can sharp your desired image in a perfect way . This filter (Unsharp Mask) precisely sharpens the image . Unsharp mask uses the contrast and make it extends with the edges . Using sharpening technique in your photo, you can upgrade the edges .
Unsharp mask , this name sounds little bit weird . Many of us think that unsharp mask can decrease the sharpness of any image because of its weird name . But it is actually not like this . It helps to create sharpness in an image . To apply unsharp mask effect on your photo, you need not to know so many thing . Photo-shop itself will do all the tasks . You are required to know that how to pull out the sliders to generate the outstanding image sharpening effects on your photo . That all you need to know , Rest of the task will do photo-shop.
In this article , I will describe how easily you can you use unsharp mask in photo-shop for image sharpening purpose . The procedure is done in photo-shop CC but You can also use photo-shop CS6 for sharpening your image .
Important things need to know : Applying sharpening effect in your photo demonstrates that it helps to create your image more sharper and acute . It is not like balancing the focus . Remember one thing , a hazy image will always remain hazy . It will not leave its haziness even if you apply sharpening effect. You can sharp the center of attention by applying unsharp mask effect.
How can you sharpen your image using Unsharp Mask Effect?
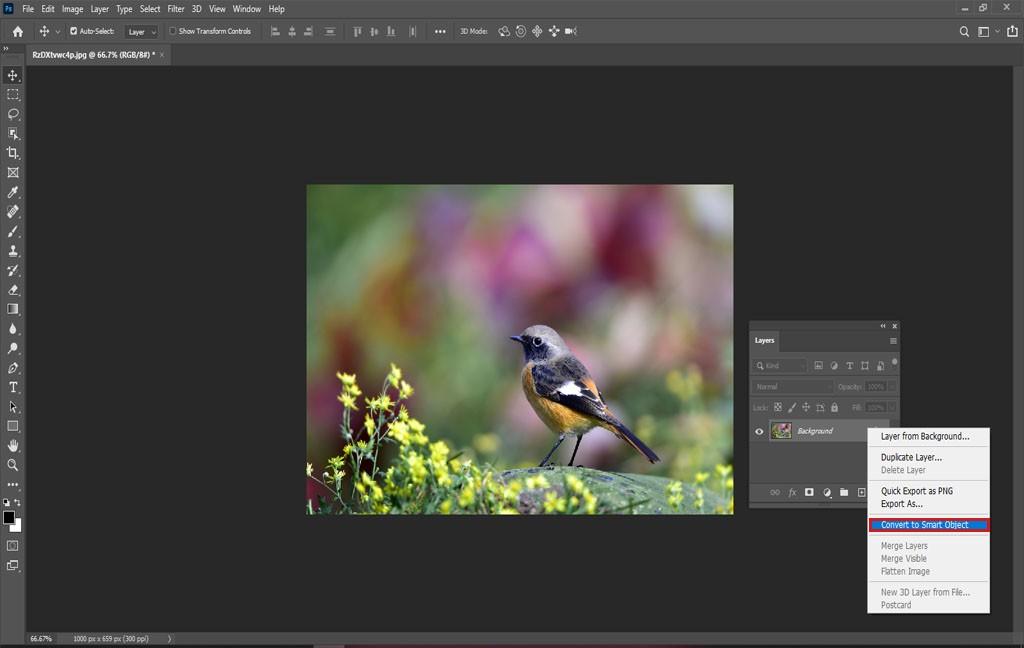
Step 1 : Turn the layers into smart object : First of all , change your image layer into smart object . It will help you to use the unsharp mask . You have two benefits of turning your image layer into smart object . One is , it will support you to edit the sharpening effect if you need it later . And the another one is , it will create it as simple and trouble free to modify mode of the sharpening effect. Photo-shop can use the sharpening effect only one layer . So if your image carries various layers , then you need to merge all the layers into one layer . After then , you can apply sharpening effect. There will be a menu icon at the right side , click on that icon . Now hit on the option which is named as convert to smart object and change your layer into smart object easily. A tiny icon will be appeared when you will click on the convert to smart object option . It means it has changed into smart object.
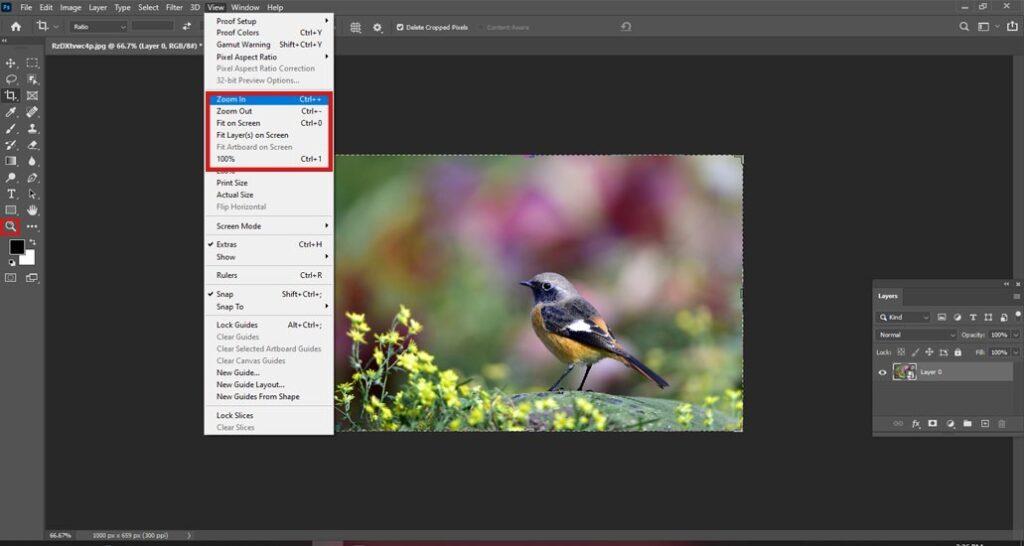
Step 2 : Use Zoom Option : It is always good to use the zoom icon into 100 % . It helps you to clearly see the changes you have made . From the menu bar , go to the zoom icon and set it into 100 % . Beside this , you can use your keyboard key to zoom your photo . Click on the CTRL + 1 if you are using windows , if you are using mac then click on the Command + 1 to zoom . When you have finished the zoom task , then click and hold on to the space bar key to attack on photo-shop hand tool for a shorter period of time . Pull out the image into exactly into the middle your subject or your theme on the display. When you have put in the center , then leave the space bar key .
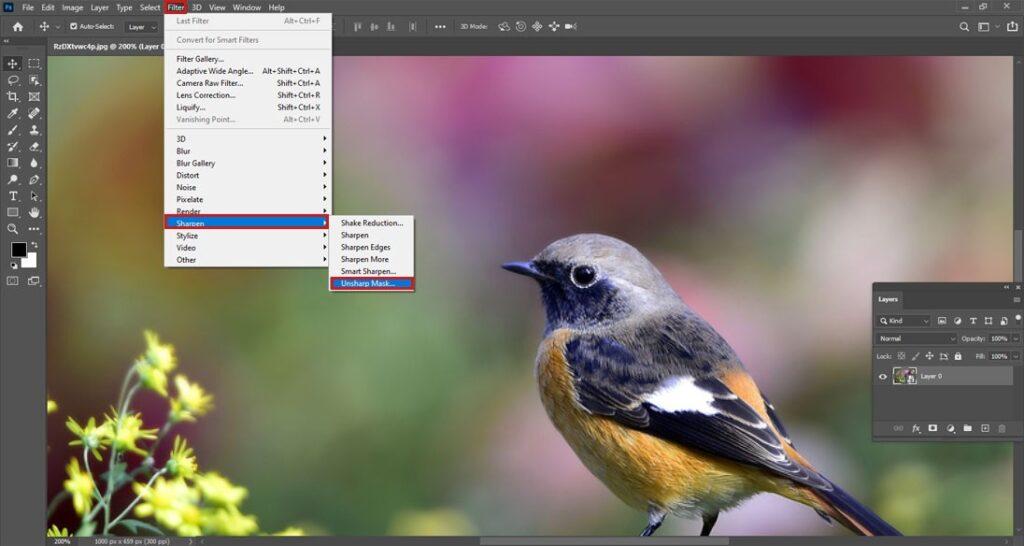
Step 3 : Choose the unsharp Filter : From the tool bar , go to the filter < Select the option which named as Sharpen < Now Select the option which is named as Unsharp Mask . A window will be appeared for unsharp mask . You need to set all the values precisely and perfectly so that it can generate amazing photos. First of all , enable the Preview Option . Tick on the preview option . There will be three other options and they are named as : Amount , Radius , Threshold. Give the value as per your requirements.
How can you alter the view mode into preview ?
When you are observing your image using zoom level at 100 % , the Preview window allows you to examine the sharpening in various segments of your image in 100 % . If you want to make a move the preview to various portions of your picture, you just need to press and pull out on the inside of the preview window. Besides this , you can hit on the picture to immediately core that mark on the inside of the preview window.
How to adjust the unsharp preview option ?
Photo-shop helps you to see organic and live preview when you will set the value of the amount , radius and threshold option in your image . To check your all settings , you can use the switch and turn it on and off to check your settings. When the preview option is disabled , then the picture will be its original state . But when you enable the preview option , the settings you have made will appear on your photo . There is a shortcut to use the preview option . You can use P key from your keyboard . It will help you to use the preview option . To use the preview option , you need to press inside of the box . Check your sharpening effect , if everything is okay then leave the button of mouse .
Step 4 : How to adjust the amount option : To get a perfect sharpening effect on your image, you need to increase the slider for better result . If any part is light , then you need to create that side lighter , and if any part is deep then you need to create that part more deeper . When you will increase the slider more and more , then the image will look more acute . With the help of this amount option , You can adjust the contrast edge . If you want to print the image then place large value on the amount option . If you use default value for your image , then the image may not look sharper the way it should look . Try to increase the slider more so that your image looks more strong and more acute. Give different types of value and check which looks best. 500% is the maximum value of amount option . If you use default value then it may not look good, also if you use maximum value then it will look too much sharp. How you can set the perfect value? For higher resolution of image give the value between 150 % to 200 % . For medium or small size of image , give the value at most 50 % – 80 % .
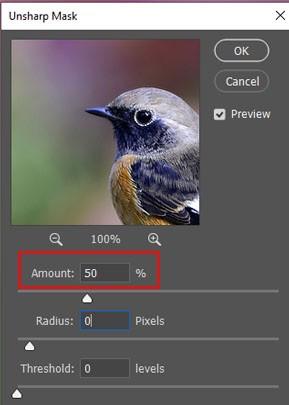
Step 5 : Use the Radius option : The radius option manages the depth of the edges. It has the control over pixels . You can use the default value but it will not effect the whole image in a good way. Increase the pixel size and get a perfect effect. Use different values (such as : 2 px , 5 px, 10 , 20 px )to see what is best for you . When you increase the value , the image will look more clearer than before. If you use the image for online purpose such as : email , then place the pixel value less than 1 px (0.5, 0.7 , 0. 8 ) . If you want to print the image then place the value more than 1 pixels (5 px, 10 , 20 px ).
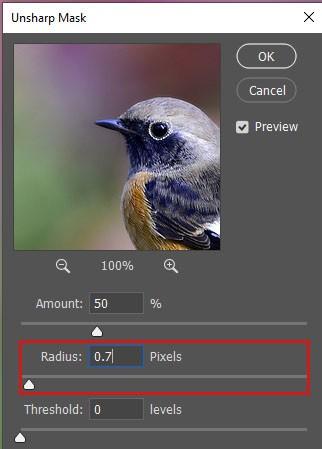
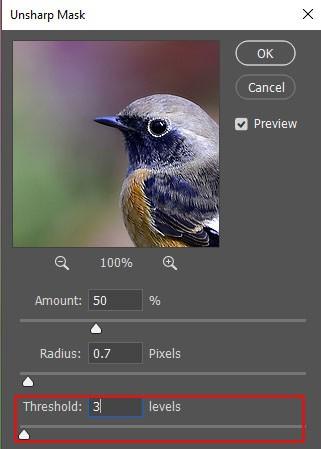
Step 6 : Use the threshold option: As you already know that unsharp mask does not determine the edges. So use the threshold option very carefully. Unsharp mask sharps the whole pixels. It sharps the background pixels as well . It is the disadvantage of using unsharp mask . Unsharp mask does not know which pixels are edges and which are not edges. Use the slider to increase the threshold value . To get a perfect look , give the value in between 1 to 10 levels. It will create a real and natural look .
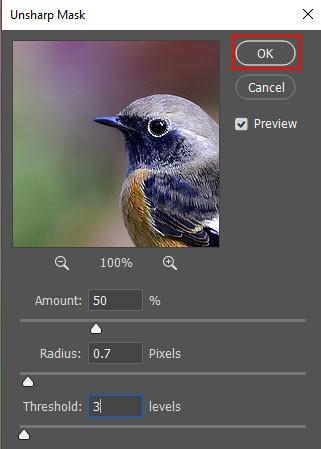
Step 7 : When you have set everything perfectly in unsharp mask window , hit the OK button . All the adjustments you have done will apply on your photo . Save your work .
Important thing needs to be done : Unsharp mask not only work on the brightness of an image , but also it affects the the picture color as well . And this makes the whole photo unreal . To avoid such problems , switch the blend mode into luminosity . Press double on the blend option , change it from normal mode to luminosity . It will help to make a real and natural look .