Do you like to make some fun and experiments by using Adobe Photoshop? When we will capture some group photo or something else then it is quite tough to capture them in a single frame and in that case, we have to mix them up and try to create some different feelings on that note. IN this tutorial we will tell you the very common technique of placing two images side by side. Let’s go for a detailed discussion.
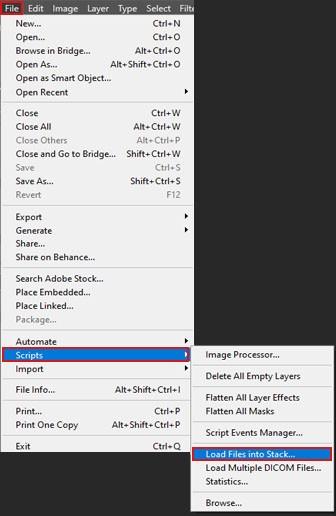
The first thing that we want to consider here is load files into a stack. Naturally, Photoshop opens those files step by step. Window after window. As we are merging two images then we need to open them up in a single window. To do that Go to the menu bar and click the file menu choose scripts and then load files stack.
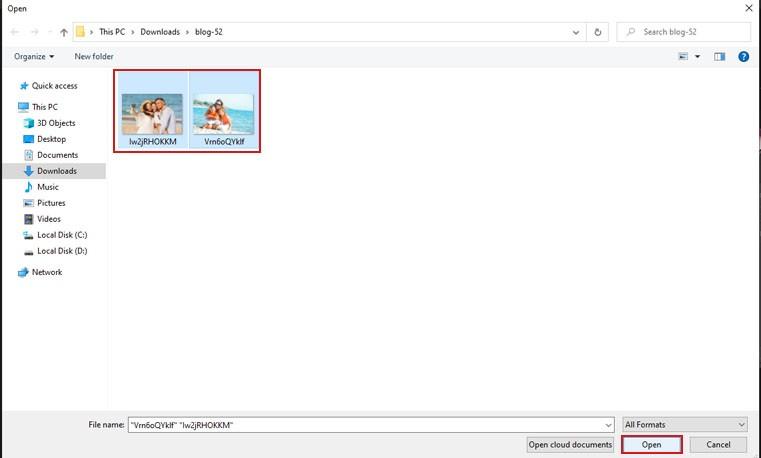
Now it’s your turn to select some images for the stack. You have to choose files and browse to set them one after another.Now you will see a pop-up window on your monitor firstly, select one image from there and then press the shift key to select another one.
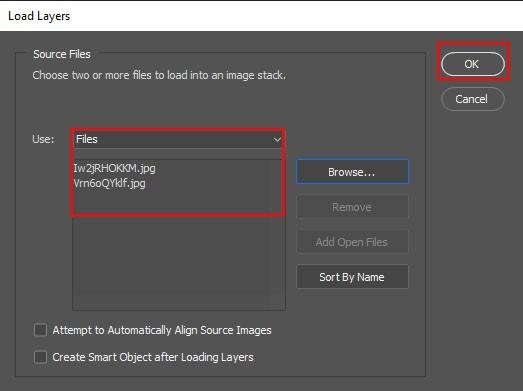
It’s high time to load those images into Photoshop. Get back to the load layers’ dialogue box and the selected images will show below the use button. You can simply sort them as your wish and eventually click the okay button to complete the mission. Now Photoshop will load both images in different layers. The interesting thing is, name of the files is used as layers’ name.
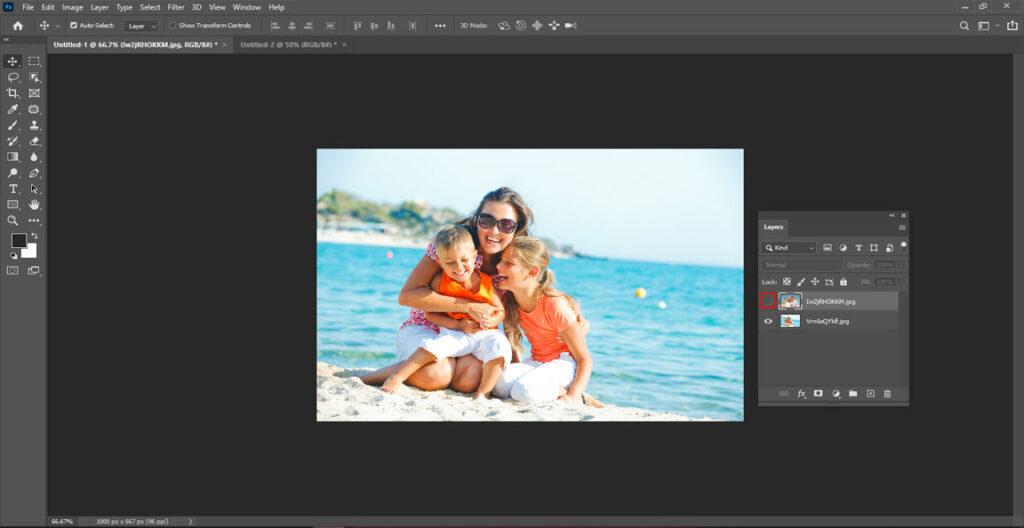
Now you can view them at the layer’s window. As it is quite impossible to show both two images in the same window. You can simply show them one after another. From the layers button, you will see an eye icon. By clicking it make it visible or invisible to the window panel.
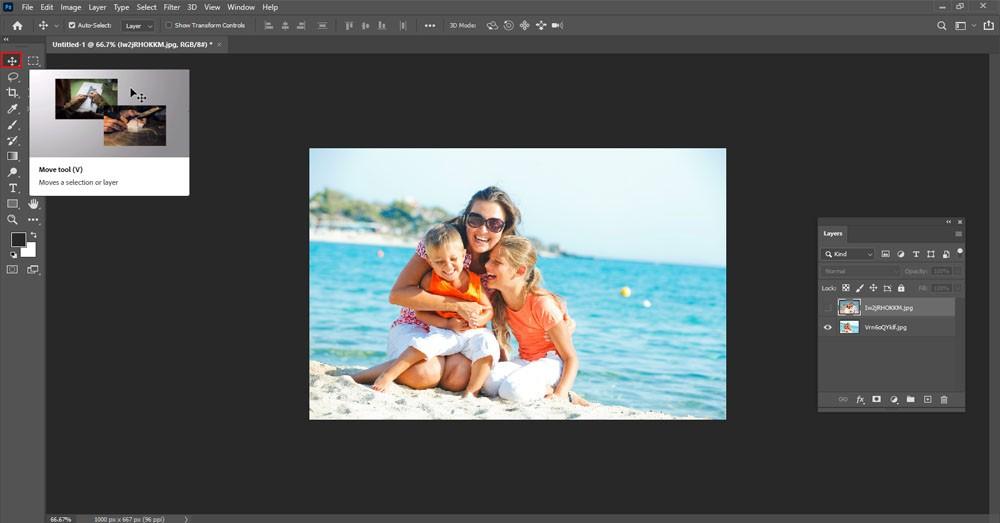
Now, our task is to show both the documents in the same window. You can simply do that by using the move tool. Select it from the toolbox and then place both two images in the same window.
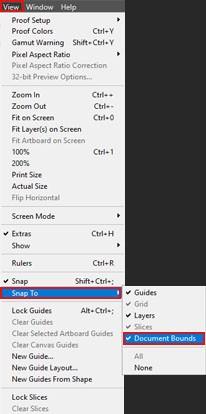
Enabling the snap documents is the key here. To do this firstly, go to the view option in the menu bar and make sure that the snap option is enabled properly. For verifying it you can see a mark option beside it. Now from the snap option, you need to select the documents bunds.
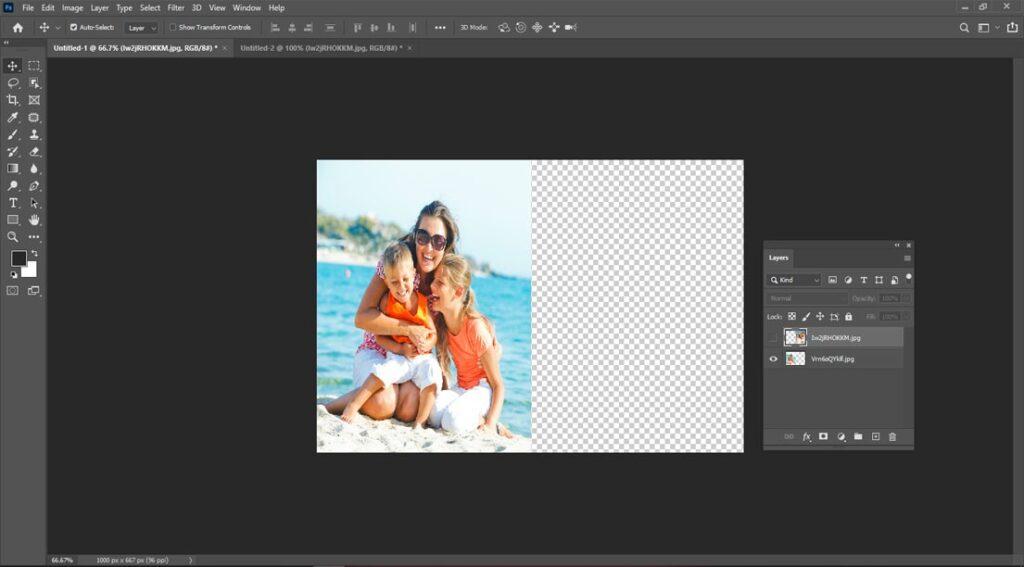
Now drag the image to the opposite side of the window and then place it side by side. You can just press the shift key and place it in any position you wish. Please make it symmetrical which means the same height and same weight to all the images.

Now our task is to snap the image to the document edge. As soon as we make both two images side by side we need to make it natural. This is the main challenge that we face regularly. Click the shift key and now the top images are hidden from the side and the two images look like a single one. It looks natural. Now from the menu button, you need to click the reveal all button. You will have it just below the trim button. That’s all the journey is over now.
It is a step-by-step guide as you need to be cautious while uploading those images. Do not miss any steps as it is a sequential process. Firstly, it might seem a hard task but after the time you will get habituated and things will be easy for you. Always keep a thing in your mind that while combining two images on the same platform makes those images the same like symmetrical. Their shape, color tone, and intensity should be the same. Otherwise, it will be quite tough to manage them all and convince your targeted audience. You should not understand that it is an artificial image. It must have to look like an original one. I believe that is the success of an image editor. Best of luck!