Have you ever experiment with something funny when you will blend some letters into something? I know you didn’t get the point. Okay, let me tell you in detail do you have any idea to blend some letters into clouds? It seems crazy. Yes, it is possible by applying the advanced tips and tricks of Photoshop. Today our discussion topic is “How to blend text into clouds with Photoshop?” Let’s go for a detailed discussion.
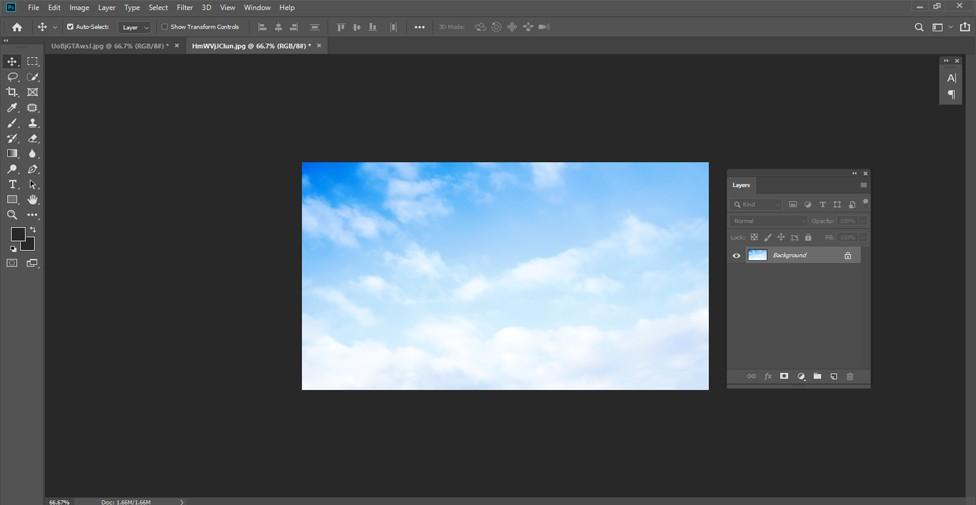
From the file menu, you have to open up a new image that consists of a cloud. Please choose an image that has some cloud and later on we can blend some text on it.
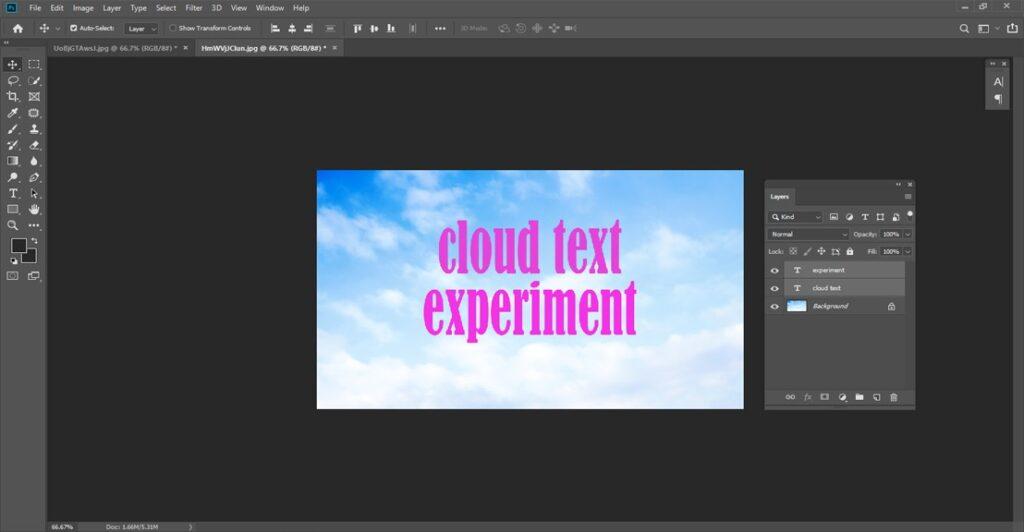
From the left side menu bar please pick up the text icon. You can easily get it as it contains a simple icon of “T” which is for text. For this experiment, we are typing “Cloud text experiment”. To check whether your writing is okay or not please click the visibility icon from the layer’s panel.
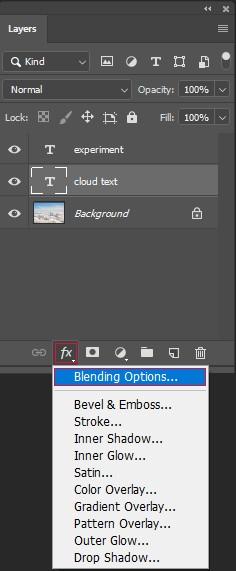
What we have to do now is blending. We have to blend the text into the image. You need to click the fx option and from there at the top of the option, you will have the blending option.
The blending should be accurate otherwise you cannot have a great feeling here. At the bottom of the dialogue box, there are two sliders. One is called this layer and another one is an underlying layer. It is commonly renowned as a Photoshop blend of features. They are working based on the current layer and luminosity. You can simply choose the value from 0 to 255. In this context, we are setting a high standard that is 255. A user can select it depending on his necessity. Here we are choosing a blending color like grey. There is a drop-down menu box beside the blend if button. Now, we will work on the underlying layer and move it from 255 to 200.
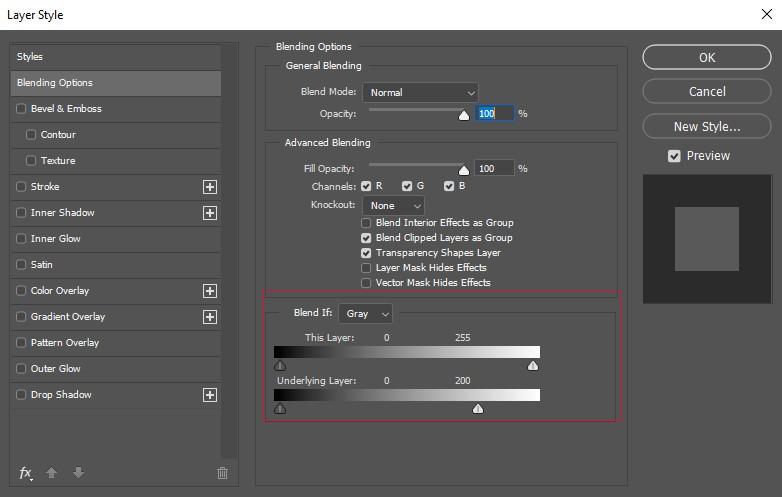
After reaching a certain point we will notice that the text is going to disappear soon. If you reduce the level below 200 then it might blend again. At the lowest point 0, it will disappear completely. While doing this work please look at the background it should not be too light or dark. As we are experimenting with something new it must have to be accurate.
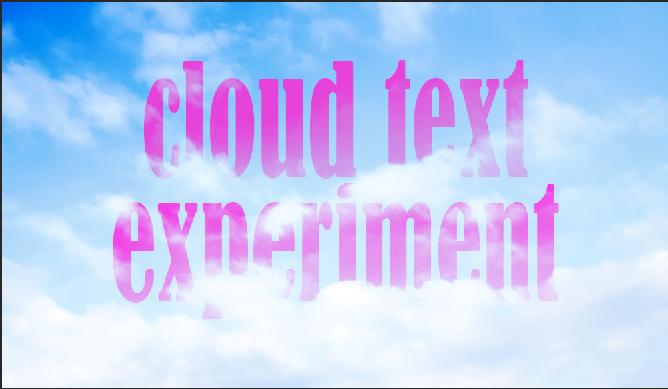
Does it look harsh to you? We are experimenting with it, again and again, to make the document perfect for use. The cloud and text should be the same platform and one is blending with another. If you are using the Windows platform, then click Alt and move the slider to left and decrease the amount now convert it to 100. It is almost half from the previous situation. That’s all now recheck the whole process and in this way, your given text will be blending with the clouds.
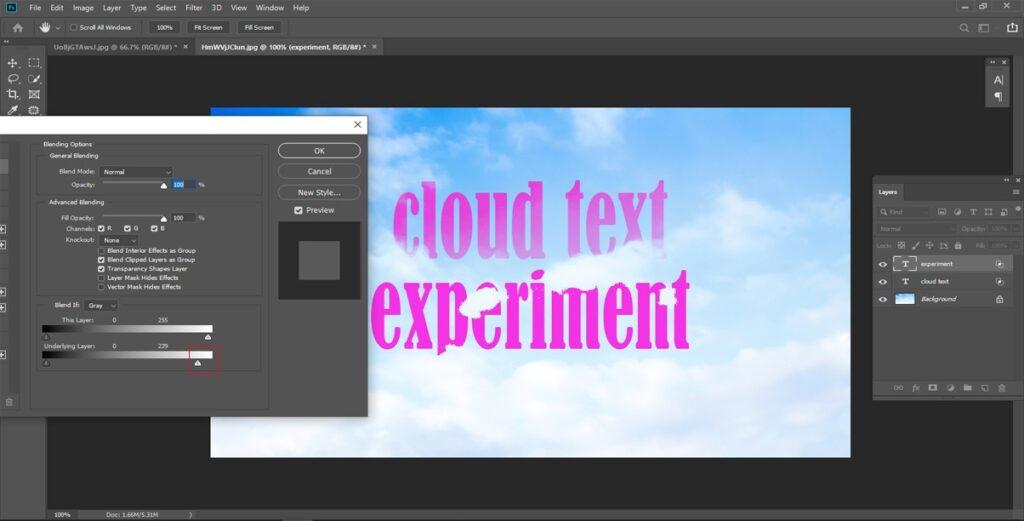
Figure: Text with cloud
Up until this point, we’ve just utilized the white slider to mix the mists in with the content. But at the same time, there’s a backslider underneath the left half of the “underline Layer” inclination bar. The white slider mixes the lightest pieces of the picture in with the content, while the dark slider mixes in the most obscure regions.
Assuming we were mixing an alternate kind of background into the content, we may likewise need to mix in the more obscure territories. We could do that by hauling the dark slider towards the right. Holding Alt (Win)/Option (Mac) while hauling the dark slider would part the slider fifty-fifty to make smooth progress, similarly as we’ve seen with the white slider. Yet, for this situation, all we would wind up doing is mixing the more obscure spaces of the sky into the content, which wouldn’t look right. We just need to mix in the mists. Since the mists are the lightest pieces of the picture, the solitary slider we need for this impact is the white one.
That’s all. I hope now you have the detailed idea to experiment with it step by step. We are providing different tutorials for Photoshop users. Stay with us and learn the basics of Photoshop.