Do you need to add text to a picture but there is just no good place to put it? So why not try adding text as transparent text in Photoshop. The process is easy and the result is amazing. Lets learn how to easily make a transparent text area, meaning that the type itself will be fully transparent, allowing the picture below it to show through. To reveal the shapes of the letters, surround the text with a block of solid color usually white. Then the transparent text becomes a frame for your subject. This is an effective and easy design trick for pictures that are too busy for text to be easily readable.
Creating transparent text in Photoshop is also fun. You can start by adding a new layer above the photo and filling it with white. Then, add your text. To make the text transparent, use Photoshop’s Advanced Blending options. These options are very simple advanced options to turn your type layer into a Knockout layer which punches holes right through to the picture in the shapes of your text.
How To Add Transparent Text
You can use Photoshop CC but every step is compatible with Photoshop CS6 and earlier versions too.
Step 1: Open Your Image
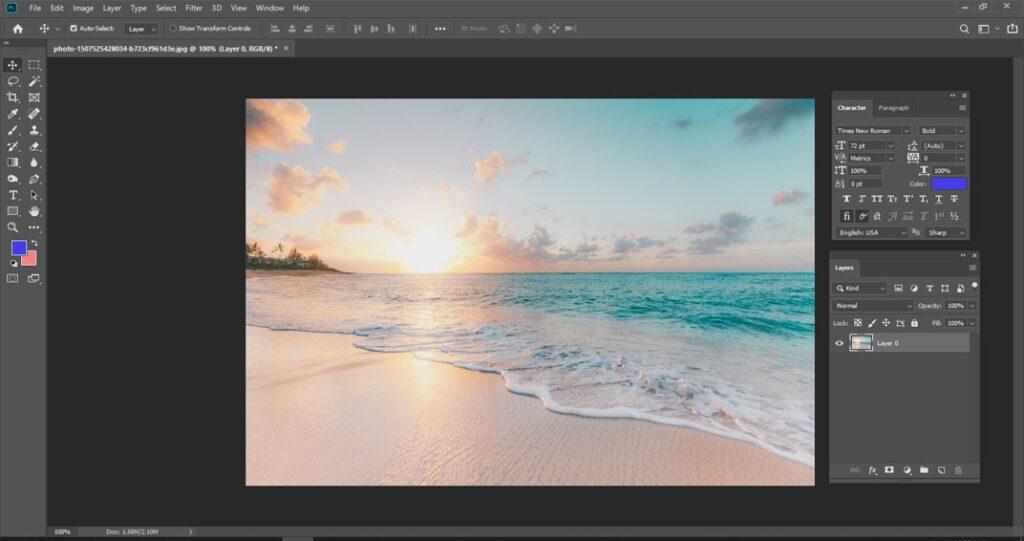
At first open your image where you want to add some transparent text.
Step 2 : Add A New Layer
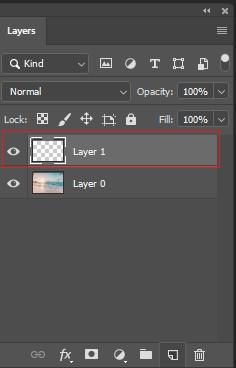
Now in the Layers panel, you can see the picture on the Background layer. Then add a new blank layer above the photo by clicking the new layer. You will find this icon at the bottom of the Layers panel. So here a new layer named Layer 1 appears above the Background layer.
Step 3: Fill The New Layer With White
Use this layer to create the area of white. It will surround the text. Go to the Edit menu in the Menu Bar and choose Fill and fill the layer with white.
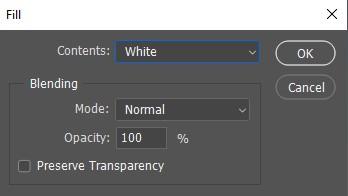
Go to Edit > Fill.
Then set the Contents option at the top to White in the Fill dialog box, and then click OK. Photoshop fills the layer with white, and temporarily blocks the picture from view.
Step 4: Lower The Layer Opacity
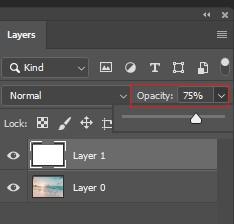
Make sure to lower the opacity of Layer 1 to 75%. You will find the Opacity option in the upper right of the Layers panel. After lowering the opacity, the photo is now partially shown through so you can see it as you are adding the text.
Step 5: Select The Type Tool
Now select the Type Tool from the Toolbar.

Step 6: Choose Your Font
It’s time to choose a font in the Options Bar. Then set the font size to 72 pt. You will need to resize the text once you have added it, but this will give you the largest preset size for now.

Step 7: Set The Type Color To Black
You have to set type color to black by pressing the letter D on, which resets the color to its default. This is just so you can see the type in front of the white background. You can find the current font color in the color swatch in the Options Bar.
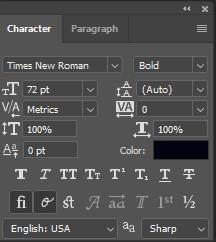
Step 8: Add Your Text
Now click inside the document and add ext. To accept it click on the check mark in the options bar. You can see a new Type layer appear above Layer 1 in the Layers panel.
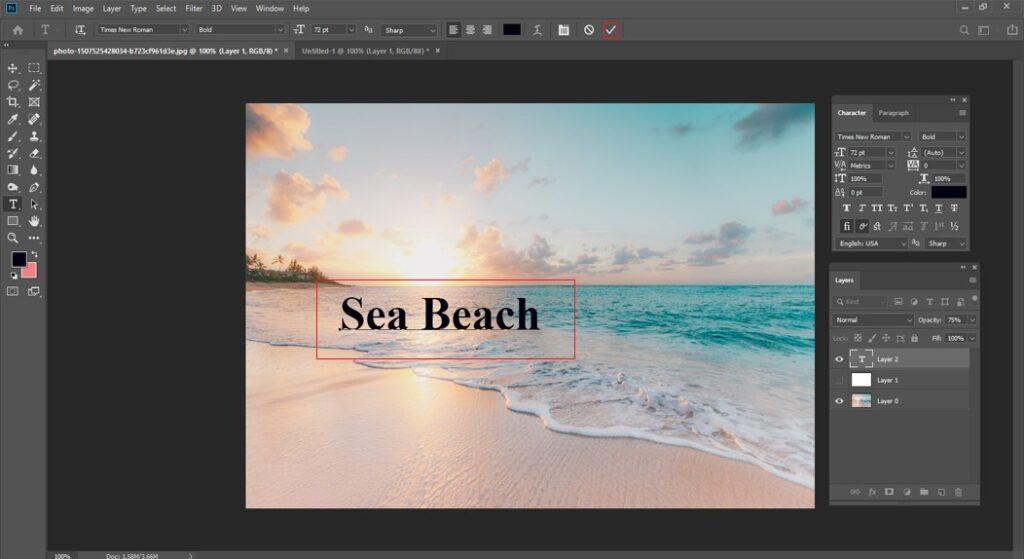
Step 9: Resize The Text
Go to the Edit menu in the Menu Bar then choose Free Transform.
Now click and drag any of the corner handles to resize the text according to your needs. Press and hold Shift key as you drag to avoid distorting the shapes of the text as you are resizing it. Click inside the Free Transform box and drag it into position to move the text. When you are done, press Enter (for Windows user) / Return (for Mac user).

Step 10: Open The Blending Options
Click on the Layer Styles icon which is the fx icon at the bottom of the Layers panel with the Type layer selected. From the top of the list choose Blending Options. Now change Knockout from None to Shallow in the advanced blending section.
It will turn the type layer into a knockout layer, which means that Photoshop will use the shapes of the letters to punch through Layer 1 and reveal the photo on the background layer. Drag the Fill Opacity slider all the way down to 0% and you can see the effect. Then click OK to close the layer style dialog box.
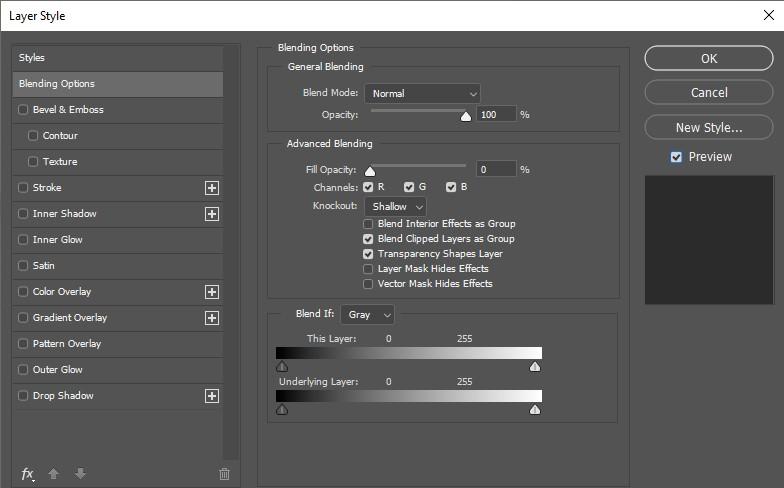
Not only the text itself is transparent, but also the area on Layer 1 directly below the text. You can now see the photo on the background layer through the letters.
Step 11: Select Layer 1
Now you should resize the white area surrounding the text so that it’s not covering up the entire image. So click on Layer 1 in the Layers panel to select it.
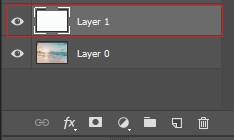
Step 12: Resize The Layer With Free Transform
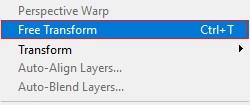
Go to the Edit menu, again choose Free Transform.
Go to Edit > Free Transform.
Then drag the top and bottom handles in towards the text. Press and hold Enter (for Windows user) / Return (for Mac user) when you are done.
Step 13: Adjust The Layer Opacity

Adjust the opacity of Layer 1 to fine-tune the visibility of these letters. To make the white area surrounding the text more solid and the type easier to read you can increase the opacity. On the other hand decreasing the opacity will fade the text area into the photo.