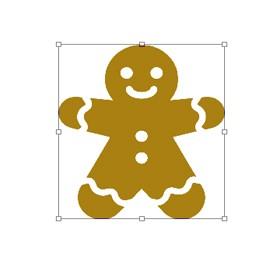
In this article , I will describe how to create your own photo-shop custom shapes. You can create different types of shapes for digital scarp-booking. Scarp-booking is a procedure of maintaining and organizing and preserving special moments , some unique moments and family’s old days memories or personal old days memories . You can create any type of shapes for any type of theme , concept . You can beautify the scarp-book album using different types of shapes. And you can create shapes with the help of photo-shop. After creating different shapes , you can use all these shapes for professional work. Using pen tool , rectangle tool , ellipse tool , you create multiple types of shapes. You can create shapes for holiday themes , summer themes, birthday occasions and many other themes .
How to create photo-shop custom shapes using pen tool :
Step 1 : Choose the pen tool :Go to the tools palette , pick out the “Pen tool”. You can choose the pen tool using shortcut command. Press the “P key ” from your keyboard to choose the pen tool.

Step 2 : Choose the “Shape layers” from the options menu : In the options menu , there will be three symbols grouped together . Go to the left side and choose the “shape layers” symbol from the option bar . After selecting the shape layer icon , then you can draw out shapes with the help of pen tool . And shape layer option remains activated by default . You do need to set this manually. But still you should check before drawing the shapes.

One thing needs to be remembered: There is no dissimilarity between drawing paths using pen tool and drawing shapes with the help of pen tool. Both are created accurately the same procedure. Pull out the handles to make straight or wavy path section if required . The dissimilarity is that with shapes , photo-shop covers the path using color. It helps us to see the shape.
Step 3 : Start drawing the shape : Choose your desired object to create custom shape . For example , select zinger-bread man to create custom shape . You can choose any subject to create custom shape. Now the pen tool is selected because you have selected the Shape layers symbol from the option bar. Now , start detecting throughout the object. Detect the top side of your object , press with the pen tool to set the anchor points and pull the handles to create a curvy path sections throughout the side and also the top of the object. Here is a small problem and that is photo-shop covers the shape using forefront color . It creates a barrier to view the subject. But you can solve this problem . Do not worry .
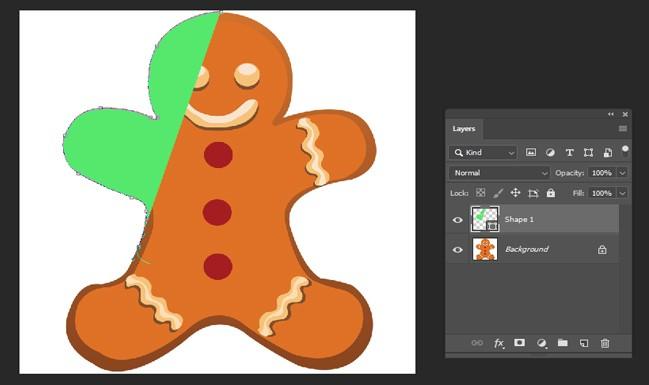
Step 4 : Decrease the opacity of the shape layer : Photo-shop covers the shape using forefront color . It creates a barrier to view the subject. To avoid this problem, go to the layer palette and then decrease the opacity of the shape layer . In the layers palette, there will be two layers. One is background layer which contains the actual image and another one is “Shape 1” layer .
Shape 1 layer is highlighted with blue . It means that it is currently activated. Select the “Shape 1 ” layer and decrease the opacity. Set the opacity as 50 % . After decreasing the opacity , you will be able to view the ginger-bread man photo or any other photo which you have used for creating shape . You can see the photo via shape color . Now it has become much comfortable to continue the detection throughout the photo. The object is clear to see using the shape color after decreasing the shape’s layer opacity value.
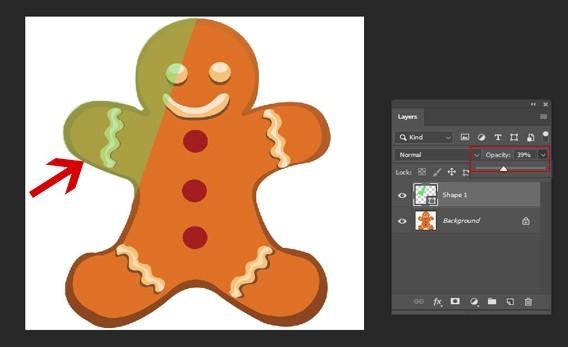
Step 5 : Follow and observe the shape layer : Follow the object and complete your initial shape. From the layers palette, notice the shape layer . You can view the perfect shape of the object on the layers palette. It means that , you have detected the root shape of your object. If needed , you can add some other parts in the shape as well. For example, if you are creating ginger-bread man shape , then you can use his eye , tie and other things in the shape .
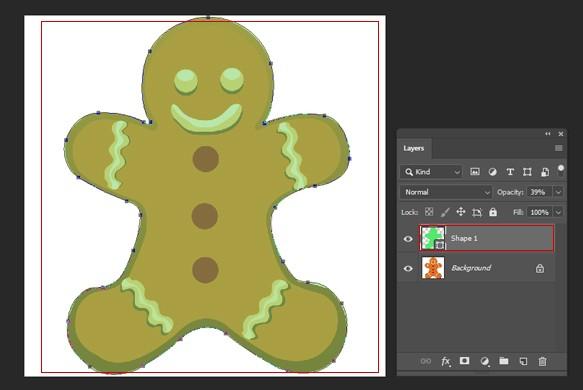
Step 6 : Choose the ellipse tool: If you want to add eyes to the shapes , it would be better to use ellipse tool . You can use pen tool also , but ellipse tools works better for eyes . Since the eyes are round , it would be better to use the ellipse tool. Go to the tools palette < choose “Ellipse Tool” from there. But you can not directly select the ellipse tool. To select the ellipse tool , you need to Press on the rectangle tool and then select ellipse tool.
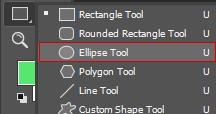
Step 7 : Pick out this option “ Substract from shape area ” : After selecting the ellipse tool , go and search the option bar. You will find many options there and they are grouped together. You will see a small rectangle box icon there. These symbols help us to include a new shape in the present shape , deduct a shape from the present shape . Also you can create intersection with one shape to other . Go to the left side and press on the third number symbol . Third symbol is the “substract from the shape area ” . From the options menu , press on this symbol .
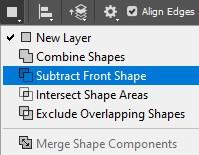
Step 8 : Pull out the shape to detach them from the primary shape : Since you have selected the Substract from shape area option , you can start including small items into your shape if you want. Pull out the elliptical shape throughout the small item which you want to include in your custom shape.
For example : if you are creating a custom shape of ginger-bread man and you want to include his eyes in the shape. To include the eye , Hold your mouse and pull out the elliptical shape throughout the eye. The moment you will leave the mouse , eyes will be detached or cut out from its primary shape and it makes a hole for the eyes. To include any other shapes into your custom shape, then pull out the elliptical shape throughout that particular item and then leave the mouse and it will cut out the item and make a hole. Go and check the shape layer’s preview thumbnail from the layers palette . New holes are included into your shape that you have cut out. If you want to include some other items which are not round shape then return back to the pen tool to include those.
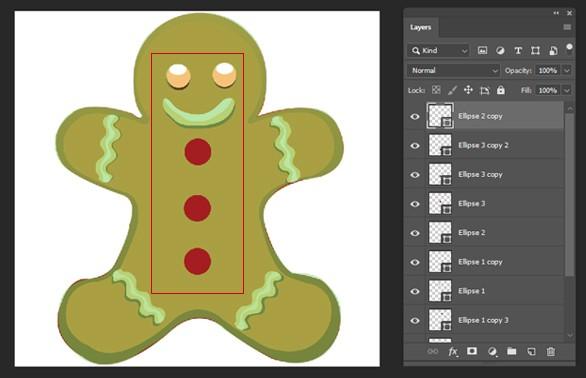
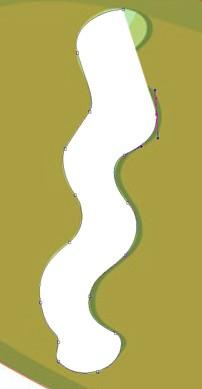
Step 9 : Apply the pen tool and substract some other items: Choose the pen tool and also select the “substract from the shape area ”. Detect the area which you wish to substract from your primary shape. Draw out a path throughout the items and then cut it out. Go and check the layer’s preview thumbnail from the layers palette . New holes are included into your shape that have been cut out with the help of pen tool. Now Shape layer thumbnails are displaying every little items.
Step 10 : Set the opacity value of the shape layer : Go to the layers palette < go to right side < set the opacity value as 100 % . We are increasing the opacity value because we have detected all the segments of our shape. Press on the background layer eye icon or visibility icon and turn it off. By doing so , it will help us to see the shape accurately. Initial task is done but it is not enough. We have to specify it as a “Custom Shape”.
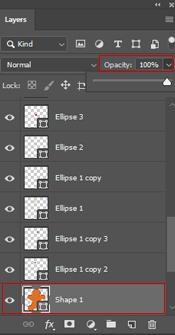
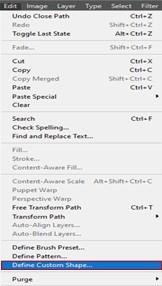
Step 11 : Select the “ Define Custom Shape” option: At first, select the shape layer as well as the shape layer’s preview thumbnail. After selecting these two, a white outline will be appeared and you can view the path layout throughout the shape. Just press on the thumbnail to select it. Now go to the top < select the “Edit” option < Choose the “define custom shape” option. Shape name dialog box will be appeared. Set a name for your shape. Press OK. Now our task is completed. Creating and saving the shape is done.
Step 12 : Create a new PS document : create a new document to know where you can find out the shape and how can you use it for your work. Go to the file option < choose new < set the preset menu as per your wish.

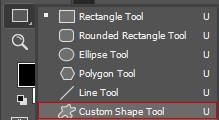
Step 13 : Pick out the custom shape tool: Go to the tools palette < Choose the rectangle tool <go to down and pick out the “custom shape tool”.
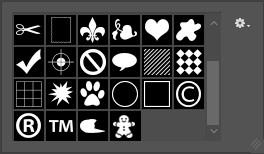
Step 14 : Now pick out your custom shape : after selecting the custom shape tool, use right click (for windows) or control click option (for mac) on the inside of your new PS document. Shape selection box will be displayed. Choose your Custom shape that you have created some times ago. You will find it at the last. Press on the thumbnail and make it selected.
Step 15 : Start pulling out your shape : pull the shape on the inside of the document. Do not disfigure your custom shape. So press on the SHIFT key when you are pulling the shape. To place the shape into the center of the document , press and hold on the ALT (windows) or Options key (mac). If you want to relocate your shape then hold the space key and pull the shape into a new place. Then leave the space key . Since you are pulling this , you will be able to view a path layout there. If the size and the location is okay then leave the mouse button. Photo-shop sets the shape color with your present foreground color.
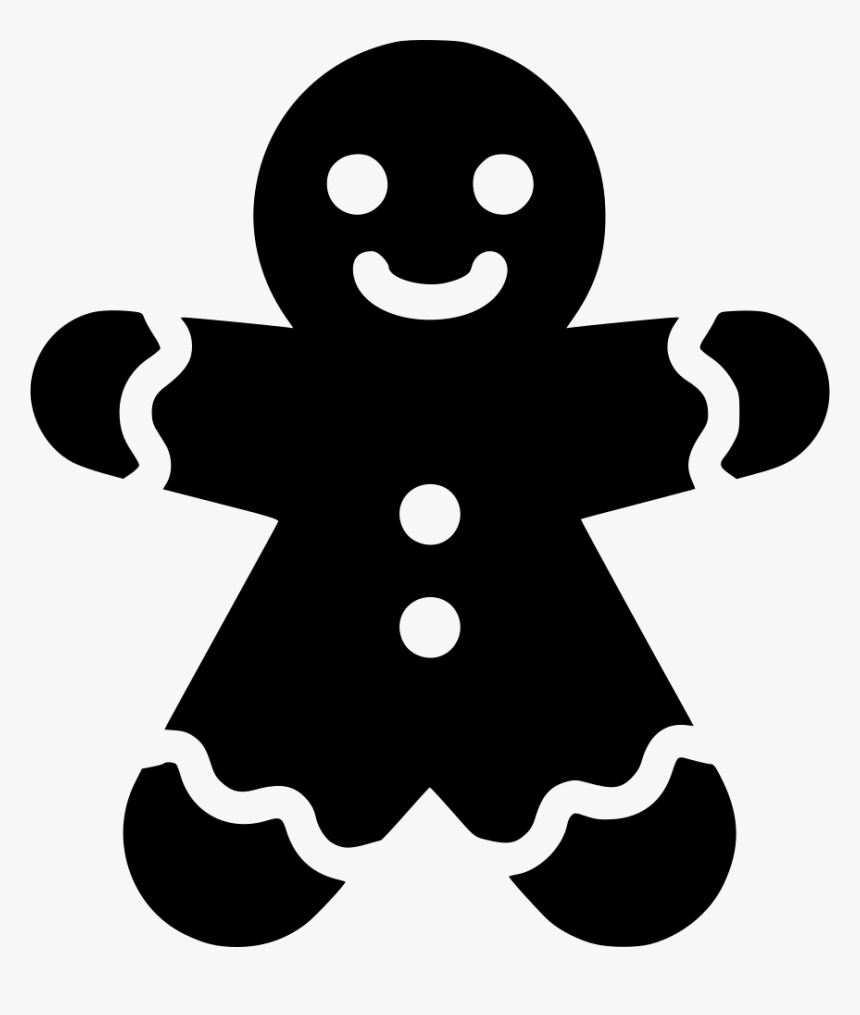
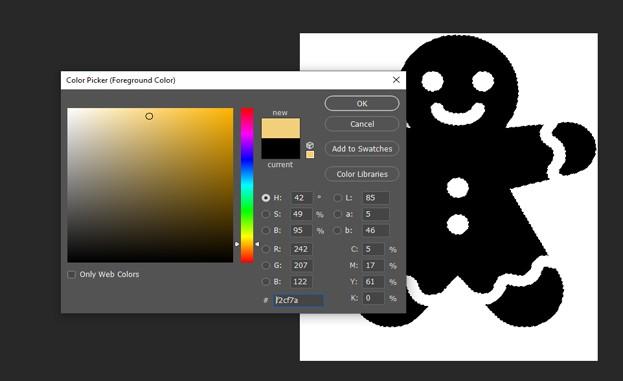
Step 16 : Alter the shape color :If you do not like the shape’s color , then do not panic for it. Go to the shape layer’s thumbnail and press twice on it . Do not click on the shape preview thumbnail . Go to the left side , you will find something looks like color swatch . Just click double on the shape layer’s thumbnail to alter the shape color . Color picker will be appeared. Set your desired color .
Step 17 : alter the size of the shape: If you do not like the size of the shape , then you can re-scale it . You can alter the size many times and it will not damage the picture. You can make it smaller or larger . Go to the layer’s palette and select the shape’s layer < press on the CTRL+T (windows) or COMMAND+T (mac) to get the free transform box and get the handles throughout the shape. Hold the SHIFT key and pull out any corner . Beside this , you can press on the ALT (windows) or OPTIONS key when you are re-scaling the shape. You can rotate the shape also. You can alter the color , make it larger or smaller , rotate it in a different position.
