In today’s digital age, photos are a fundamental aspect of our lives. From capturing precious memories to promoting products and businesses, the power of a well-crafted image cannot be underestimated. As such, it is essential to have the skills and knowledge to enhance and edit photos effectively.
One crucial skill in the world of photo editing is the ability to wrap pictures in Photoshop. This technique allows users to manipulate the shape and placement of an image within a design, creating a more dynamic and visually appealing result. While it may seem like a daunting task, wrapping pictures in Photoshop is a relatively straightforward process that can elevate your design game.
In this article, we will guide you through the step-by-step process of wrapping pictures in Photoshop, providing you with the necessary tools and techniques to achieve a polished and professional finish. So, whether you are a graphic designer, photographer, or simply looking to enhance your photo editing skills, read on to learn how to wrap pictures in Photoshop like a pro.
When it comes to enhancing your photographs in Photoshop, the ability to wrap pictures effectively can add a unique touch to your digital creations. Whether you want to create a seamless background or give your image a three-dimensional appearance, mastering the art of wrapping photos is an essential skill to have in your design arsenal.
By understanding the various techniques and tools available in Photoshop, you can achieve stunning results that bring your images to life. With precise control over the wrapping process, you can seamlessly blend elements, create visual illusions, and enhance the overall composition of your photos.
So, let’s delve into the techniques and steps you can follow to successfully wrap pictures in Photoshop and unlock the full potential of your digital artwork.
When it comes to achieving precise and intricate edits in Photoshop, utilizing layer masks is a powerful technique that can elevate the quality of your work. Layer masks allow you to selectively apply effects, and adjustments, or even hide portions of an image without permanently altering the original content.
By using layer masks, you can maintain the flexibility to make changes at any point in your editing process, ensuring utmost precision and control. Whether you want to remove distracting elements, blend multiple images seamlessly, or create complex composites, layer masks provide the means to achieve seamless and seamless results.
With the ability to brush in or out specific areas, adjust opacity levels, and make fine-tuned edits, layer masks are an invaluable tool in your repertoire for wrapping pictures in Photoshop.
Creating seamless patterns with pictures in Photoshop opens up a world of creative possibilities. By utilizing the power of layer masks, you can easily transform any image into a repeating pattern that seamlessly tiles together. This technique allows you to design unique backgrounds, textures, or even textile prints with precision and ease. Begin by selecting an image that you want to turn into a pattern.
By using the Clone Stamp or Content-Aware Fill tools, you can seamlessly extend the edges of the image, ensuring a seamless transition when the pattern repeats. Next, create a new document of the desired size for your pattern. Copy and paste your modified image into this document as a new layer. With the use of layer masks, you can carefully blend and tweak the edges of the image to ensure a flawless and continuous pattern.
Experiment with different blending modes and opacity levels to achieve the desired effect. With practice and creativity, you can master the art of creating seamless patterns with pictures in Photoshop, opening up endless possibilities for your design projects.
Adding depth and dimensionality to your pictures in Photoshop can greatly enhance their visual impact. By utilizing various techniques and tools, you can create a sense of depth and realism that brings your images to life. One effective approach is to utilize the power of shadows and highlights.
By carefully manipulating the lighting and contrast within your image, you can create the illusion of depth and three-dimensionality. Another technique is to incorporate depth-of-field effects, selectively blurring certain parts of the image to simulate a shallow depth of field. This technique draws attention to the main subject while creating a sense of depth in the overall composition.
Additionally, you can experiment with layer styles and blending modes to add texture and depth to specific elements within your picture. By combining these techniques and exploring the vast array of tools and features Photoshop offers, you can elevate your images to a whole new level of visual impact and professionalism.
When working with Photoshop, the warp tool can be a valuable asset in creating professional and visually engaging images. This tool allows you to manipulate and distort selected areas of your picture, giving you the ability to reshape objects or adjust their perspective. To use the warp tool effectively, start by selecting the desired layer or area you want to modify.
Then, access the warp tool from the toolbar or by pressing Shift + R. Once activated, you can click and drag on specific points within the selected area to warp and transform it according to your desired effect. Experiment with different anchor points and handlebars to achieve the desired distortion.
Remember to pay attention to the overall composition and maintain a balanced look as you apply the warp tool. With proper practice and experimentation, you can harness the power of the warp tool to create stunning and visually captivating images in Photoshop.
One of the key techniques to master in Photoshop for wrapping pictures is experimenting with different blending modes. Blending modes allow you to combine multiple layers or elements in unique ways, adding depth and visual interest to your composition. By adjusting the blending mode of a layer, you can achieve various effects such as blending images seamlessly, creating texture overlays, or adding vibrant color combinations.
To explore different blending modes, select the desired layer and navigate to the blending mode dropdown menu in the Layers panel. From there, try out different modes such as Overlay, Multiply, Screen, or Soft Light to see how they affect the interaction between layers.
By experimenting with blending modes, you can unlock endless possibilities for enhancing your wrapped pictures and elevating them to a professional level in Photoshop.
When it comes to wrapping irregular shapes in Photoshop, there are a few tips and techniques that can help you achieve a seamless and professional result. Firstly, consider using the Liquify tool to manipulate the shape of the image to fit the irregular object. This tool allows you to push, pull, and warp pixels, giving you more control over the shape and contour.
Additionally, utilizing layer masks can be beneficial in hiding or revealing certain parts of the image to match the irregular shape. You can carefully paint on the layer mask using a soft brush to blend the edges and create a natural transition. Another useful technique is using the Warp transform tool, which enables you to reshape the image to conform to the irregular shape more accurately.
Finally, paying attention to lighting and shadowing is crucial to ensure that the wrapped picture seamlessly integrates with its surroundings. By using techniques such as dodging and burning, you can enhance the highlights and shadows to match the lighting of the irregular object. By implementing these tips and techniques, you can confidently wrap pictures of irregular shapes in Photoshop with professional-looking results.
Enhancing your graphic design skills is essential for any professional in the field. It not only allows you to create visually stunning designs but also gives you a competitive edge in the industry. One way to enhance your skills is by continually exploring and experimenting with different design techniques and tools.
Whether it’s mastering advanced Photoshop features, learning the latest trends in typography, or understanding the principles of color theory, investing time in expanding your knowledge will greatly benefit your work.
Additionally, seeking feedback and critiques from fellow designers and participating in online design communities can provide valuable insights and help you refine your skills further. Remember, the key to becoming a proficient graphic designer lies in continuous learning and practice.
To wrap a picture around an object or shape in Photoshop, you can use the “Warp” transformation tool or the “Displace” filter.
The Warp tool allows you to distort the image to fit the shape, while the Displace filter uses a displacement map to wrap the image around the object.
Both tools give you flexibility in manipulating the image to conform to the desired shape or object.
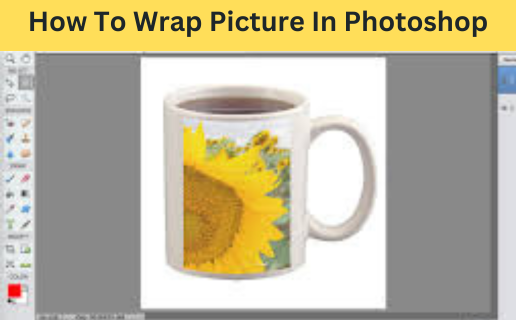
To wrap a picture around a cylindrical object in Photoshop, start by creating a new document with the dimensions of the object. Then, use the “Vanishing Point” filter to define the perspective of the cylinder.
Next, paste the image onto the document and use the “Free Transform” tool to adjust the size and position.
Finally, use the “Warp” tool to conform the image to the shape of the cylinder, and blend the edges for a seamless look.
Remember to adjust lighting and shadows for realism. This process may require experimenting and practice to achieve desired results.
When wrapping a picture in Photoshop to make it look realistic, ensure the lighting, shadows, and perspective of the image match the surroundings. Use tools like the warp tool or liquify filter to adjust the image shape to fit naturally.
Pay attention to details such as texture, color, and scale alignment with the background. Blending modes and opacity adjustments can help merge the image seamlessly.
Consider the reflection, highlights, and depth to create a believable final result. Experiment with different techniques to achieve a convincing integration of the wrapped picture into the scene.
To create a seamless wrap effect when wrapping a picture around a 3D object in Photoshop, use the “Offset” filter to split the image into four quadrants, then blend the edges of each quadrant to create a seamless transition.
Next, use the “Vanishing Point” tool to map the image onto the 3D object’s surface by defining a perspective grid. Adjust the image on the grid to match the contours of the object, then use the clone stamp tool to blend any visible seams.
Finally, refine the colors and details for a more natural and realistic wrap effect.
To achieve a more professional-looking wrap effect when working with pictures in Photoshop, consider using the “Displace” filter to create a more realistic distortion effect, adjust the lighting and shadows to match the picture’s environment, and pay attention to details such as texture and color blending to ensure a seamless wrap effect.
Experiment with different blending modes and opacity levels to achieve the desired result, and always use high-resolution images to maintain quality. Practice and patience are key to mastering this technique.
Mastering the skill of wrapping pictures in Photoshop can greatly enhance your design capabilities. With the step-by-step guide provided, you can now easily create visually appealing and professional-looking designs with wrapped images. Remember to practice and experiment with different techniques to perfect your skills.
By utilizing this tool, you can elevate the quality of your designs and stand out in the competitive world of design. Keep learning and honing your skills in Photoshop to create stunning and impactful visuals for your projects.


