The world of product photography is constantly evolving, and one technique that has gained immense popularity is the ghost mannequin effect. This photography method provides a clean, professional look to clothing and apparel by creating the illusion that an invisible model wears the product. Brands and e-commerce businesses rely on this technique to showcase their clothing in a visually appealing way that draws attention to the product, rather than the mannequin or model.
The ghost mannequin effect, also known as the invisible mannequin technique, involves removing the mannequin or model in post-production, leaving only the garment, perfectly shaped. While it may seem like a complex process reserved for professional photographers, mastering the art of DIY ghost mannequin photography is entirely achievable with the right tools, knowledge, and technique.
Before diving into the step-by-step process of achieving the ghost mannequin effect, it’s essential to understand its purpose and how it works. The primary goal of this technique is to create a lifelike presentation of clothing without the distraction of a mannequin or model. This helps potential buyers visualize how the garment will look when worn, while also ensuring that all product details, such as stitching, fabric, and fit, are clearly visible.
Achieving this effect involves photographing the garment on a mannequin or model and later removing the unwanted elements through editing software like Adobe Photoshop. In the final image, the clothing appears to float on an invisible body, showcasing its shape and structure.
The key to a successful DIY ghost mannequin effect lies in preparation. Setting up the right environment, gathering the necessary tools, and ensuring that the clothing is properly styled will help you achieve professional results, even if you’re not a seasoned photographer.
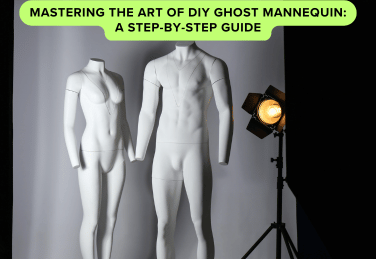
First, you’ll need a mannequin that is close in size to the actual body shape you want to represent. A standard dress form works well for this purpose, but if you don’t have access to one, a model can serve as a substitute. Ensure that the mannequin or model can hold the clothing in its natural shape, as this is crucial for the ghost mannequin effect to look convincing.
Lighting plays a crucial role in capturing the details of the garment. Even, soft lighting is ideal for product photography, as it minimizes harsh shadows and brings out the fabric’s texture and design. Natural light can be used, but investing in studio lights with softboxes is a more reliable option. Proper lighting will enhance the overall appearance of the clothing, making the editing process easier.
A camera with manual settings is highly recommended, as it allows you to control the exposure, aperture, and shutter speed. This ensures that the images are crisp, well-lit, and clear. Finally, having a tripod helps keep your shots consistent, reducing the chance of movement that can blur the images or change the angle between shots.
When it comes to photographing the garment, multiple angles and shots are essential. Take clear, high-resolution images of the front, back, and sides of the garment. Pay attention to details like collars, buttons, and seams, as they will need to be accurately represented in the final image.
It’s important to note that for a successful ghost mannequin effect, you’ll need at least two images: one of the garments on the mannequin and another of the same garment turned inside out. The inside-out image is necessary to capture the inner fabric and label, which will later be combined in post-production to create the illusion of depth.
When photographing, ensure that the garment is neatly arranged on the mannequin. Wrinkles, folds, or creases can make the final image appear unprofessional. Use clips or pins if necessary to ensure that the clothing fits the mannequin well and displays the product’s intended fit.
For areas like sleeves or collars, you may need to adjust the positioning of the garment so that these details are visible and well-lit. Capturing as much detail as possible in the photography stage reduces the amount of time needed in post-production and ensures a high-quality final image.
Once the photoshoot is complete, the next step is the editing process, where the magic of the ghost mannequin effect takes place. Adobe Photoshop is the go-to tool for this, as it provides the necessary features for manipulating images and creating the invisible mannequin effect.
The first step in editing is to open both the front view and the inside-out images in Photoshop. Using the pen tool or lasso tool, carefully trace around the garment in the front view to remove the mannequin or model. Be precise in your selection to avoid cutting off important parts of the garment.
Next, select the inside-out image and cut out the areas that show the inner fabric or label. These pieces will be placed behind the front view image to create the illusion of depth, giving the garment a more realistic appearance. Align the two images carefully, ensuring that the inner details match the garment’s outer shape.
Blending the images is the final step in creating the ghost mannequin effect. Use Photoshop’s layer masks and blending options to seamlessly merge the front view with the inner details, removing any visible seams or mismatches. Adjust the lighting, contrast, and shadows to make the garment appear natural and well-integrated. This may take some trial and error, but the result should be a lifelike image of the clothing, free from any visible mannequin or model.
After creating the ghost mannequin effect, it’s time to fine-tune the image for a polished, professional finish. This includes cropping the image to focus on the garment and ensuring that the background is clean and distraction-free. Most product photos use a plain white or neutral background to keep the focus on the product itself.
Enhance the colors and contrast to bring out the texture and design of the fabric. If necessary, adjust the brightness and sharpness to ensure that the image is crisp and detailed. Check the edges of the garment to ensure that they are smooth and free from jagged lines or artifacts caused by the editing process.
Finally, zoom in to check for any imperfections or missed spots in the editing. Fix any stray threads, wrinkles, or uneven shadows that may detract from the overall look of the image. The goal is to present the garment in the best possible light, highlighting its features and quality.
Mastering the art of DIY ghost mannequin photography may seem intimidating at first, but with practice, attention to detail, and the right tools, you can create professional-quality images for your clothing brand or online store. This technique not only showcases garments in a visually appealing way but also enhances the overall shopping experience for potential customers.
By preparing properly, capturing detailed shots, and refining your editing skills, you can achieve the ghost mannequin effect on your own, elevating your product photography to a new level. Whether you’re an e-commerce business owner or an aspiring photographer, learning how to execute this technique can set you apart and add value to your visual content.


