The Gradients in Photoshop are adaptable tools of editing with applications in everything from color grading through to special effects for an image. Photoshop is a photo editing tool that has a number of functions and modules, but even the easiest of them has boundless depths and a multitude of applications. Many of the approaches are various ways of adding a mood to a photo, either through fog or sun effects. For example, the sun flare gradient effect can be nice for making that summery vibe of a photo.
The Gradients may sound very easy and out of place in an image editing workflow, but there are really a lot of great ways of use for gradients you may never have heard of. You can also add light rays to your photo, brighten your subject of the photo, create interesting backgrounds of the photo, add colors to your sky, and make sunset effects and colorings. We can make a number of cool effects by just using gradients Effects like as:
1.Sun Flare
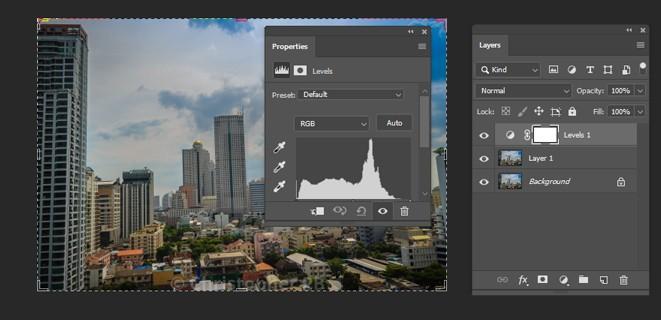
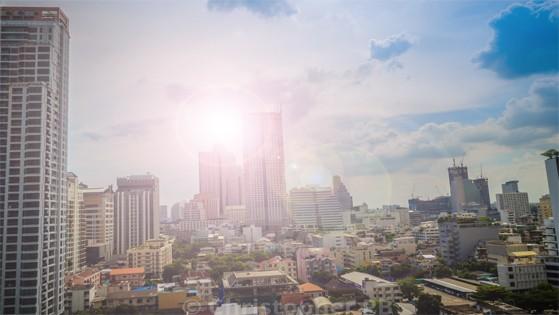
Making a bright sun flare to the photo will not create any changes to an already washed-out sky and part of the building. First, you would need to make a contrast by darkening the photo. Copy the photo on a new layer of photoshop using CMD/CTRL + J, and darken the photo using a Levels adjustment layer. Merge the background of the photocopy layer with the levels layer, by selecting these two layers and typing CMD/CTRL + E to merge them. Now you have a brand new darkened layer. Create another copy of the new darkened layer of the photo, then work on this brand new layer with the sun flare.
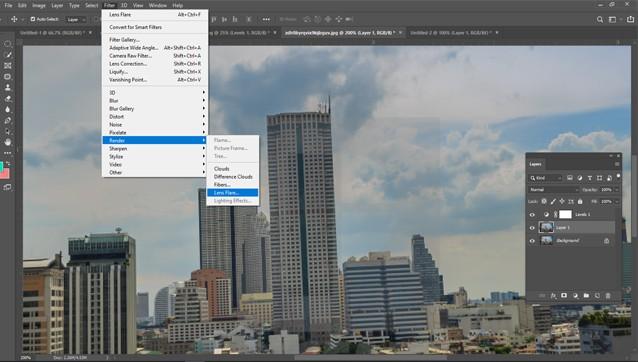
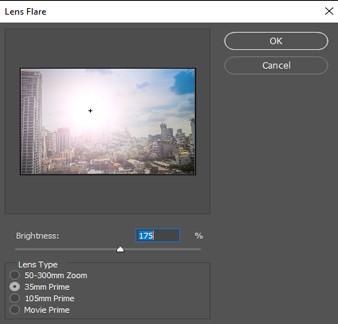
The time when you use sun flare, it is automatically attached to the layer as part of the photo, and not on a new layer by itself. So to be careful, keep a safe copy of the darkened layer which you do not touch. Every time you should work on the new copy of the photo with the sun flare, so in case you make any kind of mistakes or need to reposition your sun flare, then you will not need to create a darkened layer all over again. You can just remove the layer you are working on, and duplicate your untouched dark layer of the photo, to start attaching a new sun flare. In Adobe Photoshop, take the Lens Flare from the top menu bar of photoshop using the Filter>Render>LensFlare bottom menu. You can also do an experiment on which type of lens flare you want to attach, by ticking on the circles next to the type of sun flare option and modifying the brightness intensity by moving the slider.
Once the sun flare is enforced to the photo, attach a layer mask, and using a very soft black brush, detach some of the sun flares from a particular area you want to protect like faces.
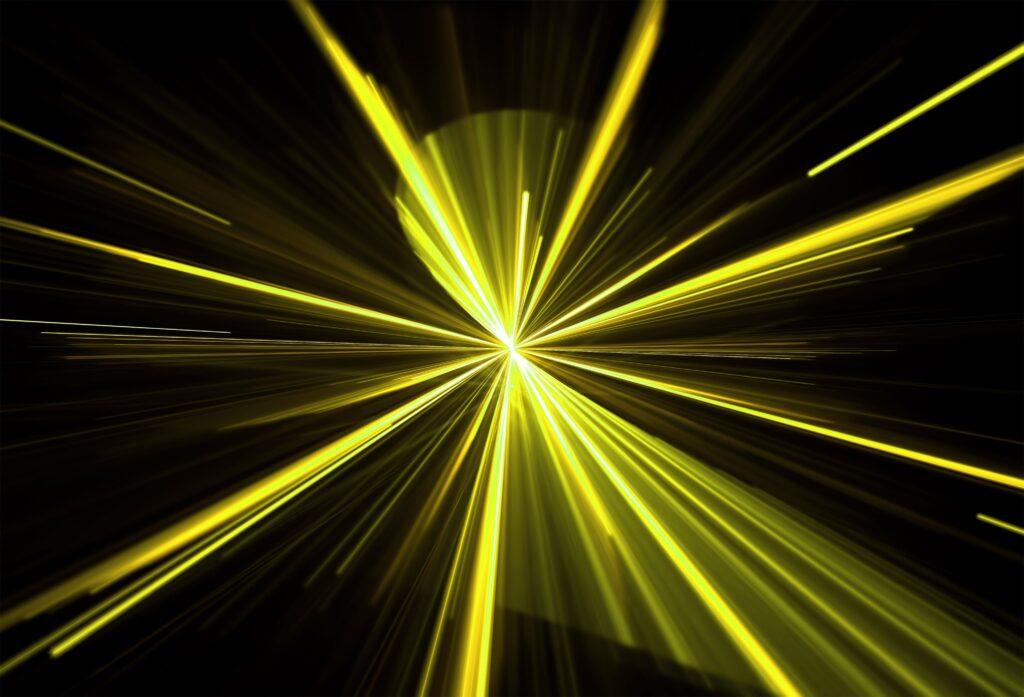
2.Light Rays
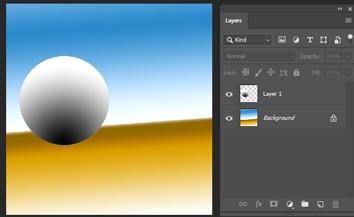
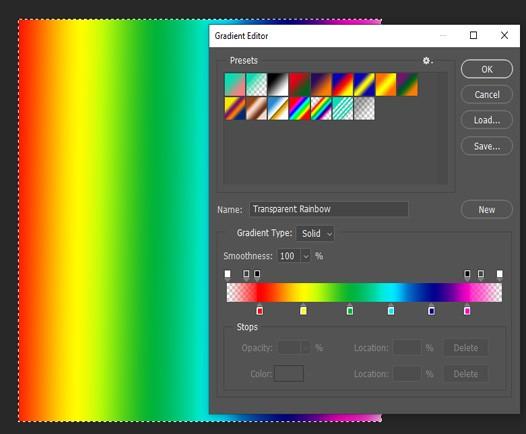
Light Rays is perhaps the most impressive and uses a kind of gradient we have not used yet: gradient noise. It is very easy to get to, but maybe a bit secret. Create a brand new gradient fill, and within the gradient editor, under the Gradient option, choose gradient Noise. Now you may think “What is gradient noise, and this is not very useful” But with just a very few settings of adjustments we are going to be able to make this into realistic light rays.
Experiment with randomizing the pattern until you get anything you like, but the main goal is to have the maximum variation possible. When that is done, exit the gradient editor and alter your style to Angle. We have not used Angle yet because it does not have a lot of applications, but this will make all those little lines spread out from a simple single point. The next part is to demolish those lines, and for that, we will have to use clipping masks.
3.Background Coloring
Possibly the most uncomplicated of examples is next, but with these kinds of points, you can color the background with gradients in just a few steps. First, we will need to select just our background of a photo, rotate our selection into a layer mask, and then jump to town with a gradient fill that will let us be as an innovator as we want.
4.Selecting your Background
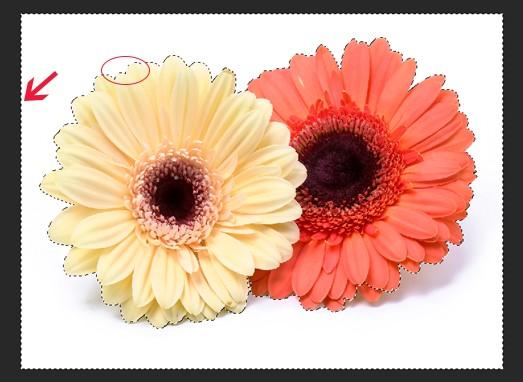
This step is the easiest when your background is very nice and spotless. If the background of your photo is very complex we recommend checking out some useful tutorial How to Remove Backgrounds in Photoshop on the internet. For an image, we are going to use our Magic Wand Tool from Photoshop. You can click anywhere on your background and the Magic Wand tool will try to select all the adjacent pixels of the photo of the same color. Now turn off adjacent and the tool will select every matching pixel in the entire photo. You may have to create a number of selections to get everything, but you can press and hold shift each time you click to attach to your base selection. Do not forget to play with your level of tolerance if the tool is choosing too little or too much.
With your selection active, make a new Gradient Fill layer and Photoshop will automatically apply your selection as a mask of your photo. You are now free to edit all your gradient fill layers as much as you would like.