Create Photoshop action to adjust curves & hue or saturation
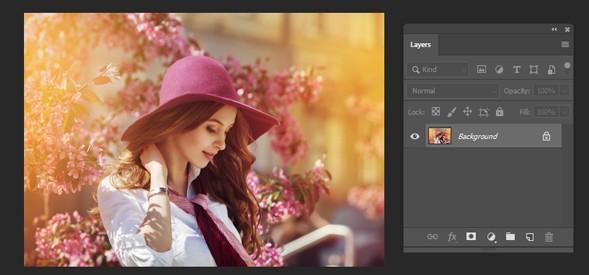
To begin, open up your shading diagram picture. We’ll require this to ultimately work with our bends.
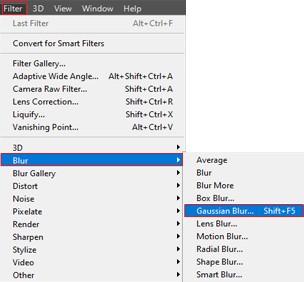
Fast tip: in the event that you zoom into the picture and take a gander at the base column you’ll see a few pixels aren’t unadulterated white, dark, or dark. Some may even look somewhat green. Yowser! This is commotion that comes from your camera. To guarantee you don’t tap on a stained, loud pixel, we will apply a Gaussian Blur channel to dispose of the commotion. Go to Filter > Blur > Gaussian Blur.
Set the sweep to about 6.0 pixels and snap OK. Zoom in again – not any more boisterous pixels!
Now it’s time to start creating our Photoshop action.
Make a new Set by clicking the folder icon. Name your Set anything you’d like.
Make another Action by clicking on the icon that looks like a piece of paper with a fold.
Name the Action whatever you want then” Click “OK.”
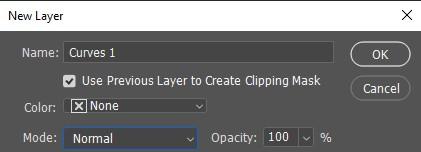
Now make a new adjustment layer for Curves, go to Layer > New Adjustment Layer > Curves.
Click the box where you find this message “Use Previous Layer to Create Clipping Mask.” it means the adjustments you make on your Curves layer will apply only to the layer directly below it. Then click OK.
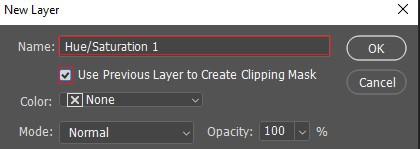
To make a new adjustment layer for Hue/Saturation, go to Layer > New Adjustment Layer > Hue/Saturation. Use the Previous Layer to Create Clipping Mask and click OK.
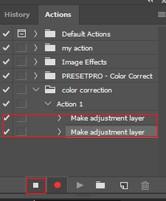
Click the “Stop Recording” button in your Actions palette .
Adjusting curves with Photoshop actions
1.Return in your History range and snap on the progression which peruses “Gaussian Blur.” This progression should now be featured blue, and the accompanying advances (“Curves 1 Layer,” and “Tone/Saturation 1 Layer”) ought to have vanished. .
In your Actions range, click on the bolt close to the primary “Make change layer.” Look three lines down and you’ll see “Type: bends.” We need to change this piece of the Action, so how about we double tap on the content “Make change layer.”
You’ll see the “Record” and “Play” catches in the Actions range are presently chosen. This implies we are presently changing this progression of the Action. An exchange box will spring up requesting that you make another layer. Ensure the name is right box is checked, then, at that point click OK.
In the Curves range, click the image with the hand and bolts looking to a great extent. In the drop down menu that scrutinizes RGB, select the Red channel(Mac alternate way: choice + 3; PC easy route: alt + 3).
We will make reference focuses for our Curves levels. Put your cursor (it ought to show up as an eyedropper apparatus) anyplace close to the center of your white square. Hold down “Order” and snap. You’ll see a little point show up in your Curves.
4.In the Curves range, click the symbol with the hand and bolts facing here and there. In the drop down menu that peruses RGB, select the Red channel(Mac shortcut: option + 3; PC shortcut: alt + 3).
We will make reference focuses for our Curves levels. Put your cursor (it ought to show up as an eyedropper device) anyplace close to the center of your white square. Hold down “Order” and snap. You’ll see a little point show up in your Curves.
Now do this for each RGB channel. If you have set your point for Red once, then select Green from the drop down menu (Mac shortcut: option + 4; PC shortcut: alt + 4). then click in your white square again. Do the same thing for Blue (Mac shortcut: option + 5; PC shortcut: alt + 5).
c.Utilizing the up bolt on my console, I will expand my blue worth until it is inside 2 quantities of my red and green qualities. My RGB currently peruses 224, 225, 225. Presently in the event that I move my cursor around the white square and take a gander at my Info range, my RGB esteems are never more than 1-2 numbers off from each other!
Color Correction with photoshop
I’m presently going to rehash how we just managed our white square. In the first place, select the Red divert in the Curves range. Then, at that point, float over your dim square, and Command click anyplace in the center. Do likewise for Green and Blue. My blue is low once more, so I will utilize the up bolt to build the number until it’s inside 2 quantities of red and green. Rehash these means for your dark square. On the off chance that everything has worked out as expected, you ought to have the option to float your cursor over the three squares you’ve changed and see a pleasant 2 number distinction range in your Info range!
To adjust your color chart’s brightness/darkness, choose the “RGB” filter in your Curves palette.
Ensure the hand with the arrows is chosen. Click in the middle of your white square. You are going to use this reference point to increase your brightness.
While taking a gander at your Info range, utilize the up bolt on your console to build your RGB esteems to around 240. Shading outlines may differ, yet 240 will in general be the awesome white brightness.
Presently you will work with your blacks. Click in your dark square. Set your RGB esteems to around 40. This is the thing that searches best for your diagram, however mess with which worth best accommodates your inclinations.
You should now have decent, radiant whites, and dim blacks.
Snap OK in your Curves palette. This will close the window and quit recording the Action.
Close color chart picture without saving.
We should twofold watch that our Action recorded what we needed. In the event that you click on the bolt close to the primary “Make change layer,” you’ll see every one of the means we just went through. This implies your Action presently has this load of steps saved, so that next time you need to change the bends, you should simply click play.
Stop Photoshop – this will make Photoshop for all-time save your activity.