What does spot healing do in photo-shop?
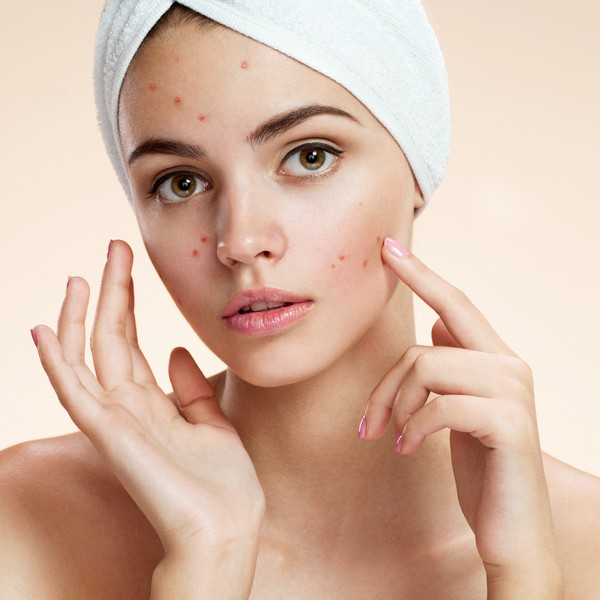
Spot healing is a brush tool in a photo-shop that is used to fix the imperfections or discoloration or distracting parts of any images . Spot healing tool alloy the pixels from the sampled part of an image. The proposition is that the appearance from the tested portion is beautifully merged with the color and illumination encompasses where you want to apply color.
In order to remove any scars , acne spots , or unwanted objects from any picture , you can use spot healing brush tool . With the help of this tool , you can balance the color context and can smooth the skin also . You can produce high end image with the help of spot healing brush tool.
What are the benefits of using spot healing brush tool?
Where it is located in photo-shop ?
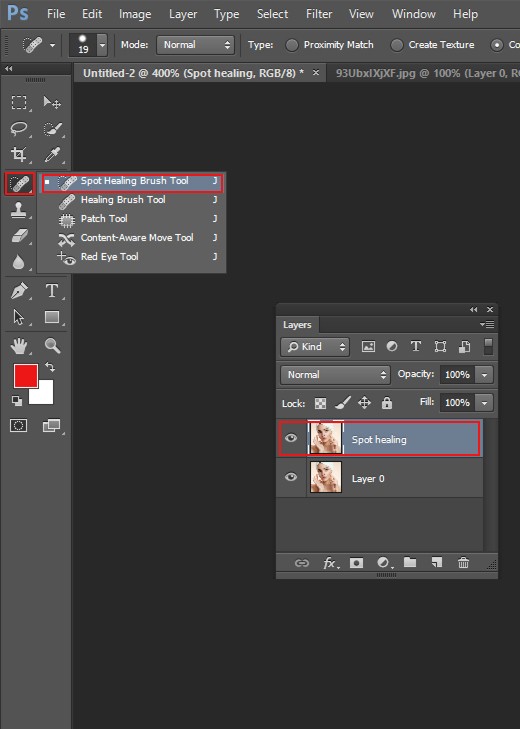
Experts knows the location of spot healing tool but people who do not use photo-shop regularly they do not know where it is located . Well, it is situated in the tool bar . Besides spot healing brush tool you will find there other healing tools also and they are : healing brush tool , patch tool , content aware tool and red eye tool also .
How to clean up imperfection with spot healing ?
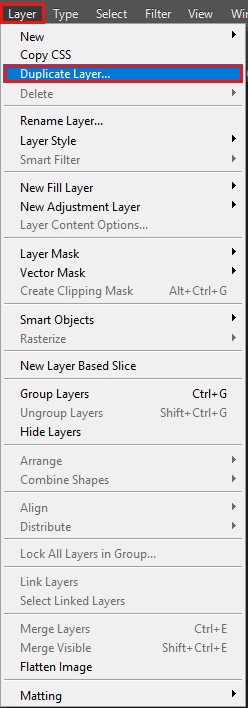
Step 1:At first, go to the top of the window and select Layer < Choose New < Select Layer via Copy. Adding new layer is really important. The main purpose of making a copy is to apply all the settings in a non-corrosive way. Or simple way we can say that you need to add a new layer to protect your original photo. After that you can conveniently make some rectification in your image. Give a new name to this new layer . Press double on the new layer and give a name . For example Give Spot healing name to this layer . It will help to categorize the layer properly. Click on the enter key after giving the name . Go to the Zoom option and zoom it into 200 % .
From the toolbar, select the spot healing brush tool. At the top , there will be available many other options and some of them are : mode , type etc . You need to set it perfectly. There are three different types of healing tools are available. And they are : content aware, create texture, and proximity match. Content-aware works beautifully if you are working with watery image or any kind of complex image that contains reflections in its image body. The proximity match option works flawlessly if the image contains lots of color in its body.

Step 2 : Click on the option that is named as “ Sample all the layers” . As we know that spot healing tool works only with the selected layer.
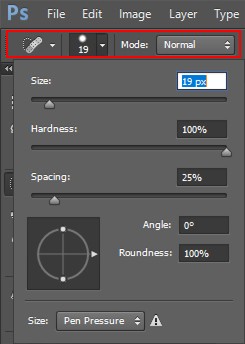
Step 3: Change the brush size that you want to apply in your image. You can change the brush size only using left and right square bracket. Lets start with content aware option . Choose the object or spots which you do not want to see in your picture. Start brushing around the object or spots to erase it . If content aware option is not available in the option box , then you can choose proximity match option also . It will also produce great outcome .
Step 4: It is always good to select lasso tool to make an outline around the object that you want to remove . It helps to hold the object precisely and after using lasso tool , apply spot healing brush tool over the unwanted object and it will be removed smoothly and also it will leave a natural looks in a photo. If you are working on removing acne or spots then you can directly brush over the spots and it will be removed perfectly. And it is done andready to use .

How to repair if any mistakes happen when applying spot healing brush tool ?
We specially use spot healing tool to remove any kind of imperfection in a photo. But sometimes photo-shop fails to rectify all blemishes from an image . If the final result is not satisfactory , then you can just undo all the changes that you have made or you can use shortcuts by simply pressing on ctrl+z . This type of mistakes happen if the brush size is not right . So change your brush size and again do all the process . Apply the brushes over the objects or elements which you want to erase from your photo. Make sure you have adjusted the brush size properly . Only then you will get the better result.
Match the final result with your actual image : To match your final image with your actual image , you need to press on the switch and hit the ON/OFF button . Turn off the spot healing layer and see the actual image and turn on the layer and see the changes you have made here . You will see the differences .
Save your work : If you have done everything properly for your image thensave your work in .PSD format or .TIFF file format to keep back the layer made by spot healing tool option .
Spot healing tool plays a vital role in every sectors . This spot healing tool is rapidly used for portrait photography, fashion industry , media industry and many other sectors . It is really helpful for image editing companies also .


