Create a clipping path for a jewelry item like a bracelet with intricate details
HomeBlogCreate a clipping path for a jewelry item like a bracelet with intricate details
A Step-by-Step Guide to Create a clipping path for a jewelry item:
Open Your Image:
Creating a clipping path for a jewelry item like a bracelet with intricate details can be a meticulous process, but it’s essential for precise image editing and manipulation. Here are the steps to create a clipping path for such an item using Adobe Photoshop:
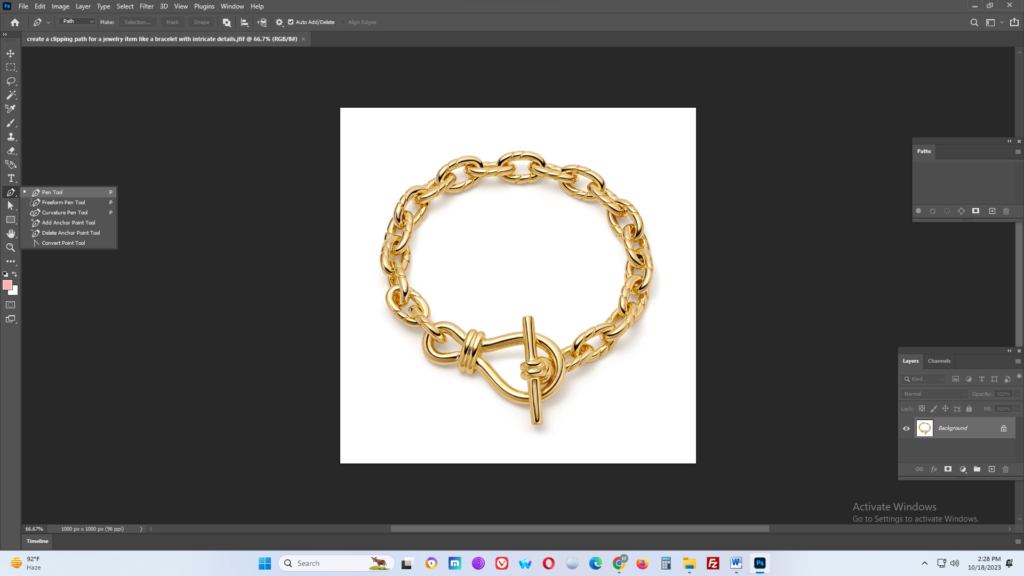
Open the Image:
Launch Adobe Photoshop and open the image of the jewelry item that you want to work on.
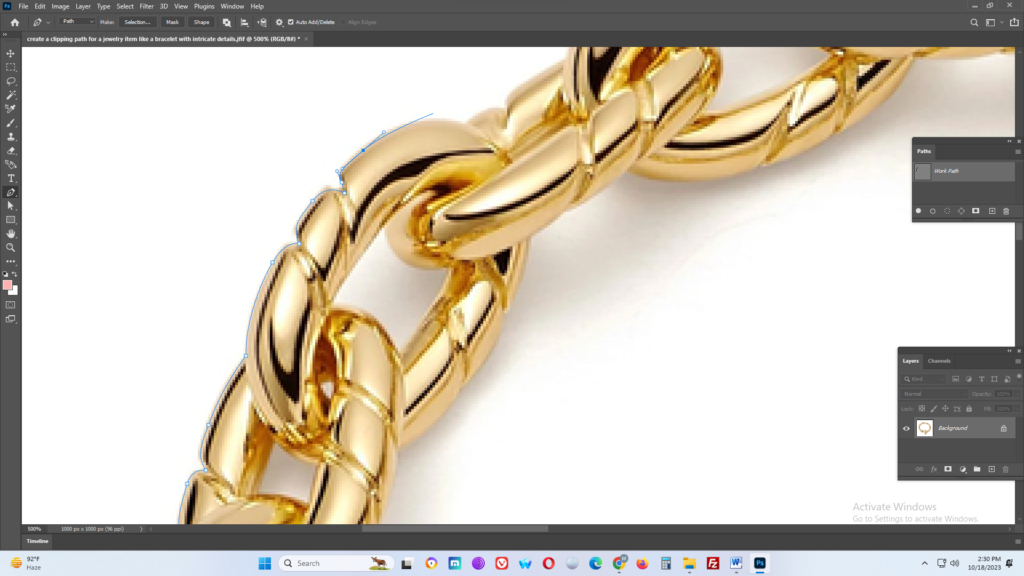
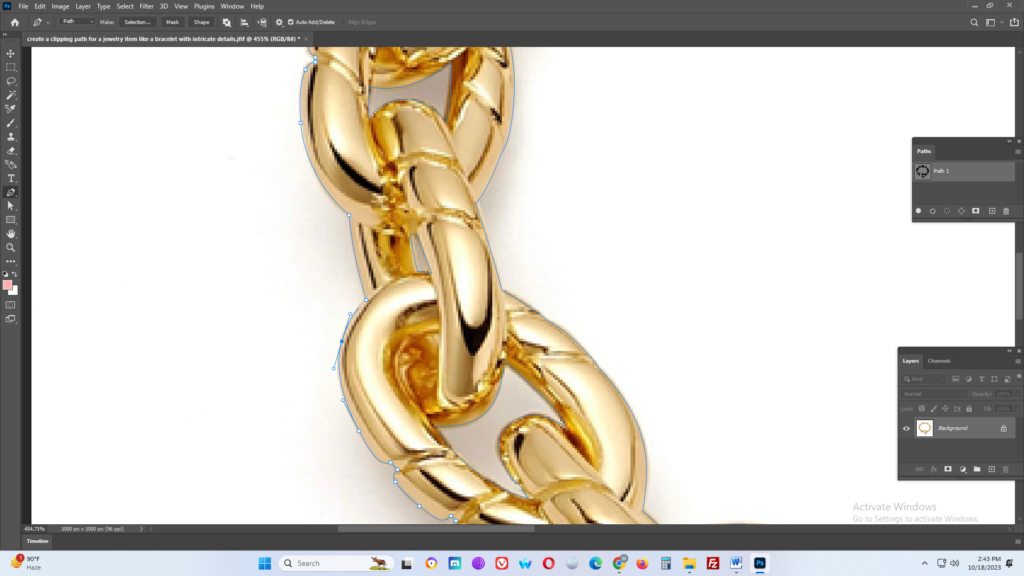
Select the Pen Tool:
The Pen Tool (P) is the most commonly used tool for creating clipping paths as it allows for precise and detailed selections.
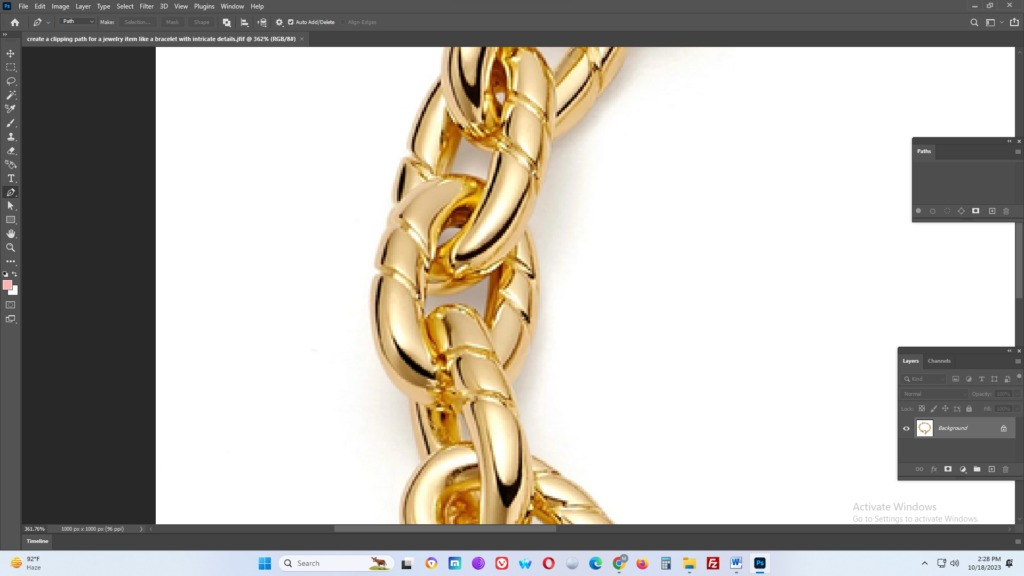
Zoom In:
Zoom in on the intricate details of the bracelet to get a better view.
Create the Clipping Path:
Click on the edge of the jewelry item and start creating anchor points around the item. To create a precise path, you should click and drag to create curved lines where necessary.
When you reach a point where the path intersects, make sure to complete the path by clicking on the initial anchor point.
Fine-Tune the Path:
After creating the initial path, you may need to fine-tune it to ensure it accurately follows the edges of the bracelet. You can do this by adjusting the placement of anchor points, adding new ones, or deleting unnecessary ones.
Close the Path:
Once you have traced the entire outline of the bracelet, close the path by clicking on the initial anchor point. This will create a closed shape that defines the clipping path.
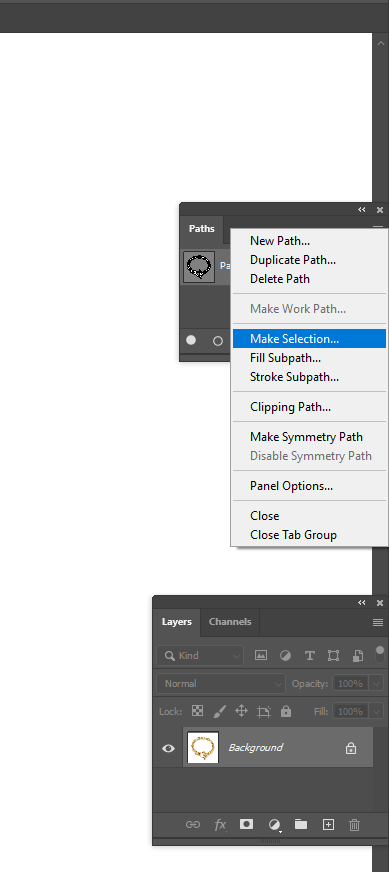
Save the Path:
To save the clipping path for future use, go to the “Paths” panel (if it’s not visible, you can find it in the “Window” menu) and right-click on the path. Choose “Make Selection” to turn the path into a selection, and then click “Save Path” to save it for future use.
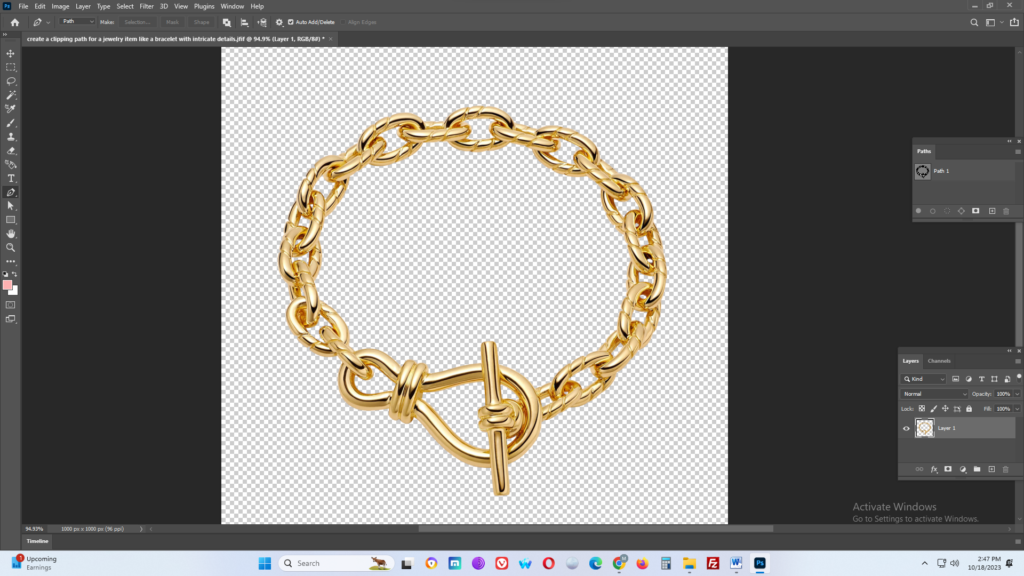
Apply the Clipping Path:
With the path selected, you can use it to create a layer mask or make selections for various image editing purposes. For example, you can delete the background, change the background, or apply various effects to the jewelry item.
Refine the Edges:
Depending on the quality of your path and the image’s background, you may need to refine the edges of the jewelry item further. Use tools like the “Refine Edge” option to smooth out edges and ensure a seamless look.
Save Your Work:
Finally, save your edited image in an appropriate format (e.g., PNG or TIFF) that supports transparency, so you can maintain the clean, clipped jewelry item without a background.
Creating a precise clipping path for intricate jewelry items may require a lot of patience and practice. Be sure to save your progress regularly, as it allows you to backtrack if you make mistakes. Additionally, you can use tools like the “Zoom” and “Hand” tools to navigate through the image for more precise path creation.