Do you want an easy way to make Pinnable blog post graphics using photoshop?
This is for you if:
The reason behind using photoshop:
The obvious reason for using Photoshop is that it’s awesome. On a serious note– it is very quick to learn, and you are also getting a 30-day trial for free. But you have to learn a few basics in Photoshop, and everything you create will be fast, on-brand, and customized just for you. You can make blog post graphics, social media posts, branding, basically, you can make yourself an inventory of I’ve-got-this.
Are you Ready? Let’s create your first pinnable blog post graphic:
1st step – Open a new Photoshop document first
Set the dimension of your new document to 750 widths & 1100 height, using the pixels as the measurement of your post. Enter 72 for the resolution of your post. Make sure that the colour mode is on RGB. This is a better dimension for Pinterest, where the vertical (tall) photos perform the best.

2nd step – Choose an image for the background of your post
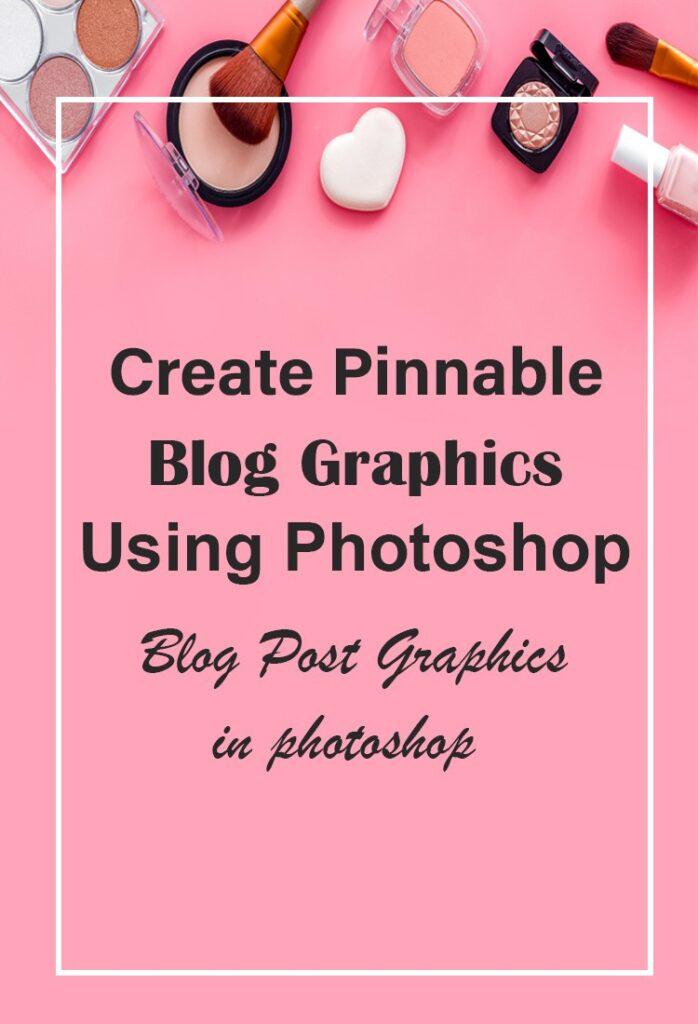
Choose an image that has plenty of space for your text which you want on your post – this is called COPY SPACE of a blog post. You are looking for images with large areas of light or dark. If you take your own images, think about this during your next photoshoot and take plenty of images with copy space.
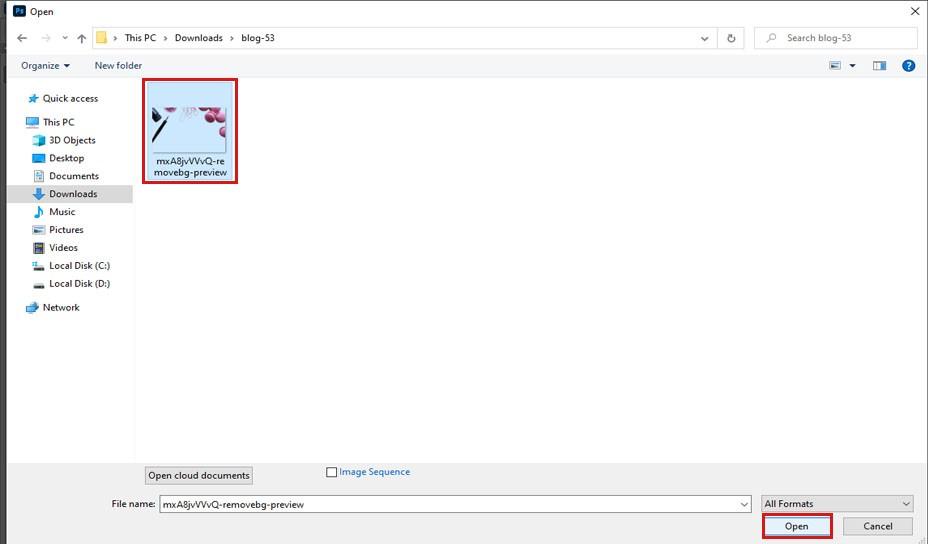
Open the folder of your pc that contains your image, and drag that image onto your canvas in Photoshop. Resize the image so that it covers your working canvas.
Before we do anything, let’s save the graphic first. Go to File option and Save As, and choose a good name for your graphic post. Save it in a specific folder you will remember.
3rd step – Add your text to your graphic post
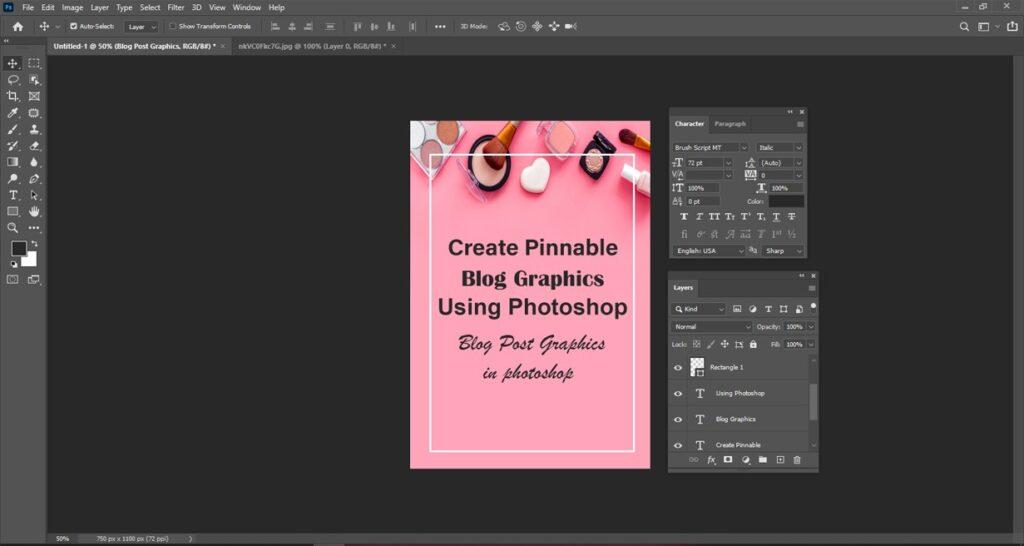
This is the time for your blog post title. Select the type tool option (the “T” in the tool panel on the left side of photoshop), and in the options at the top of your display, choose your preferable font & color for your post. If you like fancy fonts on your post, the main part of your graphic blog title is the perfect place. Just make sure that it’s still very easy to read for anyone!

Now you can click anywhere on your photoshop canvas to start a text box. Lets Type out your graphic blog post title. You can also centre the text or align it to the right or left
To make your written text bigger or smaller in size, click the Move tool (the 4-arrow icon at the top of the tools panel), and click on your text of the title.
You will see a faint rectangle around your title text – that’s called the text box. If you do not see the box, look at the top side of your screen and make sure that you check the option “Show Transform Controls”.
Click one of the corners of your title text box. Drag down it to make your text bigger or smaller. (you can also hold it down the shift key if using Photoshop 2018 or earlier.)
If you want to add a second text box (for example, a tagline of your title in a different font), just have to follow the same steps to add a new text box. For contrast, you can use a simpler font.
4th step – Add your graphic blog name
Now do yourself and your audience a favour, and add your graphic blog name to the bottom side of your graphic. If you want anybody browsing Pinterest to see at a sight where your Graphic blog post is from.
We will use an effective shortcut for this.Here is the goal: we want your blog graphics name to be in the same simple font we just used for the tagline of your post, but much smaller on size.You could make a brand new text box like you have been doing, but this is very fast: with the move tool option, now hold down the OPT/ALT key, click on your post tagline, and just drag a new layer off of the previous one.
With the type tool option, select your text and change it to your graphics blog name. Now resize it and move it down to the bottom side of your graphic.
5th step – Save your post for the web
We just need to save your blog post graphic so you can upload it later.
Now go to File > Export > Export As
Choose JPG for the format for the file.
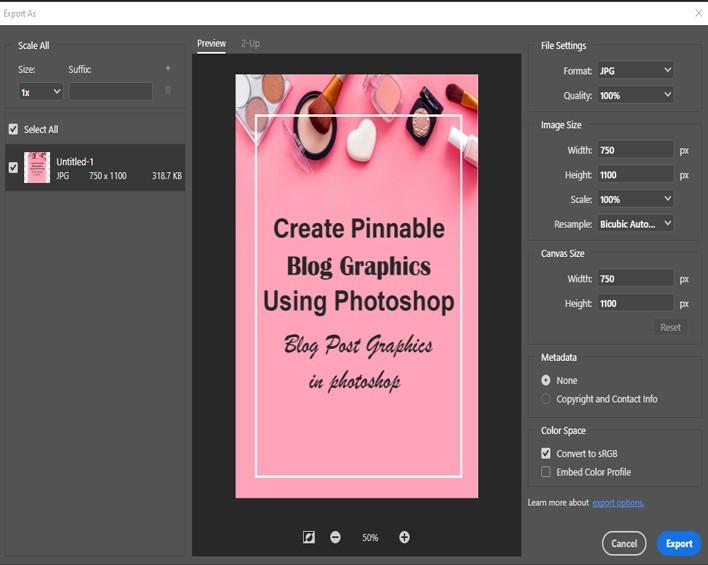
For better quality, choose between 70 to 100 percent. This determines how big your post file will be in kilobytes.
You want to get the file size as close to 100kb as you can, without losing too much quality. But if it’s more than 300kb or so, it is not the end of the world.
Get as close as you can to 100kilobytes, but do not go below 70% quality of the post.
For the Photoshop CS6 users:
Go to the File > Export > Save for Web option.
Save the file to a specific folder you will remember, and you are so done now.
The next time when you need to make a new blog post graphics, start with this one you just made.
Let’s see how this kind of format works for light-colored text.
Let’s drag in a new image, just like you did just before.
Now resize it by dragging it from the corner. On the bottom right corner side of your display, you have the Layers Panel option. Everything you add into your blog post project, from an image to a text box, gets its own layer option.
And now you have complete control of them. Do not let it go to your head – too much.