Achieving precise hair masking in Photoshop can be a challenging task, but with the right techniques, you can elevate your editing skills to new heights. In this guide, we’ll walk you through step-by-step instructions on how to master the art of hair masking, ensuring your images look polished and professional.
Eraser Tool and Layer Masking. Whether you’re a beginner or looking to enhance your skills, this tutorial is for you. Let’s get started!
Now we discuss step by step, how to remove hair background easily by using some tools.
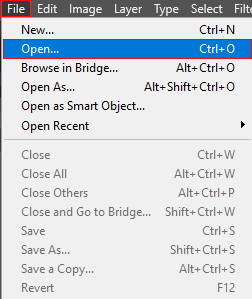
“First, open Adobe Photoshop and load the image you want to work on. This can be done by going to ‘File’ > ‘Open’ and selecting your image file.”
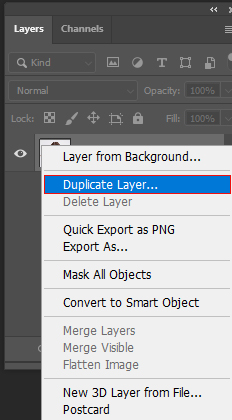
“For non-destructive editing, it’s a good practice to duplicate the background layer. Right-click on the background layer in the Layers panel and choose ‘Duplicate Layer.'”
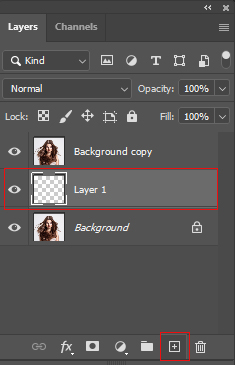
I’ll take a new layer with the background and give it a foreground color so that the hair mask is clear, then Alter + Delete from the keyboard.
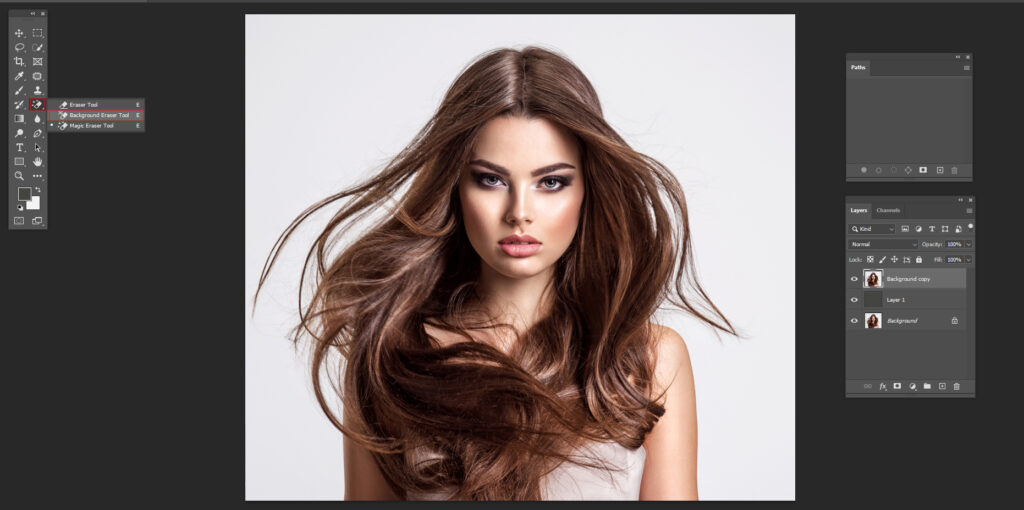
“Now, select the Eraser tool from the toolbar on the left. Adjust the brush size and hardness according to your requirements. Simply erase parts of the image you want to remove or make transparent.”
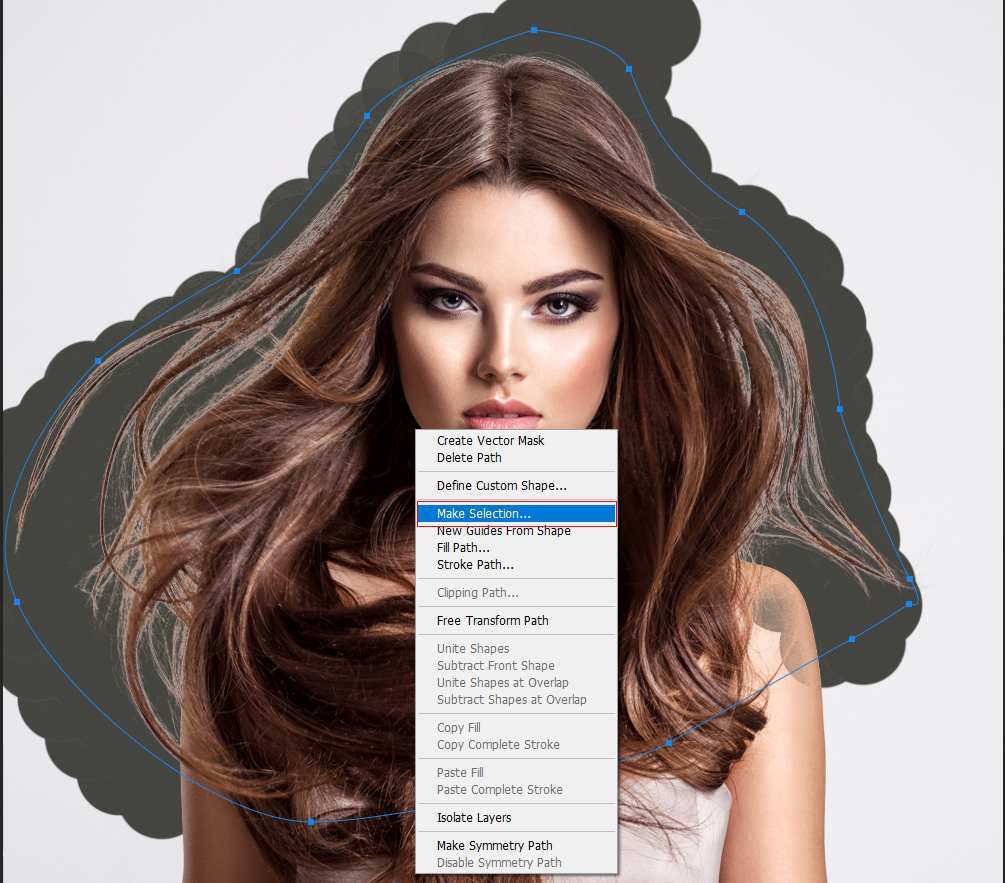
Path the section of hair with the pen tool. Once you’ve closed the path, right-click on it and choose “Make Selection.” Set the Feather Radius to 0 pixels and click “OK.”
Go to the “Select” menu and choose “Modify>Father” Set the Feather Radius to .1 pixels and click “OK.”
Select the copy background layer and copy the layer from the keyboard with Ctrl+J.
Then copy the background layer into the delete box.
Take a new path create and use the pen tool to take part of the body.
Path the section of hair with the pen tool. Once you’ve closed the path, right-click on it and choose “Make Selection.” Set the Feather Radius to 0 pixels and click “OK.”
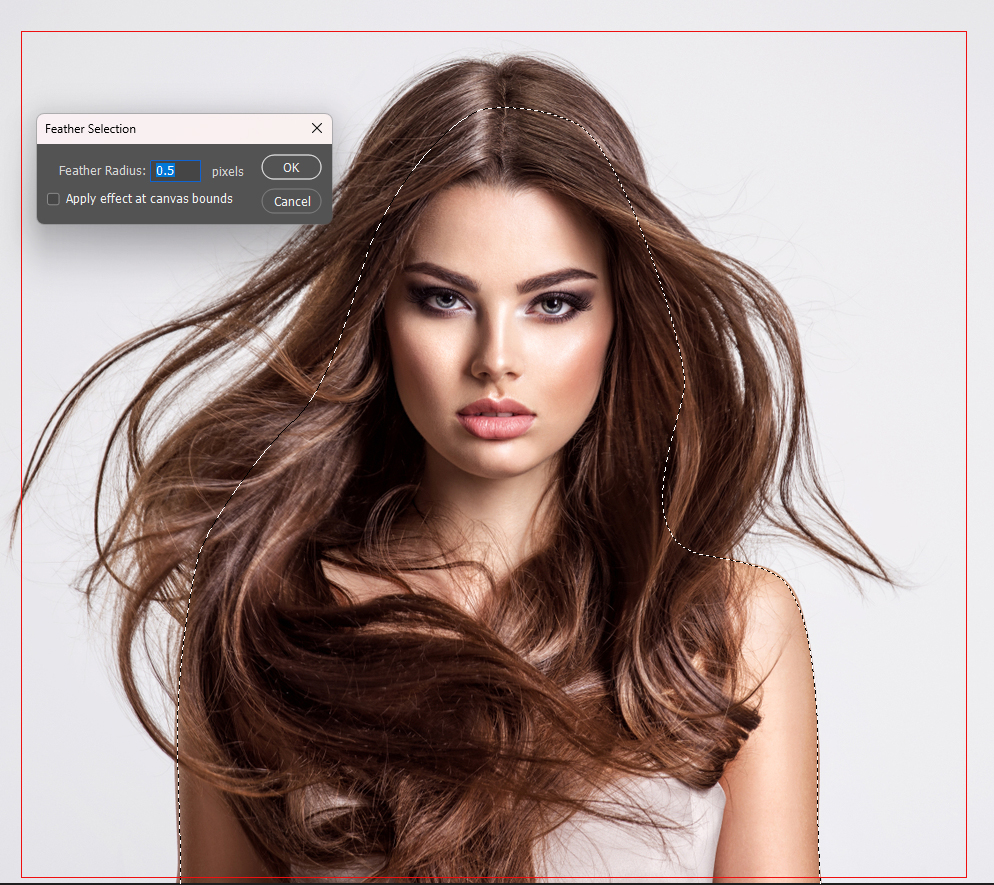
Go to the “Select” menu and choose “Modify>Father” Set the Feather Radius to 0.5 pixels and click “OK.”
Select the background layer and copy the layer from the keyboard with Ctrl+J.
You can change the background with any color on the color layer or take the transport.

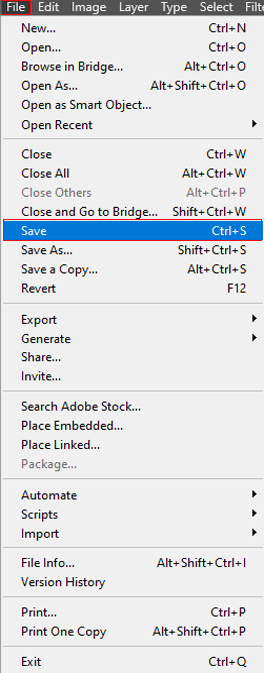
Save your Photoshop project for future edits.
Export your final image in the appropriate format (JPEG or PNG) for your e-commerce platform.”
By following these steps, you can become proficient in the art of hair masking in Photoshop. Remember, practice makes perfect, so don’t be afraid to experiment with different images and refine your skills over time. With dedication and attention to detail, you’ll be able to create stunning, professional-looking images with perfectly masked hair.


