Remember that red and blue retro screenplay that takes you into the world of 50’s or 60’s? Today we are recreating that ambiance using our Photoshop. Since Photoshop works with flat, two-dimensional images, we’re a bit limited at exploring our fantasy. But we will make at least something that looks like it came out of an old 3D movie. This is not that difficult. Once you know the steps, you’ll be adding this effect to other images to get extraordinary results.
Any recent version of Photoshop can use these steps. Let’s get started!
The document setup
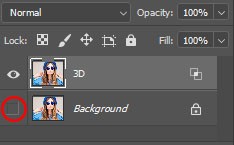
Open any image into Photoshop, whichever image you prefer to work on. At the Layers panel, the image appears on the Background layer, The Layers panel.
Step 1: Imitate the background layer:
Make a copy of the image. In the Layers panel, click on the Background layer and drag it onto the New Layer icon.

Now w Background copy layer will appear above the original. Now double-click on the name “Background copy” to highlight it.
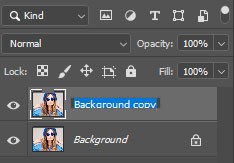
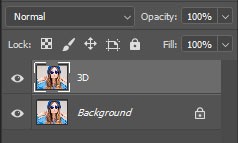
The next task is to change the layer’s name to 3D. Press Enter (Win) / Return (Mac) to accept it.
Step 2:Look into the Layer Style dialog box:
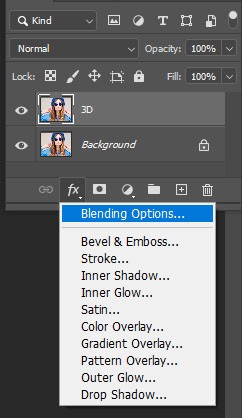
Click on the fx icon at the bottom of the Layers panel while the 3D layer is active.
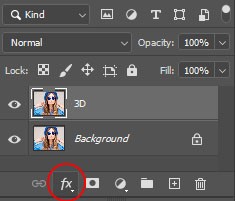
Therefore click on the layer effects icon. Now, select the Blending Options from the top of the list:
Step 3: Turning off Green and Blue color channels
Photoshop always opens the Layer Style dialog box, along with the Blending Options in the middle column. Find out the Advanced Blending section and search for the R, G and B checkboxes next to the word Channels.
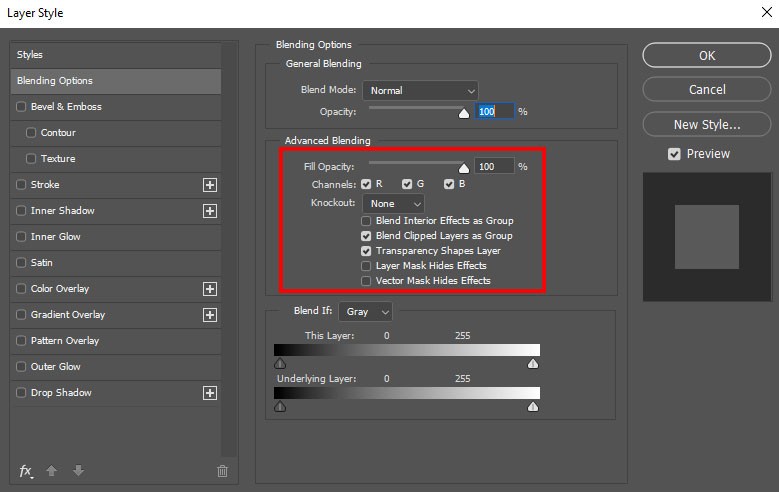
R, G and B stand for Red, Green and Blue. These are the three primary colors of light. Each primary color gets its own color channel in Photoshop. All these three channels are mixed together to create each color we see in the image. To create our retro 3D effect, these are the color channels we will use.
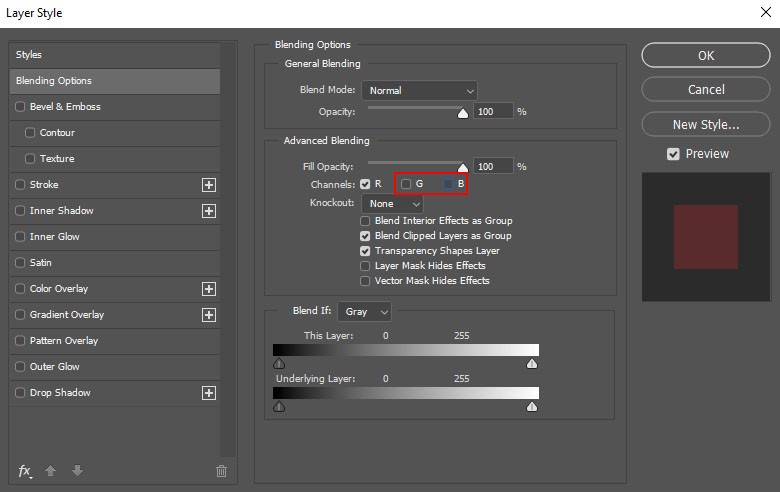
Now, uncheck the G and B boxes to turn the Green and Blue channels off, but let the Red (R) channel turned on. Next, click OK to shut off the Layer Style dialog box.
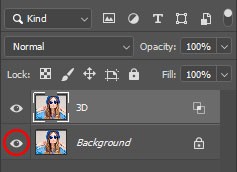
If you want to see what happened, go back to the Layers panel and by clicking the visibility iconhide the Background layer by clicking the Background layer’s visibility icon.
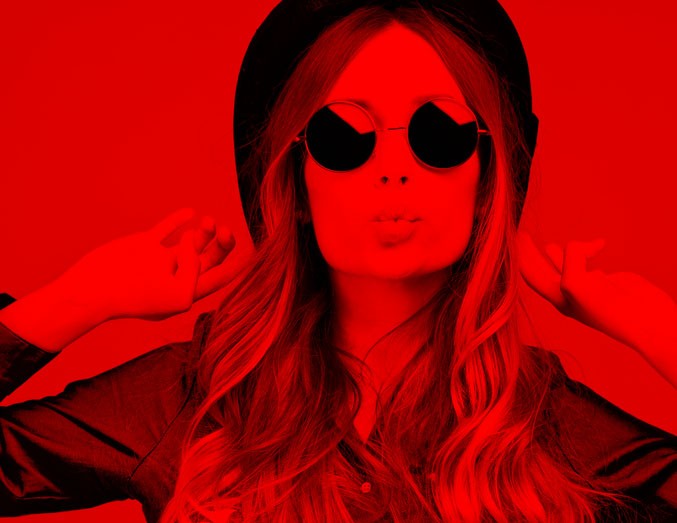
Here with the Green and Blue channels turned off and with only the 3D layer visible the image appears in red.
Next, turn the Background layer back on by clicking the empty box where the visibility icon normally appears. Now we are back at the full color image.

Step 4:Choosing the Move Tool
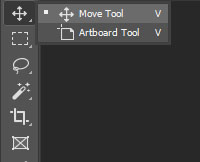
To make it out of alignment with the original image below it offset the image on the 3D layer. For this, first select the Move Tool from the Toolbar.
Step 5:Nudge the image to the left
Now you need to nudge the image on the layer towards the left. Select the 3D in the Layers panel; use the left arrow key on your keyboard.Notice during the image movement, a red outline appears along one side of each object in the image. Because cyan is the opposite of red, a cyan outline (the other color present in the classic red and blue 3D glasses) becomes visible along the other side, manifesting our retro 3D effect.The further you nudge the image on the 3D layer, the thicker the red and cyan outlines will become so adjust the effect until you’re happy with the result
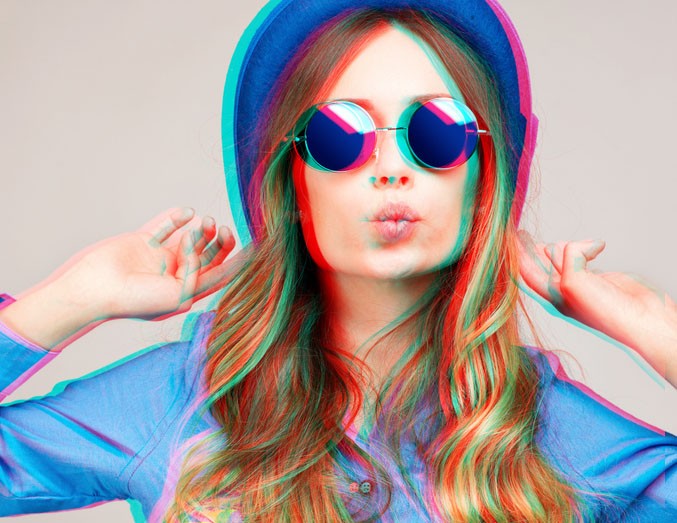
Voilà! There we have it! That’s how easy it is to create retro effect using Photoshop! With the easy steps given above you can now easily create any retro looking image or illustration of your choice. Al you need is just, explore and enjoy!


