First of all , we have to realize what technique can make an image looks more sharper . When we modify our picture sharpness with the help of photo-shop , the presentation focus on the outline to create the photo look more crisp to the audience eye. To sharp any section , photo-shop will add the contrast throughout the boundary . Thus , it will help to look more sharper in client’s eye. There are so many alternatives are available to make any image more sharper . They are : Smart sharpen effect, unsharp mask effect , Camera Raw sharpen and many more. By sharpening any picture , you can create alluring effect on any photo . People find it more interesting .
Procedure of how to create crisp and sharp photos using photo-shop:
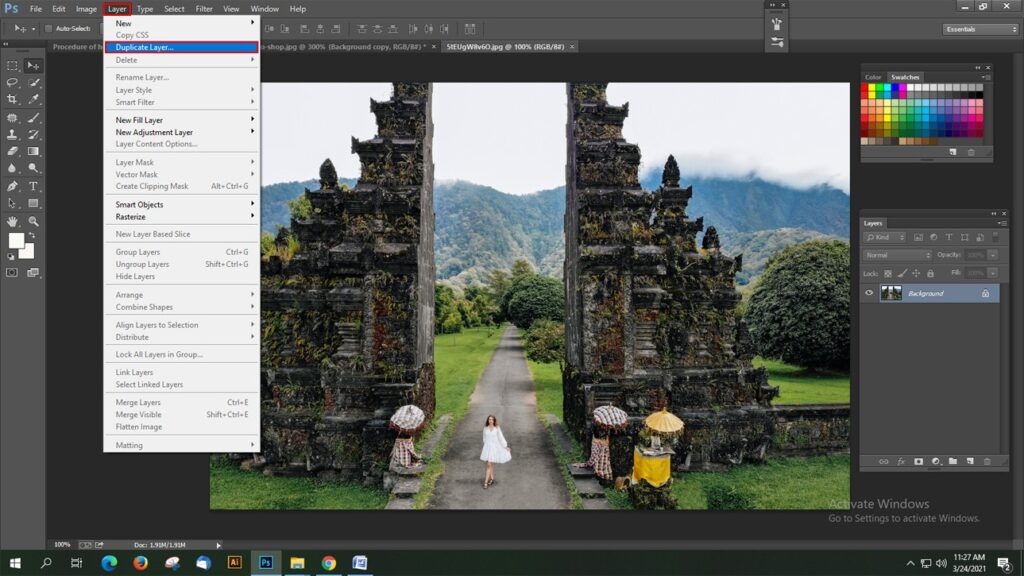
Step 1: Open photo-shop. Load your picture . Press right on your desired image layer. After that , you should create a duplicate layer and start working with that duplicate layer . And transform the duplicate layer into smart object.
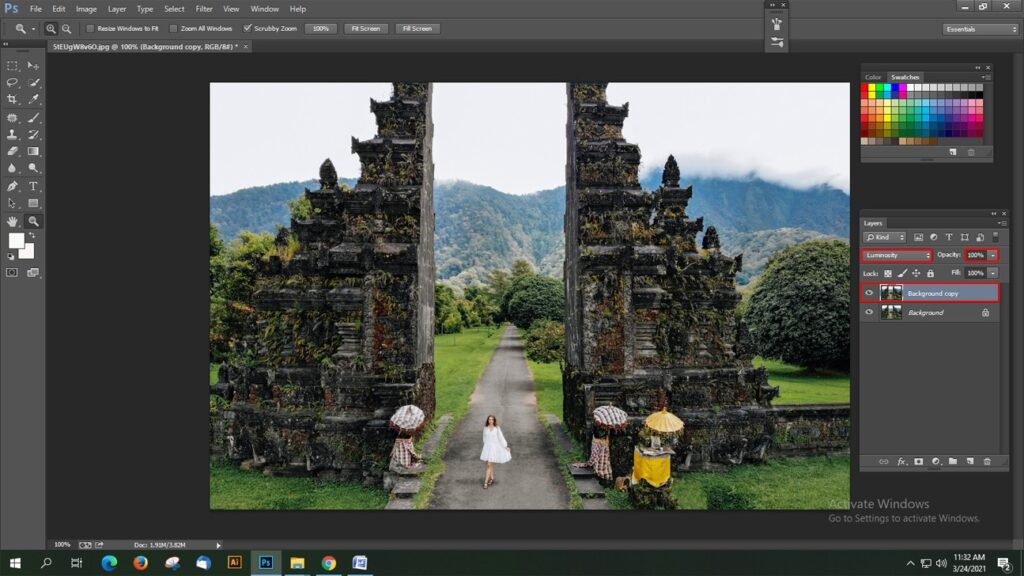
Step 2: A window will be appeared . There will be so many options . You need to set value on those options perfectly. Opacity should be 100 %. Blend mode should be luminosity . It will help to maintain the color margin throughout the boundaries . Use the sharpening effect on new layer.
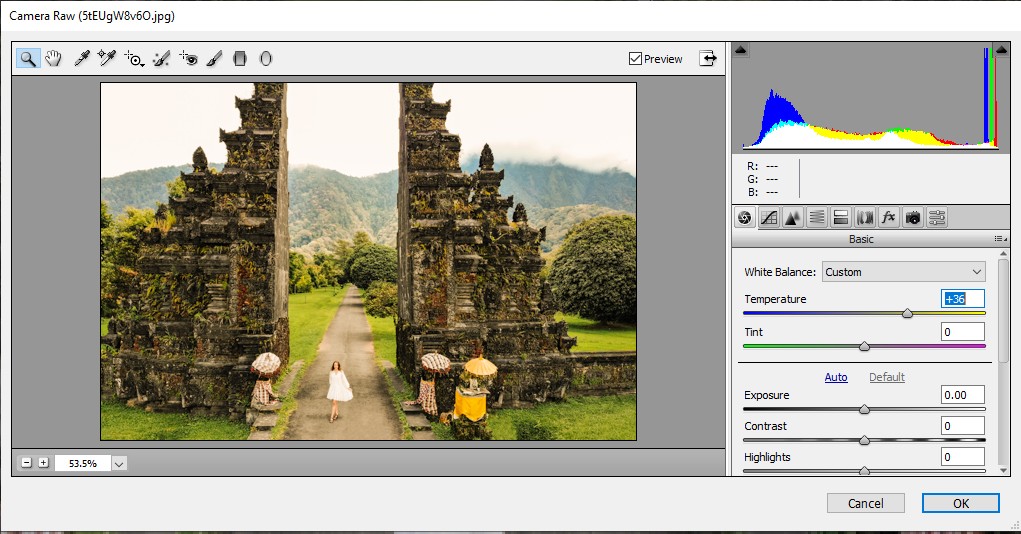
Step 3: Now, use unsharp mask effect or smart sharpen effect or camera raw sharpen filter for your image . Ensure one thing that you have enabled the preview option for unsharp mask effect and smart sharpen effect . Apply the noise reduction filter in both filter if needed .
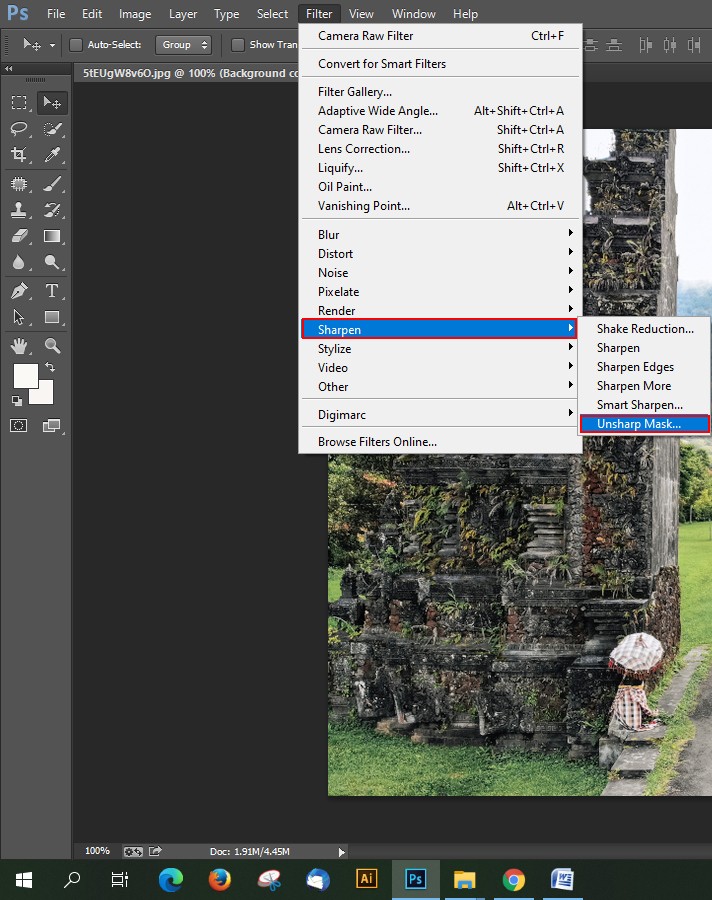
Unsharp mask effect :
Unsharp mask filter is rapidly used for image sharpening , as it does not add any kind of noise in a picture. This filter helps us to sharpen our photos perfectly. Unsharp mask filter work differently . It is not same as smart sharpen effect. Unsharp mask filter works more perfectly for automatic sharpening . It works much perfect than any other photo-shop effect for making an image sharp . If you are using photographs for online platform then you should use this unsharp mask effect . It creates a great effect on photographs if it shown at online . To apply this effect on your photographs , go to the option named as filter < select the option named as “sharpen ” < Select the named as “unsharp effect”. An window will be appeared . Different types of options will be available there and some of them are : amount , radius , threshold . Tick on the preview options also. Amount puts sharpness or acuteness in an image. Use the pointer and go right to add more sharpness in an image . Radius manage the sharpness on the picture element of any photographs. Threshold manages the final sharpness of an image . Use this unsharp mask effect for any kind of online purpose . You can upload these type of photos in social networking platform as well.
Smart sharpen effect for image sharpening :
Open photo-shop . To apply this filter on your desired image , go to the option filter < Choose the option named as sharpen < Select the option named as smart sharpen . A window will be displayed and you need to set the value in that value box . Different kinds of options will be there and you need to use those option which fits best for your picture . It will help you to create a sharpening effect on your picture .
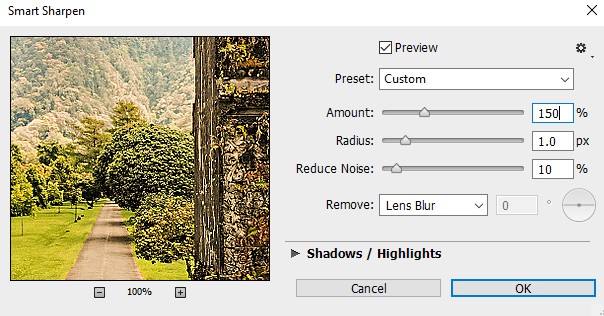
Different types of options will be available there and some of them are : amount , radius , reduce noise, shadows, highlights . Smart sharpen filter also helps to reduce noise in an image just like unsharp mask filter. Use the sliders left or right as per requirements and get the best outcome . It also supply preset option which helps to complete the sharpening more fluently and quickly. In preset option , there will be a drop down button . You should set it as custom or you can let it default as well . It will help to create a harmonious look on every photo. Amount contains the whole sharpening effect that you have used in your photo. Radius works for the sharpening section . There is an option named as remove and three types of blur are available there . Gaussian blur, lens blur and motion blur . You can choose any of them as per your requirement. Use the shadows and highlight in a way so that it can produce the best result . Save your work and see the differences you made.
Camera raw sharpen slider :
In photo-shop when you will apply camera raw sharpen slider in your image , it will help you to sharp your photos in an ordinary way . To use this option , go to the option named as “Filter ” < Select the option named as camera raw filter . This option executes the very simple and fundamental type of image sharpening. Photo-shop continues so many things with the help of this filter . As this option is an automatic option, so you need not to define any guidelines or any framework for this filter . Also , you have no authority over this filter . It will sharp the image in its own way. As it is an automated filter, so the final result may not meet your requirements. You can apply unsharp mask effect or smart sharpen effect to make it more crisp and more sharp photographs .
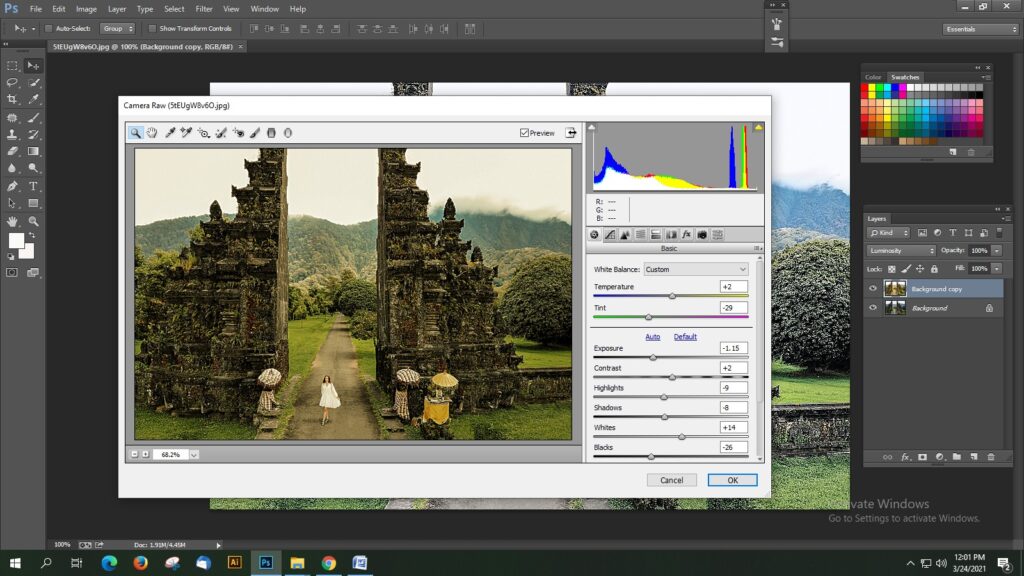
In photo-shop , for any type of procedure the initial thing you required to do is press right on your desired image layer. After that , you should create a duplicate layer and start working with that duplicate layer . And transform the duplicate layer into smart object. To do so , your actual picture will be all right . Before starting any kind of sharpening filter , always try to complete this step so that you can get the right result .
Step 4 :If everything is set up perfectly , then hit the OK button and save your work .
