Regardless of the amount, we attempt to make our pictures perfectly, at times we jumble up. That doesn’t mean we need to surrender, nonetheless. With some basic altering in Adobe Photoshop Elements, you can bring shading once again into your overexposed pictures and perhaps save them from ruin. Simply follow these straightforward advances.
The Multiply Blend Mode
The duplicate mix mode is an abnormal mode since it’s the solitary mix mode that returns to the underlying foundations of Photoshop and other picture-altering programs. On the off chance that you can envision that each image is really an extensive rundown of shading numbers for each spot, you can perceive how you could ease up or obscure a picture by increasing the rundown by a specific number. That is essentially how the increased overlay mode functions.
Stage 1: Open the culpable picture in Photoshop Elements
The present picture comes from David DeHetre, a Flickr client who playfully said he’d like to consider this a “pleasantly uncovered picture of something extremely brilliant.” That’s the soul David. I surmise we’ll need to say this isn’t an adjustment to such an extent as it is an “upgrade.
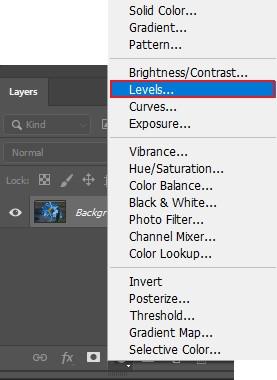
Stage 2: Create another levels change layer
Initial, a touch of foundation. A-Levels change layer permits us to change the brilliance and murkiness of the picture with sliders. Presently if this were some other Photoshop Elements instructional exercise, we may do that. In any case, for this situation, we aren’t. We will leave it be so we can utilize the increased mix mode.
When you click on this, an exceptionally little box will spring up, requesting that you name the layer. For this little undertaking, I didn’t waste time with that, however, I suggest you generally name your layers something significant so later on you’ll handily understand what each layer does. Navigate, and your new change layer will show up under the layers board on the right.
The level layer sits on top of the genuine photograph.
We aren’t adjusting the photograph by any stretch of the imagination.
We’re simply adjusting the way the layer on top mixes with it.
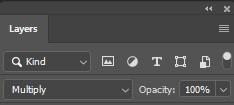
Stage 3: Change the mix mode from “normal” to “multiply”
Do you see the dropdown menu simply over the Level 1 layer? Do you see where it says “ordinary?” We will tap on that and pick “duplicate.” This will mix the layer with the photograph and obscure it in a manner that uncovers significantly more detail.
When you click this, you’re essentially done. Photoshop wraps up, and you’ll see a huge distinction in your picture. See.
It’s not great, however, it is much more beautiful and definite. You’ll see that the edges aren’t close to as cloudy as they were.
Closing Thoughts
Sadly for this photo, what we’ve done is the degree of what anybody ought to do. It’s difficult to revive the data in the overexposed (white) portions of the picture since they were excessively brilliant for the camera to record when it was taking the picture. The duplicate mix mode additionally has a few limits. In the event that you apply the increase mix mode too often, you lose a great deal of detail, and the picture begins to look super grainy. This specific change is a great deal like an escaped prison-free card. You can just utilize it once.
In the event that your picture is half as overexposed as this one, you may very well luck out and end up with a guardian. Regardless of whether it turns out like this one did, at any rate, you’ll have a somewhat better picture, regardless of whether it isn’t pretty much as great as you trusted. You don’t need to discard all that is overexposed. Do what you can with this little stunt, and on the off chance that it doesn’t work, you should keep it at any rate. Deliberately overexposing your pictures can once in a while make an intriguing impact.
Let’s learn something more.
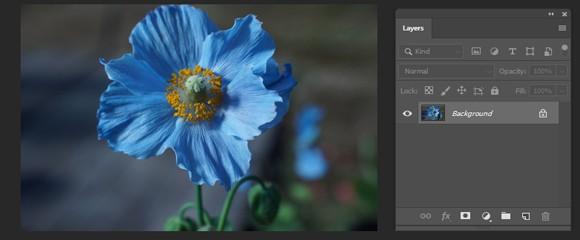
Step 1: Add A Levels Adjustment Layer
With the picture recently opened in Photoshop, click on the New Fill or Adjustment Layer symbol at the lower part of the Layers board. Pick a Level to change the layer from the rundown that shows up. In case you’re utilizing Photoshop CS3 or prior, Photoshop will open the Levels discourse box, showing the picture histogram and different alternatives. Try not to stress over any of it. Just snap OK to finish off of the discourse box since we don’t have to roll out any improvements. All we need is simply the change layer. For Photoshop CS4 and CS5 clients (I’m utilizing CS5 here), the histogram and different choices for the Levels change layer will show up in the Adjustments board. You can leave the Adjustments board open on your screen however once more, simply overlook it in light of the fact that there’s no compelling reason to roll out any improvements.
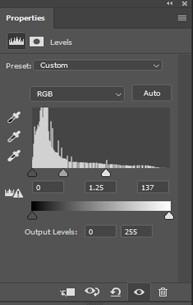
In the event that we look in the Layers board, we see that Photoshop has added the Levels change layer over the picture on the Background layer.
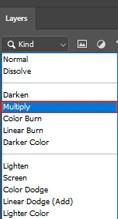
Step 2: Change The Adjustment Layer’s Blend Mode To Multiply
Our picture is overexposed – the contrary issue – so to fix it, we’ll utilize something contrary to the Screen mix mode – Multiply. Change the mix mode for the Levels change the layer from Normal to Multiply. The mix mode choice is found in the upper left corner of the Layers board.
Duplicate is one of few-layer mix modes in Photoshop that obscure a picture, and essentially by changing the mixing method of the change layer to Multiply, the photograph presently shows up a lot hazier, with more detail and tones that show up more soaked.
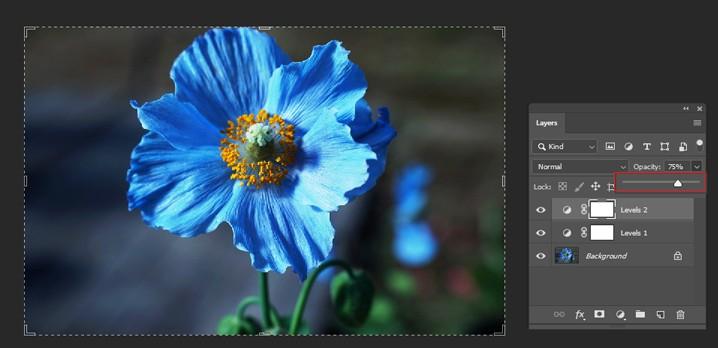
Step 3: Lower opacity of adjustment layer
The Multiply mix mode regularly does such a great job of obscuring a picture that your photograph can show up too dim thereafter, just like the case with my photograph here. We can bring back a portion of the splendor and tweak the outcomes just by bringing down the obscurity of the change layer. You’ll discover the Opacity alternative straightforwardly opposite the mix mode choice at the highest point of the Layers board. I will drop mine down to half, yet you may wind up utilizing an alternate incentive for your picture.