This is an important thing for designers to keep Photoshop always up to date. Because adobe provides technical support and security fixes for the current version and the prior version. But bug fixes are only provided for the current version. If you are an Adobe Creative Cloud subscriber, you always have access to the latest and greatest version of Photoshop. Adobe releases major Photoshop updates every six months, & minor updates and bug fixes are released all the time.
This article will start by showing you how to check for Photoshop updates and install them manually and then will show you how to set up the Creative Cloud app to keep Photoshop up to date automatically. Then you’ll learn how to avoid losing your current settings when updating to a new version, and how to keep the previous version of Photoshop in case you still need further use. Okay, let’s get started.
Step 1: Open the Creative Cloud desktop app
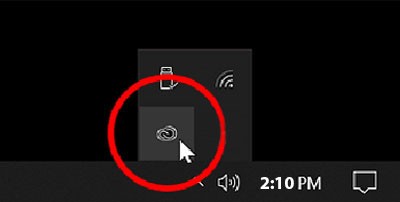
If you have already downloaded and installed Photoshop, there is a good chance that the Creative Cloud desktop app is already running in the background on your computer.If the Creative Cloud app is not running in the background, you can open it from within Photoshop. Go to the Help menu in the menu bar along the top of the screen in Photoshop and choose Updates.
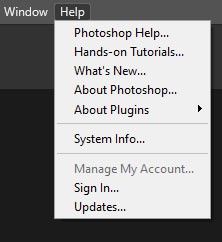
Step 2: Choose the Updates category
You can see the Creative Cloud app will open showing the Adobe apps currently installed on your computer. Choose Updates in the column along the left, to view only the apps that have updates available.
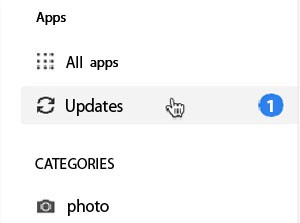
Step 3: Click the Update button
When an update is available for Photoshop, then Photoshop will appear with a big blue update button. Note the version number listed next to Photoshop’s name. Once the update is complete, it will show you how to confirm that you are in fact running the latest version. Check the version number. If Photoshop is open, a warning message will appear stating that Photoshop needs to be closed before the update can proceed. So close Photoshop, and then return to the Creative Cloud app and click Continue. This app will display the update’s progress. These updates can take a few minutes so keep patience.

Step 4: Open Photoshop
When the update is complete, the Update button will change to an open button. Click this button to open Photoshop. Now it’s time to confirm that Photoshop has been updated. You can check Photoshop’s version number, to confirm that you are running the latest version of Photoshop. On a Windows PC, go to the Help menu in the Menu Bar. And on a Mac, go to the Photoshop menu. Then Choose About Photoshop. Photoshop’s current version number will appear in the upper left of the about Photoshop infobox. This number should match the number displayed earlier in the creative cloud app.

Okay, update is done. But updating all the time manually is not a good idea and it’s also time-consuming. So now you need to know how to keep Photoshop updated automatically.
You know how to update Photoshop manually. Now let’s talk about how to set up the Creative Cloud app to always keep Photoshop up to date automatically. As well as show you a couple of important options to make sure you don’t lose your current settings.
Step 1: Open the Creative Cloud app’s Preferences
Back in the Creative Cloud app, go up to the File menu on a Windows PC, and the Creative Cloud menu on a Mac then choose Preferences.
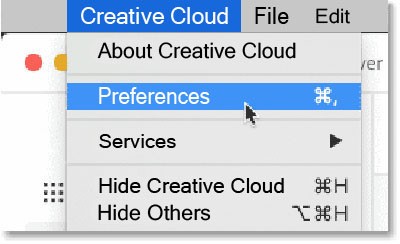
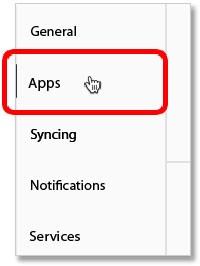
Step 2: Select the Apps category
In the Preferences dialog box, select the Apps category from the left.
Step 3: Turn on Auto-update
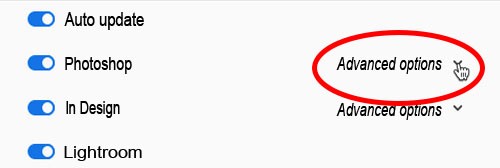
Turn on the Auto-update option.

Step 4: Open the Advanced options
With Auto-update enabled, then open the Advanced options for Photoshop. You can repeat this step for other apps.
Step 5: Choose your settings
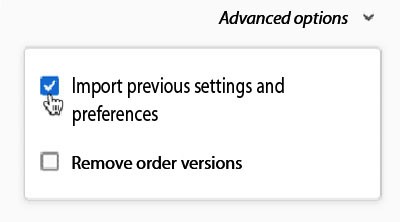
Make sure Import previous settings and preferences is selected, to prevent an update from removing your current Photoshop settings. Keeping the previous version of Photoshop until you are comfortable with the new version is a good idea. So leave the Remove older versions option unchecked.
Step 6: Close the Preferences dialog box
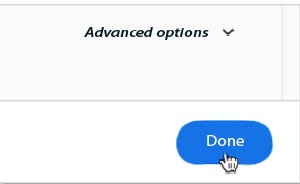
To close the Preferences dialog box, click Done. Next time when a new version of Photoshop is released, the update will be applied automatically.
Now Close the Preferences dialog box. That’s how to make sure you are always running the latest version of Photoshop.
Downgrade older versions of Photoshop
You can easily go back to earlier versions of most of the CC apps. First click the ellipses to the right of Open on Photoshop. Then choose Other Versions. This time you will see a list of other, earlier versions of Photoshop that you can install. This is an amazing thing that Photoshop allows you to have more than one version installed at the same time.
Before updating Photoshop do this
Before you update Photoshop or reset preferences, it’s a smart idea to back up all your settings and presets.
Choose Edit>Presets. You will see 3 options
Here all the presets used to live. Now it’s just Contours and Tool presets. Then select all the presets and choose the Save set. Click Load to install Them.
Migrate presets
If there are any other versions of Photoshop installed on your system, this will copy the presets over into your new version. Just go to the menu option and it will do all the work for you.
Export/import presets
Here most of your presets will be managed, including layer styles, gradients, grids, workspaces and so on. All the things that used to be in the preset manager. This is faster. To export, you will see your current presets. Highlight each one and click the arrow to add them to the Presets to export column. Click Add All, to do them all. Then press Export Presets. To load, navigate to your folder and choose Import Presets.
Manually backing up important Photoshop brushes and actions.
Let’s keep the brushes safe. Go to the brushes panel. Choose B for Brush and it will appear in the top left. Then select a brush set in the panel. After clicking the gear and choose Exported Selected Brushes. Save them to your CC account or Dropbox what you preferred most.
Do some things for your actions. First Open the Actions Panel. Then choose Save Actions from the flyout menu. You can only export one set at a time.