Creating a realistic product reflection in Photoshop involves several steps to mimic the way light interacts with surfaces. Here’s a step-by-step guide:
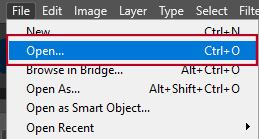
Step 1: Open your Image
1. Open your product image in Adobe Photoshop.
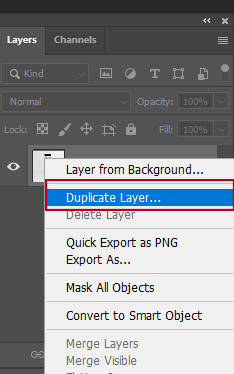
Step 2: Duplicate the Layer
2. Duplicate the product layer by right-clicking on the layer in the Layers panel and selecting “Duplicate Layer.” This ensures you have a copy to work with.
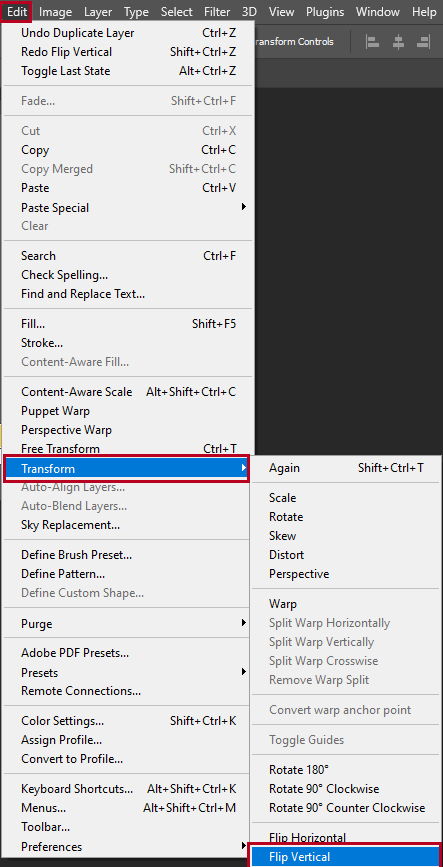
Step 3: Flip the Layer
3. Select the duplicated layer and go to Edit > Transform > Flip Vertical. This will create a flipped copy of your product layer, representing the reflection.
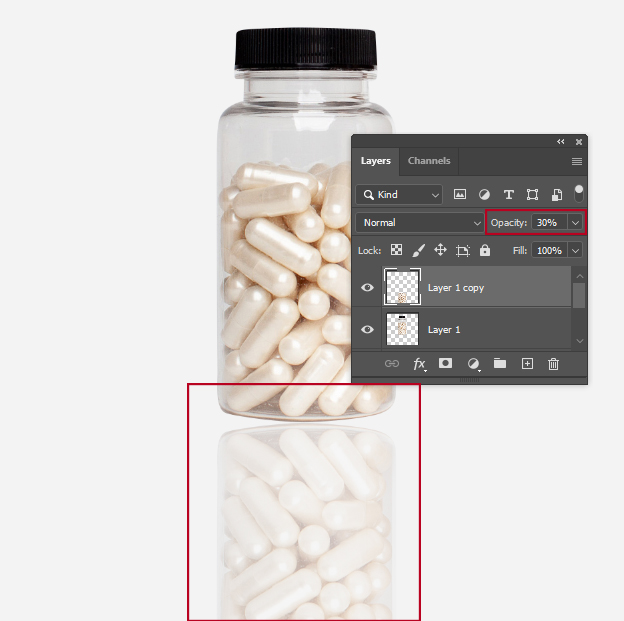
Step 4: Move the Layer
4. Move the flipped layer below the original product layer. Use the Move Tool (V) to adjust the position until it aligns with the bottom of the original product.
Step 5: Adjust Opacity
5. Lower the opacity of the reflection layer to make it more transparent. Typically, reflection is less intense than the actual object, so an opacity of around 30-60% often works well. Adjust as needed for your specific image.
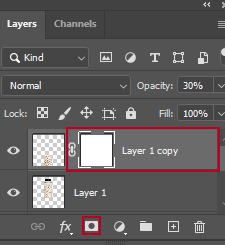
Step 6: Add a Layer Mask
6. Add a layer mask to the reflection layer by clicking the “Add Layer Mask” button at the bottom of the Layers panel. This allows you to blend the reflection more naturally with the background.
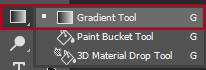
Step 7: Gradient Mask
7. Use the Gradient Tool (G) with a black-to-transparent gradient to create a mask that fades the reflection as it goes upwards. This makes the reflection blend more smoothly with the background.
Step 8: Distort the Reflection (Optional)
8. To make the reflection more realistic, you can use the Warp or Distort tool (Edit > Transform > Warp or Edit > Transform > Distort) to slightly modify the shape of the reflection to match the surface it’s on.

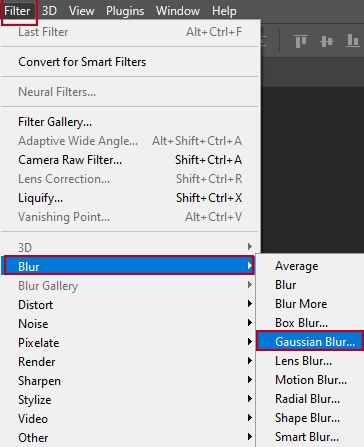
Step 9: Blur the Reflection
9. Apply a Gaussian Blur (Filter > Blur > Gaussian Blur) to the reflection layer. The amount depends on your image, but a subtle blur can enhance realism.
Step 10: Adjust Levels and Colors
10. Use adjustment layers or tools to match the color and levels of the reflection with the surrounding environment. This might involve adjusting the Hue/Saturation, Levels, or Color Balance.

Step 11: Final Adjustments
11. Fine-tune the overall look. You can use a soft brush on the layer mask to manually refine the reflection and ensure it interacts realistically with the ground.

Step 12: Save and Export
12. Once you’re satisfied, save your work and export your image.
Remember that the key to a realistic reflection is subtlety. Experiment with different settings and adjustments until the reflection looks natural within the context of your image.


