We all know that Adobe Photoshop
is a well-known software for photo editing and some other tasks. Have you ever tried to make someone laugh by using editing? What are you thinking now? Is it joking? No! not. It is possible by using advanced tips and tricks. Today we will discuss an interesting topic “how to make someone smile with Photoshop’s Liquify filter?” Let’s check out the step-by-step guideline.
Let me describe to you the working procedure step by step so that you can adopt the procedure quickly and promptly.
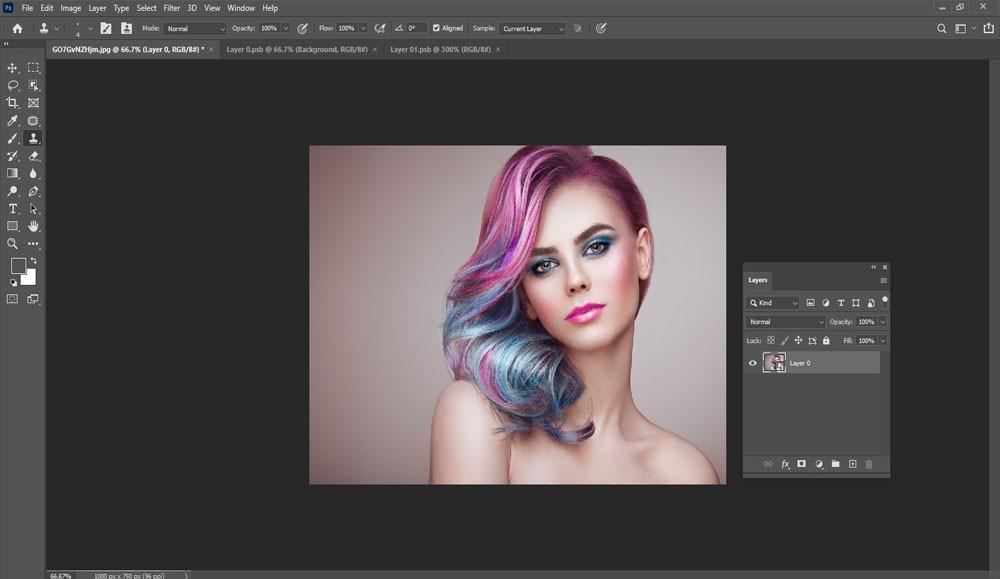
Our first task is to convert the background layer into a smart object. From the layer’s panel, we have seen the images on the background layer. As our mission is to make the object smile our first task is to Liquify it properly. To do that we will use a smart filter here. There is a good reputation for smart filter as it is non-destructive. You cannot do any permanent change to the images and it is editable. You need to click the menu icon which is situated at the right corner of the layer’s panel and then press convert to a smart object.
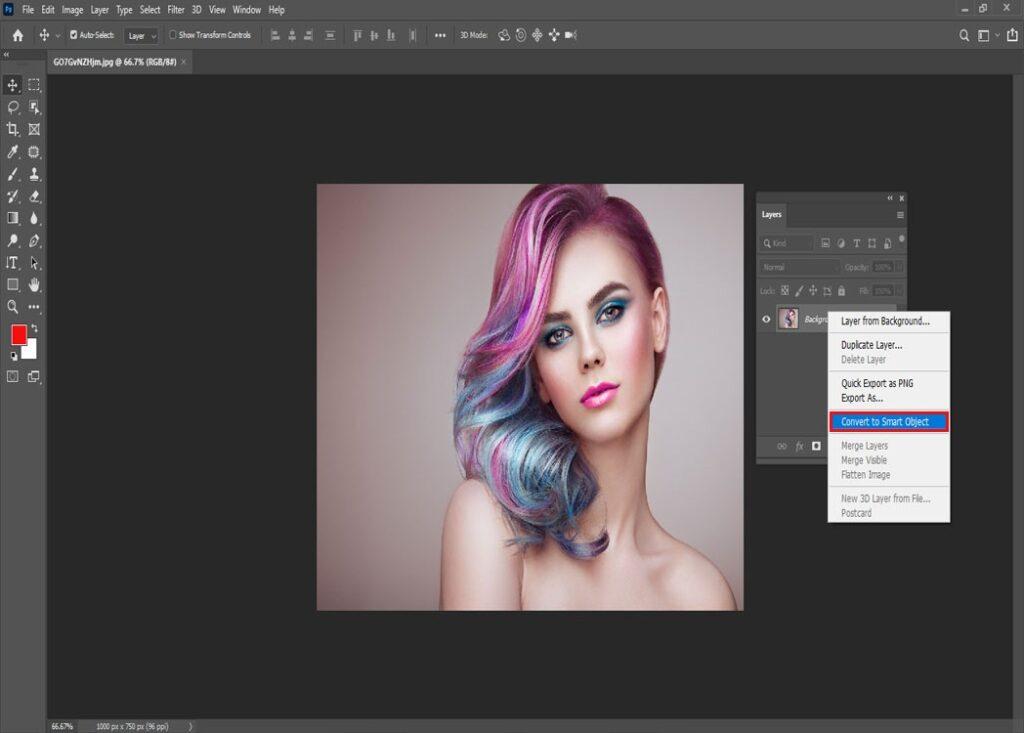
Now how do you confirm that it is becoming a smart object now? There is a simple icon at the right corner in your image that ensures it is a smart object.
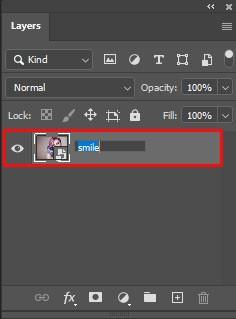
For our mission, we will name it. By default, it has a name that is layer 1. Now we will right-click that layer and rename it to smile. Now you need to press the enter button and complete the mission.
Now our task is to Liquify the smart object properly. It is a very simple process and from the filter menu bar you can find out the Liquify option.

Now our task is to zoom out the image from the face properly. Along with the dialogue box, you will find a toolbox from this area. Select the zoom tool from there and you can simply apply them to your image.
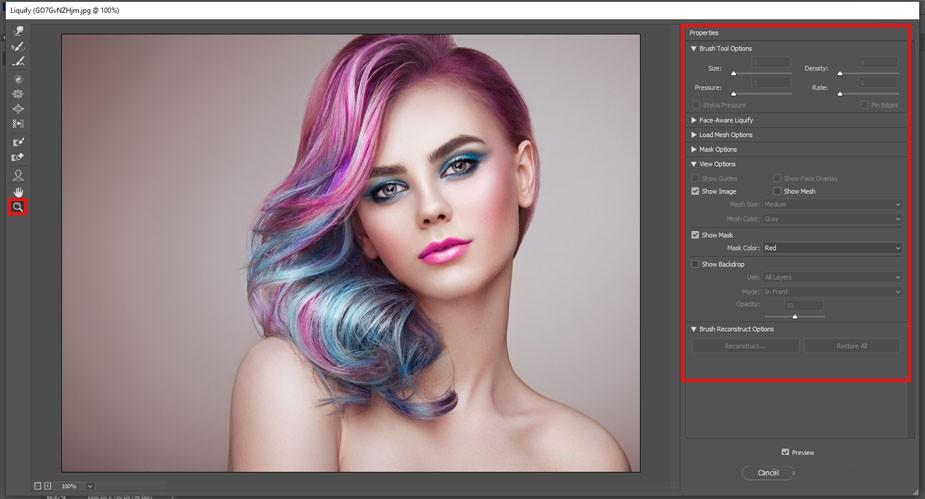
You can click a few times on the object’s face and see the instant result out from there. Use the spacebar and try to make the most of this situation. To be sure of an accurate face you can simply preview it again and again.
Now, your turn is to select the face tool from here. You can have the face tool from the toolbar. It looks like a face so doesn’t be a worry. A novice user can easily find it without a plethora of effort. Keep a thing at your mind that, it is only available in Photoshop CC. So please use this version of Photoshop while you are doing these experiments.
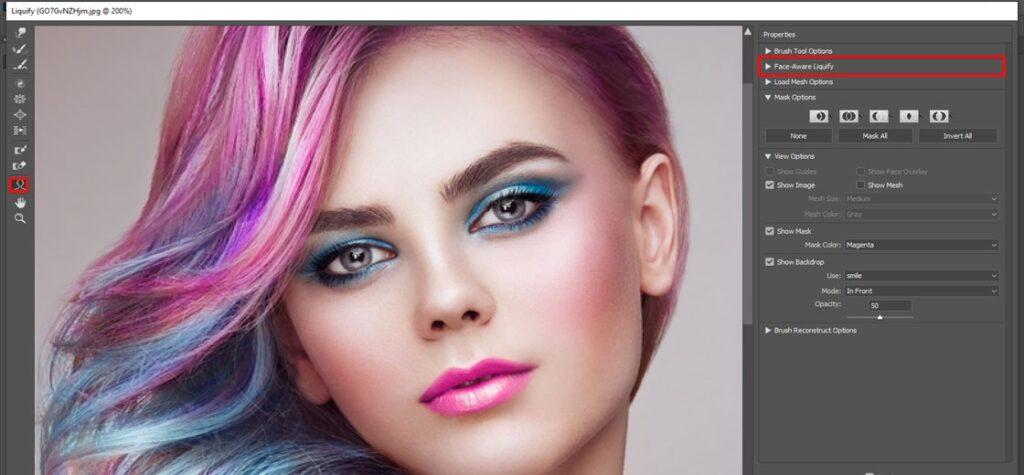
You have to drag the curve of the mouth upward. By using the face tool you can simply move the mouth and here you will have varieties of options available. Now we need to adjust the smile and to do that you have to click the two hover cursor over the lips. The cursor will then change the curve to a double arrow and after that, it will create a smile.

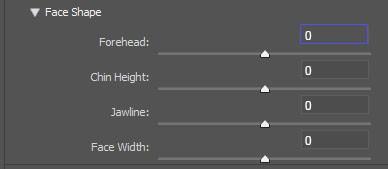
Another important thing that you will have here is a smile slider. You can simply reshape the mile by using the smile slider and there is a chance that you can make it up to 100%. Use this slider box as your wish. There is also an option of lower tips and upper tips. Simply, modify them as your requirements.
There is a change that you have made now. Now how much does it change that you can compare by using the preview button? Before that, save the edited version. From the toolbar, you can easily see the preview of your work. Now, compare it from the previous position. If you think you have not done enough then change again. Try to make a live impact from here. It is necessary to attract the targeted audience.
Thanks a lot for being with us. This is the simplest technique of making someone smile with the Photoshop Liquify filter. Have a great time! If you face any problem while doing this do not hesitate to comment below!