Have you ever done some crazy experimenting with Adobe Photoshop? It’s fun and a matter of satisfaction to us. If we place a text behind an object that will create a completely different flavor. The newbie designers might think that it is a hard task and we won’t perform that easily. That is wrong. We can do that easily by following some basic tips and tricks. This tutorial is all about “How to place text behind an object in Photoshop?” We will discuss this topic step by step and hopefully, you can understand the basics.
To start this task, we have to import an image from our computer to Adobe Photoshop. For this experiment, I am importing an image with a player who is playing soccer. We will place a text behind this image.
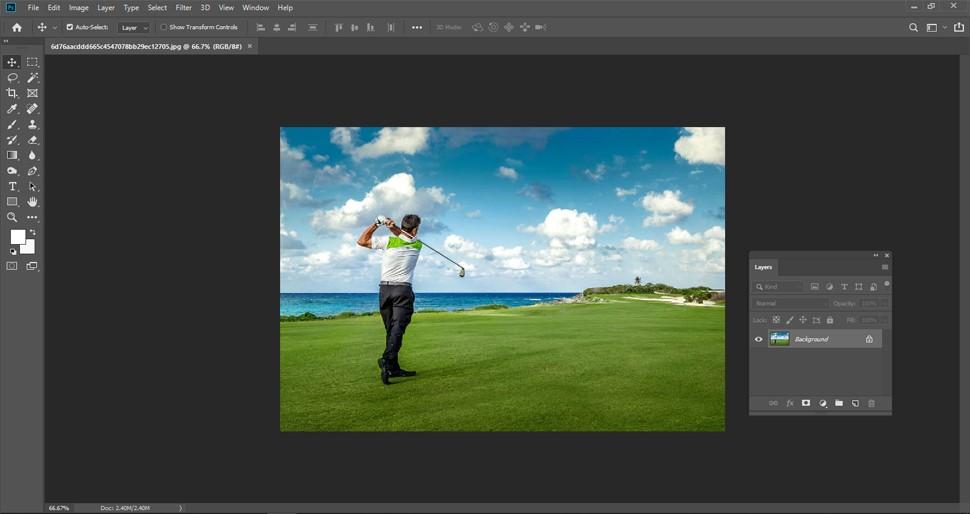
From the menu bar, you can add some text. This is a very simple process and you have to just press this icon and you will see a typing bar in the Photoshop window.
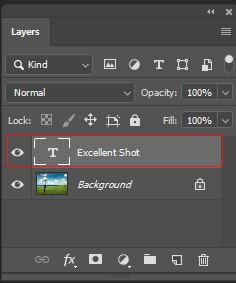
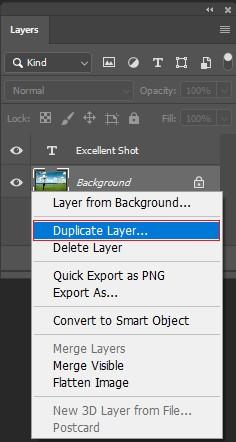
We have the background layer here and now we have to make a duplicate one for it. This is a simple task and you can do it by going to the layer menu and choose new from there. From there you have to choose layer via copy. IF you are using Windows operating system or Mac, they both have the shortcut key to do that easily. For windows it is CTRL+J and those who are using the MAC should press Command+ J
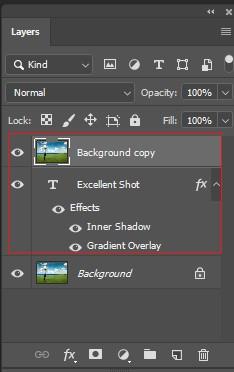
Now you have to click on the copy layer and slowly press it over the original layer. That’s all. When you will notice a highlighted bar appearing at the type layer we have to release the mouse button to drop the layer into place.
We need to hide the text document from the image and it is an elementary task in this journey. To do that we must need a basic selection tool and by using it we can easily do that. From the tool selection bar, there is an icon with a pencil and around just click it and set up the quick selection tool.
Now you have to match the text and image and both need to synchronize together. For this image, I want to place the text behind the man’s head and it would be the perfect shape to represent it towards the audience. I am selecting the entire body of the player by using the quick selection tool. You can easily do that by pressing your mouse.

After completing the selection, we have to preview it, and let’s check whether it is okay or not? Now we have to press the select and mask button from the option bar. If you are using the latest version of Adobe Photoshop, then you must find a refine edge button from the option bar.
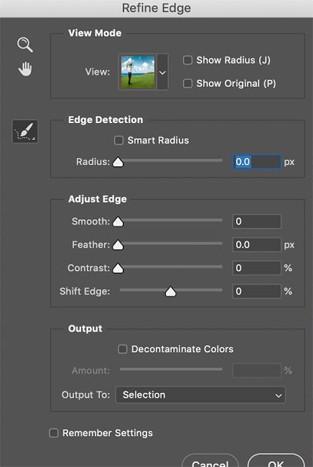
If we zoom at the image, then we will notice something which is not up to the mark and it needs to be solved immediately. Click Global refinements and here you will have some option to edit them. There are two options available for you and you have to select them as per your requirements. You can put the value 10 in the smooth option. Now you might have the confusion what would be the perfect value for a feather? We are suggesting you use 0 px here. We do not need any feathers here.
In the output selection area, we need to change it to the layer mask. Now, we can notice a thumbnail at the background copy layer. Eventually, from the document window, we can enjoy the final document. Now you can enjoy that the text is successfully replaced behind the text and there is no bad edge to notice. It looks awesome!
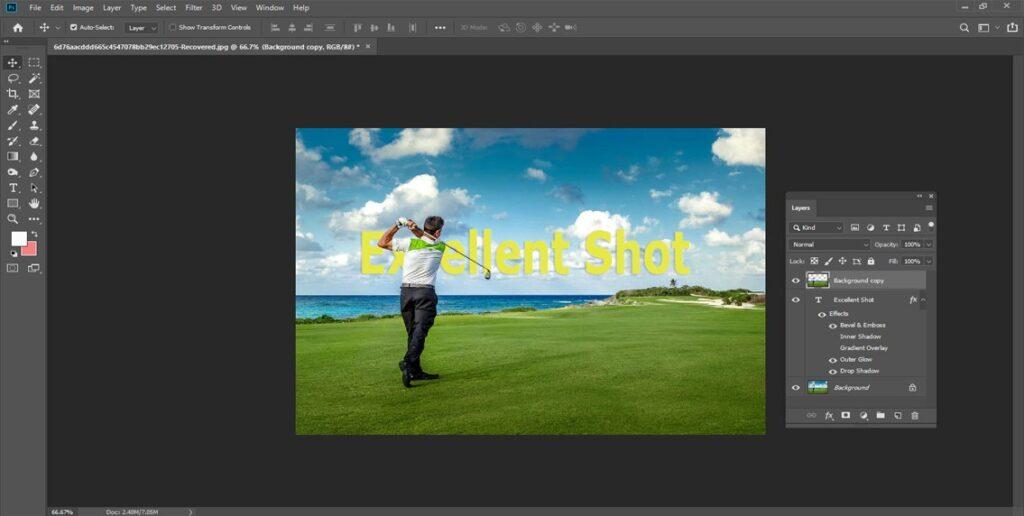
Figure: Placing text behind the object.
I hope you got the point. Follow this tutorial and you can easily make this experiment by using any image with text. If you do not understand anything feels free to comment below. Have a great day!