Recently, we have a request to make a tutorial on “How to remove background from line art in Photoshop?” Our team has done some research and eventually complete a tutorial for the newbie. Hopefully, you will love it. Let’s discuss the tutorial and learn the basics of Photoshop.
What is line art?
We can describe the term line art as the distinct quality that will draw some straight or curved line against a particular background and at the end this artwork will be represented as a two-dimensional shape or a three-dimensional shape for the audience. For attracting the audience, the line art contains different types of colors and shades that will certainly attract the audience and if you are experiencing this artwork for the first time I can definitely say that you will fall in love with that. It could be horizontal art, vertical, curved art, or some zigzag lines. However, all those properties are meaningful and they have a visual impact directly on the audience. For decades this type of artwork is amazingly popular among designers around the world.
The quick method for removing background from line art in Photoshop
Some people love to do it quickly. As the process is not always perfect but there is no problem to follow these techniques. Firstly, I would love to discuss this awesome method with you.
Step by step method for removing background from line art in Photoshop
Now we will go for a detailed discussion on this topic. Open an image in your Photoshop window and follow our guidelines step by step.
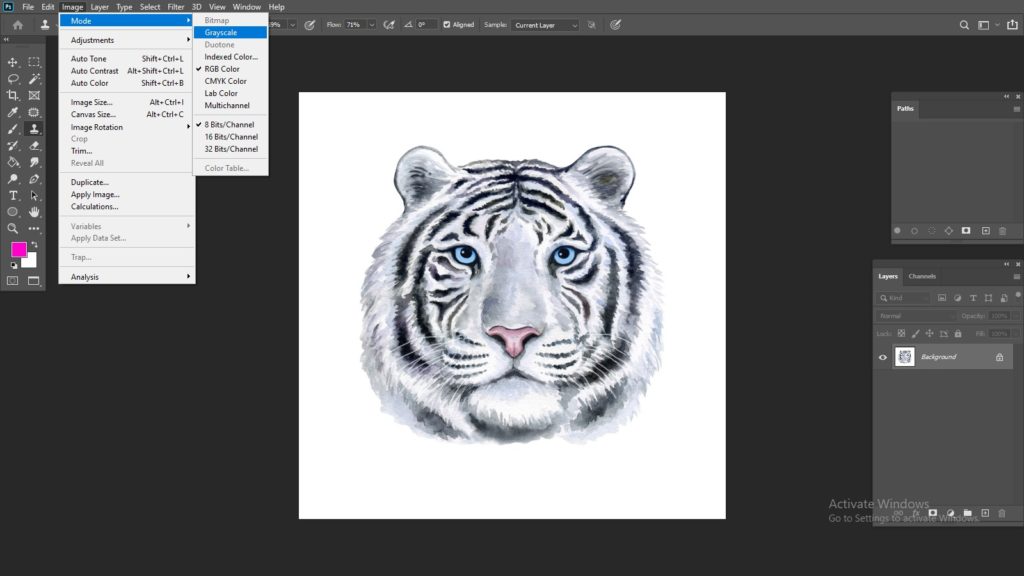
From the menu bar, you have to select the image then mode and choose Grayscale from there.
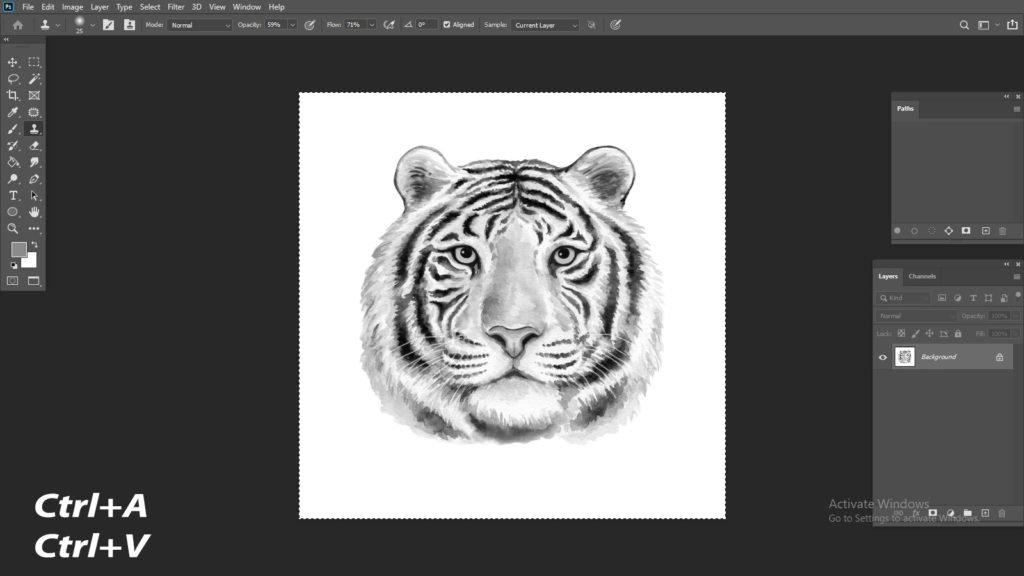
You need to press CTRL +A to select the entire image and now it’s time to copy it. In this regard press CTRL+C.
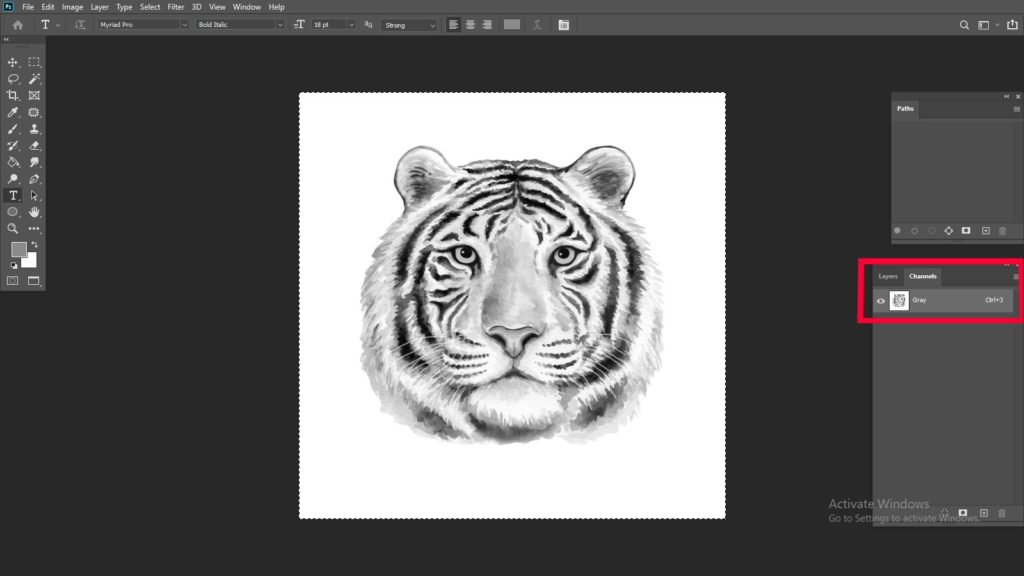
Now your task is to open the Channel panel.
Click the button to create a brand new channel. Initially, the channel will have named alpha 1. Later on, you will rename it.
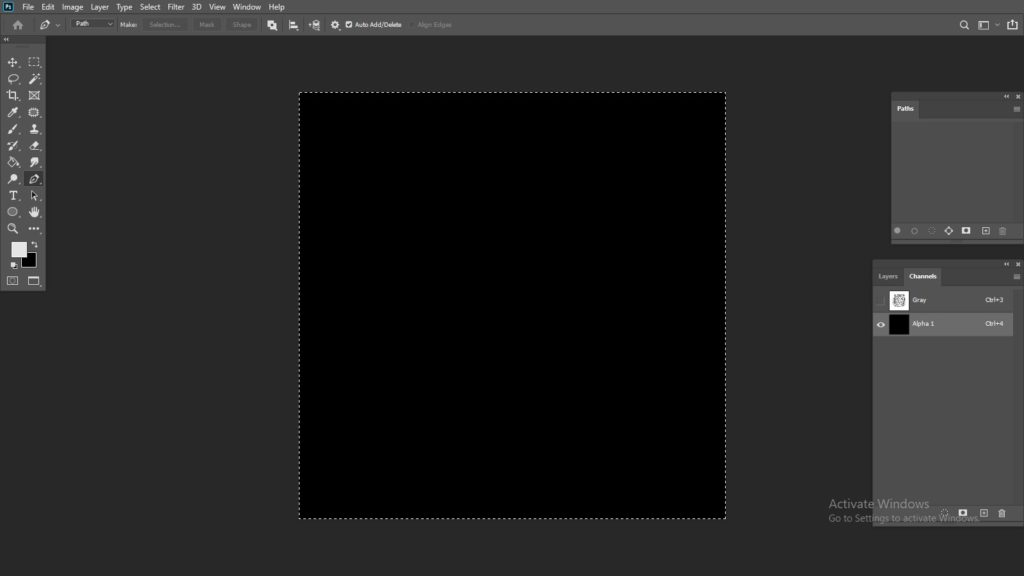
You can press CTRL+V to paste the selection onto this layer and eventually CTRL+D to deselect them completely.
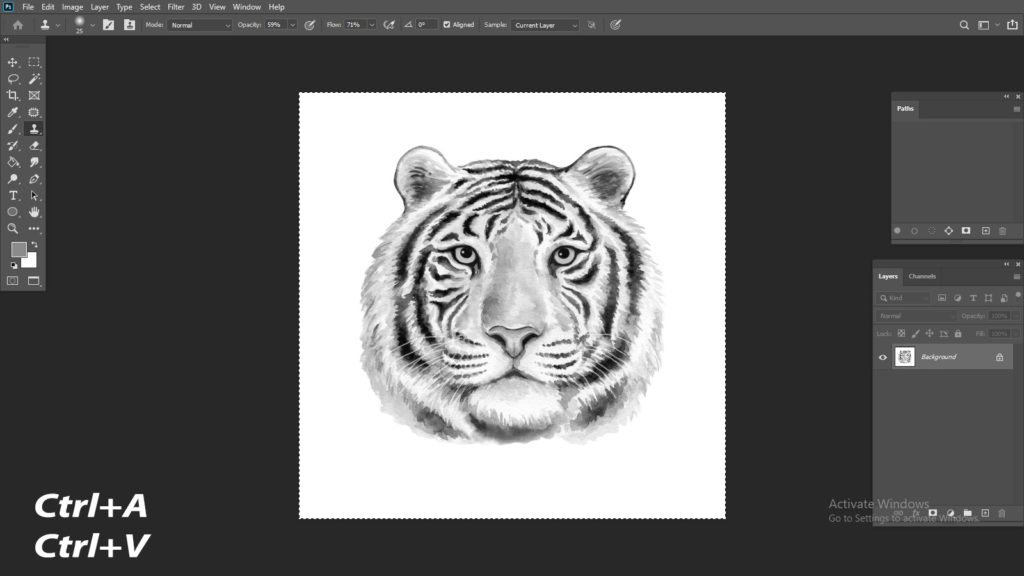
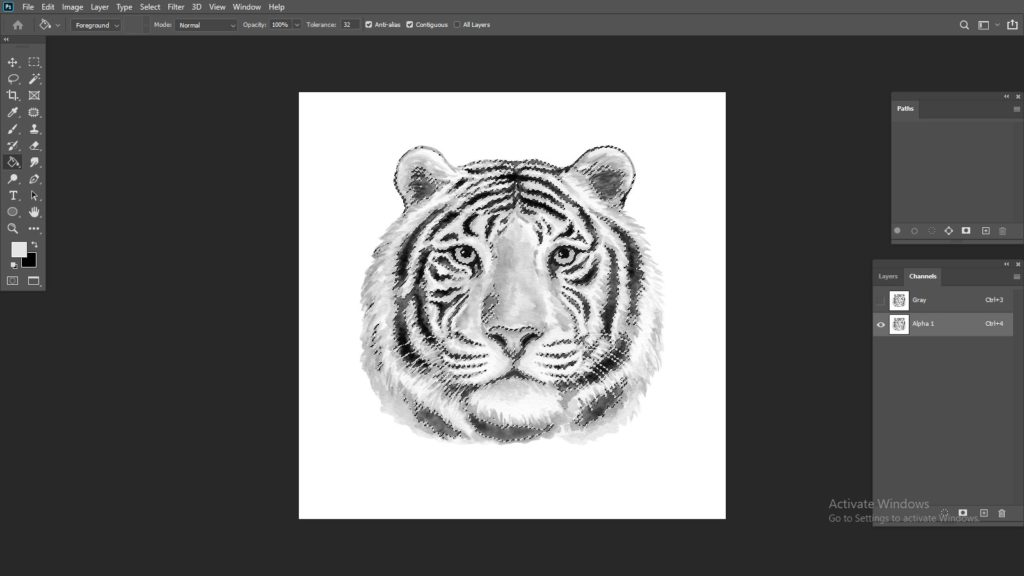
Now your duty is to load the selection. In this term, you will notice that the part of the artwork is selected properly.
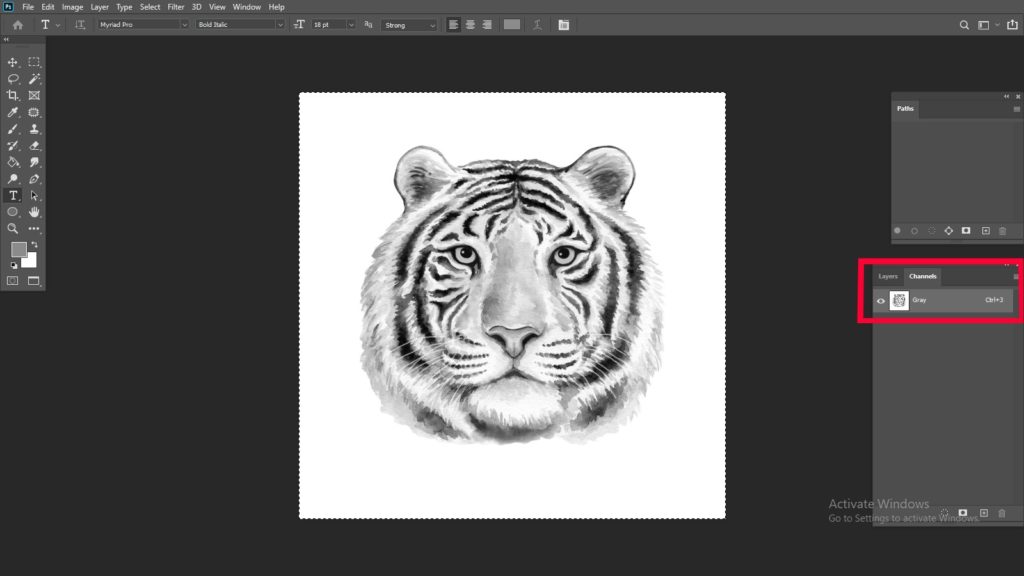
It’s time to select the black part of the artwork. In this regard, we are suggesting you press SHIFT+CTRL+I.
In this way, your task is to select the grey channel.
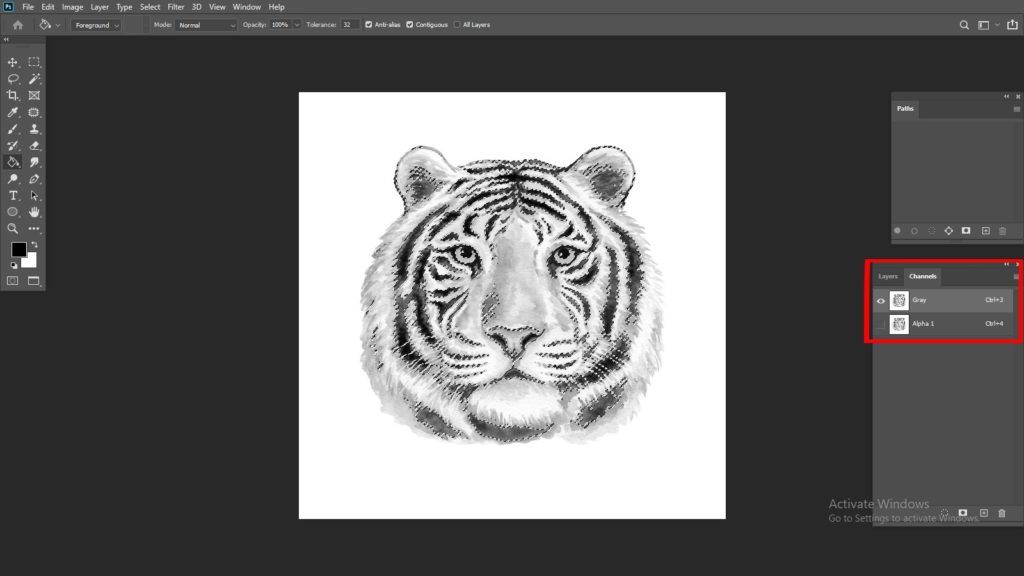
After that, please create a new layer panel here.
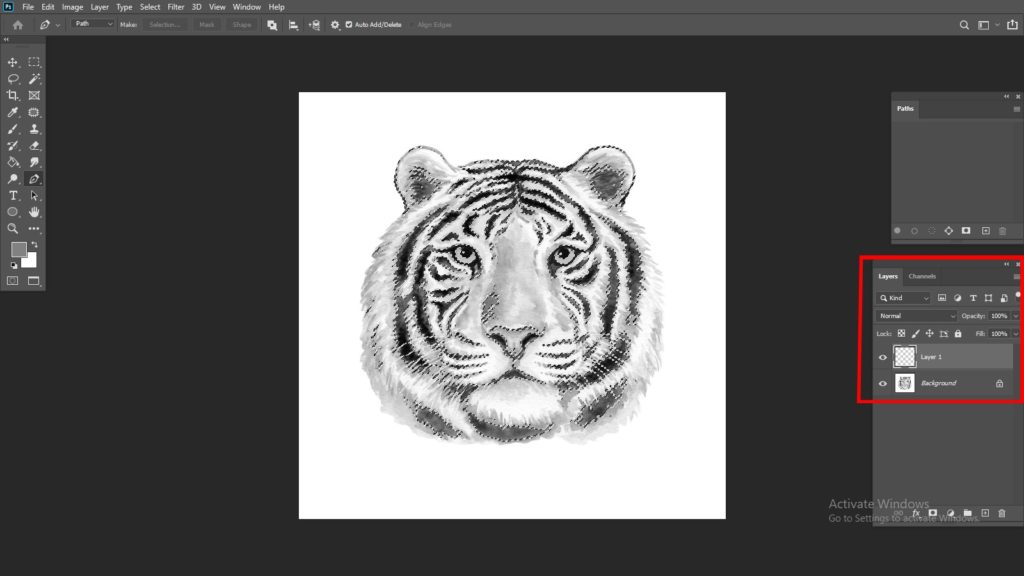
In this regard, the paint bucket tool is necessary for filling the selection with black.
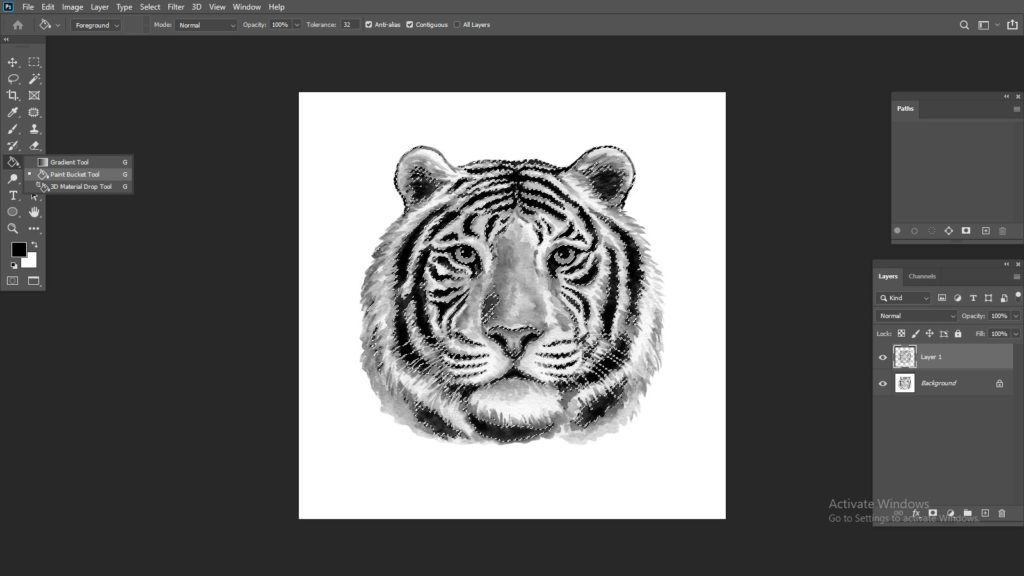
Again you need to deselect this term and for the shortcut, you can press CTRL+D.

Hide the original layer to see the changes.
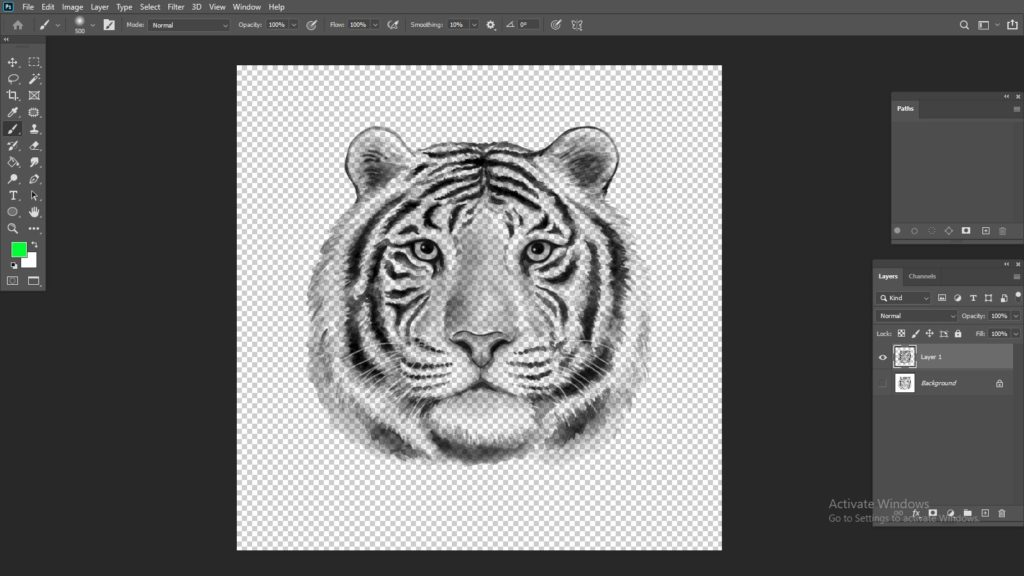
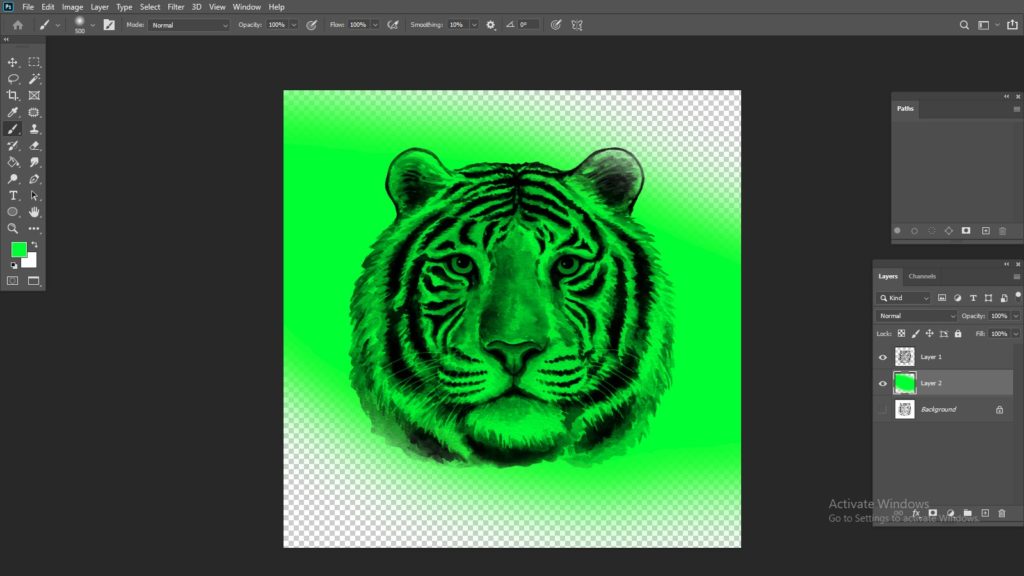
Now you have successfully differentiated the linework with a limited number of extra steps. Are you frightened to see all 13 steps? Do not be panicked with that. It is super easy to just follow the rules for removing the background from line art. In this way, the user will have more options and control for selecting and deselecting the layers and image which is necessary for any type of editing purpose. The designer should have a hundred percent freedom to his work and it will certainly improve his editing skill. By completing all these 13 steps now are ready to make the changes. Select any color from the color picker channel and use it in your line art. The line art must have to be artistic. So the presentation should be perfect and it should have the capability to attract the audience.
Final few words
I hope this tutorial will certainly help you a lot to take the initial preparation for removing background from the line art in Photoshop. Hopefully, you will be benefited from here and it is our ultimate goal to help the people by creating some informative tutorials. Please share your precious opinion with us. If you do need any other Photoshop tutorial you can directly mail it to us. We like to hear from our audience.