Nowadays, background removing techniques are applying for many purposes and it is really very popular for e-commerce business, fashion industry, magazine and many other sectors. But at first, we need to understand why we should use background removing technique. Sometimes the background does not match with the product colour, sometimes the background highlights more than a product, sometimes it looks imperfect. To remove such issues, we need to remove the background.
During photography ,most of the times we use white background for a picture. The product looks very beautiful along with the white background. Also we use white background most of the times to make the product more clear , more accurate in-front of customers or viewer’s. If we use black background color for a black color product , the product image will not look good. It will not focus on the product. In that case, we need to remove the black background from a product photo. We have to make sure that the product looks bold, clear and obviously attractive. Choosing a background for a product is always very crucial. Whether the product will sell more or less, it depends on the background in some extend.
The background helps to balance the creation of an image. A beautiful background can help to bring the attractiveness in a photo. Though background is not the main subject in a photo . But still it can play an important role for producing a great image . We can get different types of background photo from google and we can use those background in our product photo. If any changes needed, we can do that with the help of photo-shop.In photo-shop , there are so many procedures to remove the product background. We can use the background in many category such as : white background with product picture, black background with product picture. We can detach the background with many tools and services.
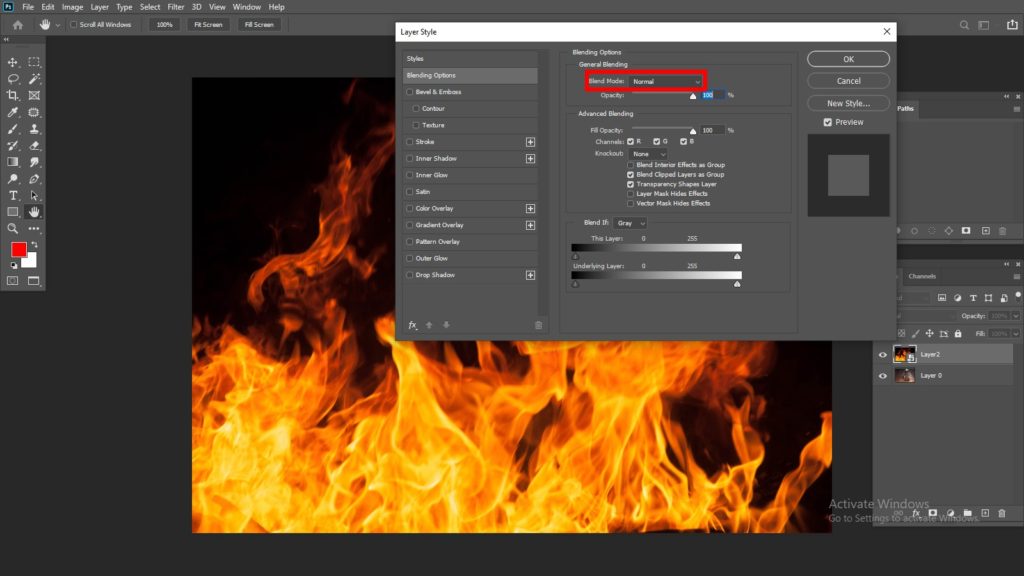
Step 1: Go to the option named as blend mode.
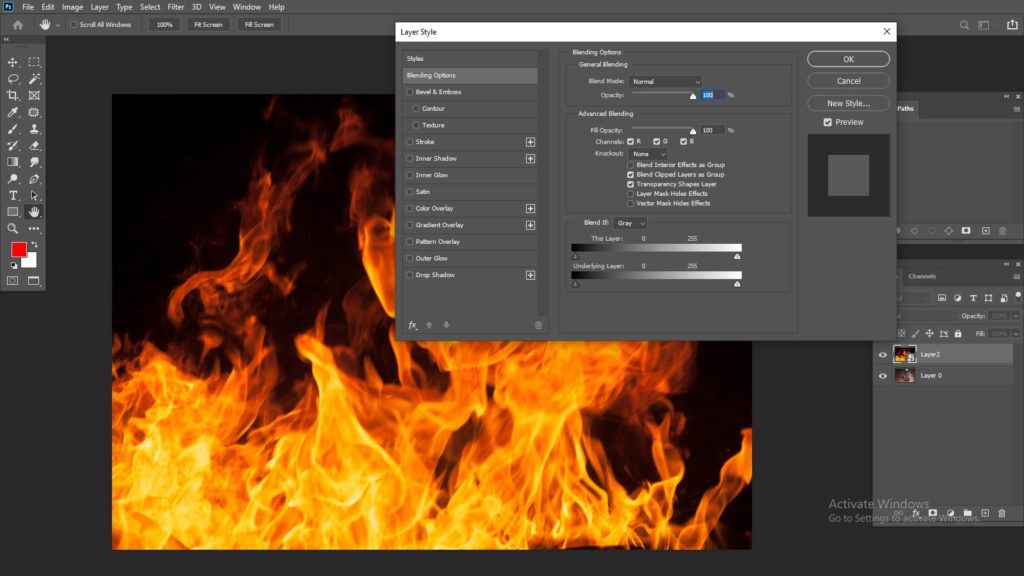
Step 2: After clicking on the blend mode , go to the Layers <after that Go to the layers panel .
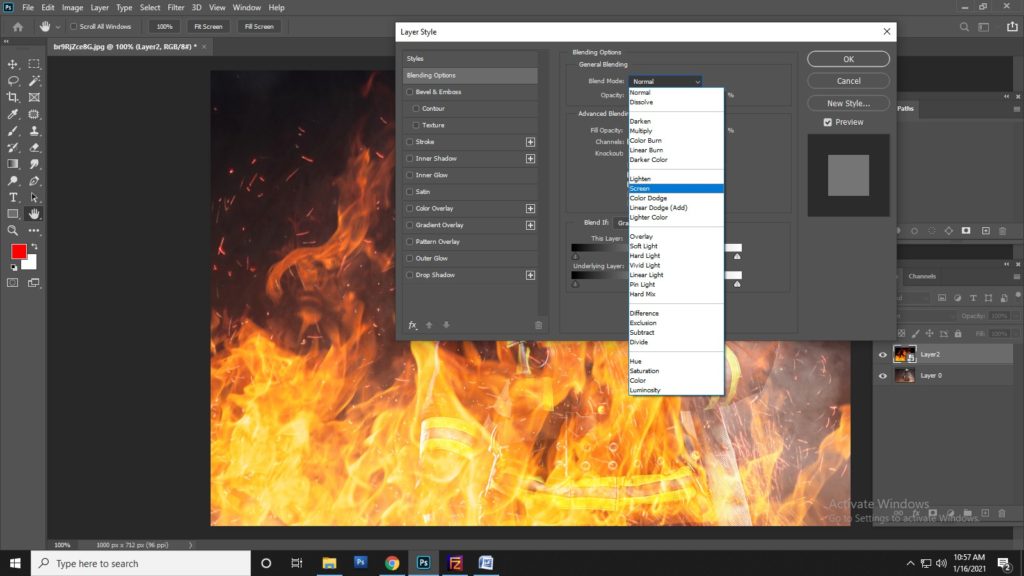
Step 3: Select the option named as “Screen”.
Step 4: Click double on the image to bring out the button box or option bar.
Step 5: Go to the bottom of the button box . There will be an option named as “Blend if ”. There will be two layer bar and they are named as : “This layer” and “Underlying Layer”.
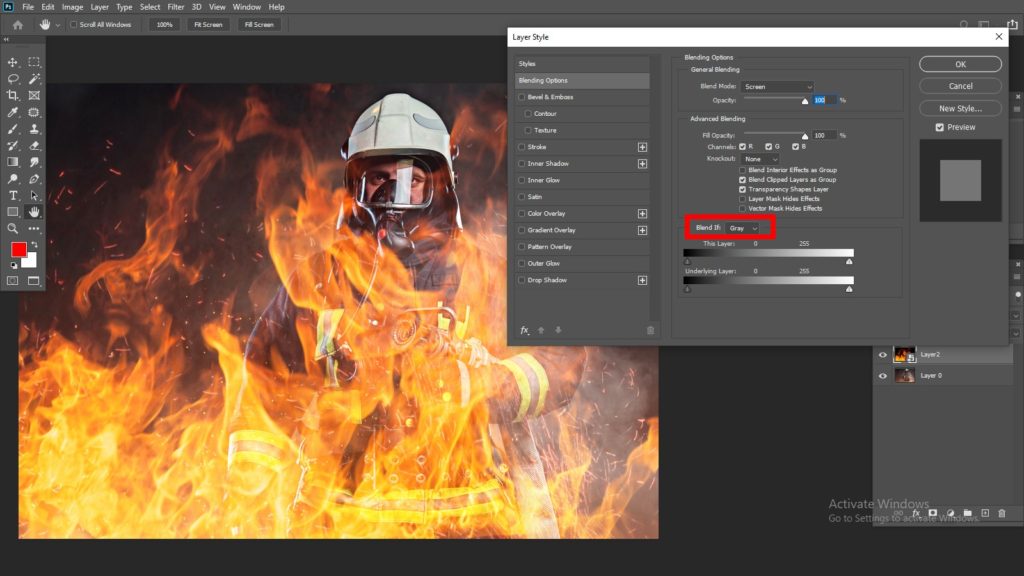
Both of this option helps to create the transparent look on a photo. There will be a pointer to increase or decrease the filter. The dark mode remain in the left and the white mode stays in the right. If the background of the product is black and we want to bring white background then we need to conceal the black part .
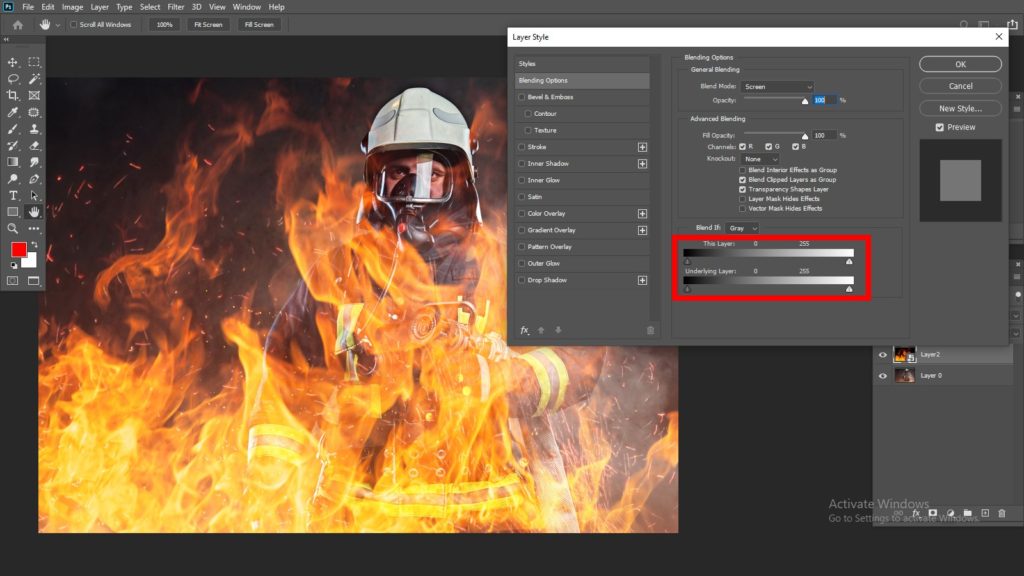
We need to pull out the pointer until the black part is transparent. As we want to blend out the black color so we need to pull out the pointer in the right side to get the transparent effects on the photo. If we pull out the whole pointer on the right side , the image will look rough and the edges will look very disappointing . And this type of photo will not be accepted to upload on website. Why this thing happens ? Photo-shop is very crucial . One small mistake can damage the whole tasks and ruin the image quality. If we look very closely then we will be able to see that the pointer is divided into two parts . If we pull out the whole pointer on the right side then picture will look very rough and edges also . But if we hold the “Alt key” and take the half portion of the pointer into the right side then the image will look fine and black background will be removed easily and edges will look also soft. If we do everything perfectly , then this will create a lively picture . Important thing needs to be remembered The pointer or slider will not work if we do not double click on the picture . In a locked picture , slider will not work . If we hold the alt key and go to the left then the background will look more darker.
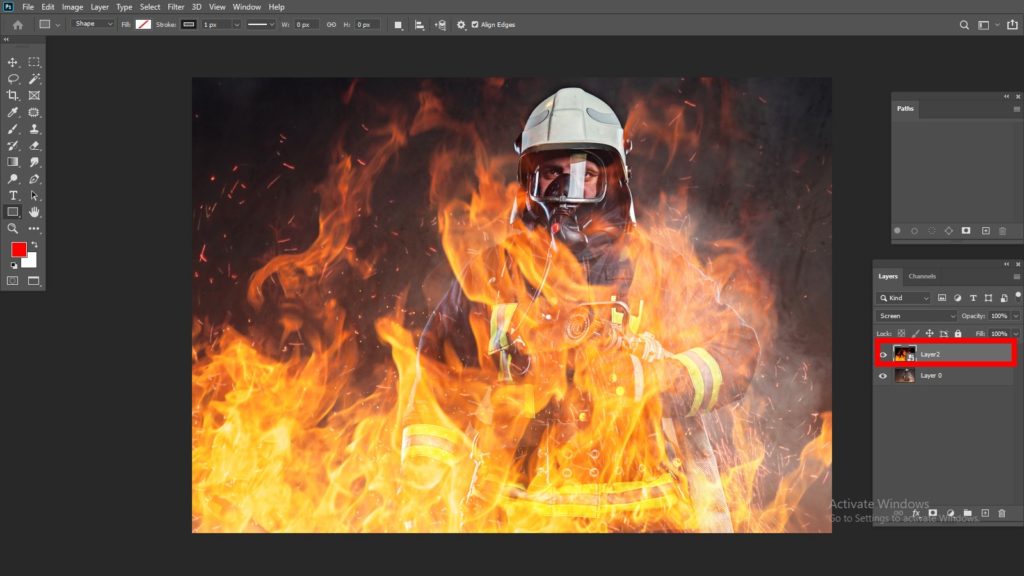
Step 6: When the blending is done , press on the option named as “OK” and it will rightly effect on the image.
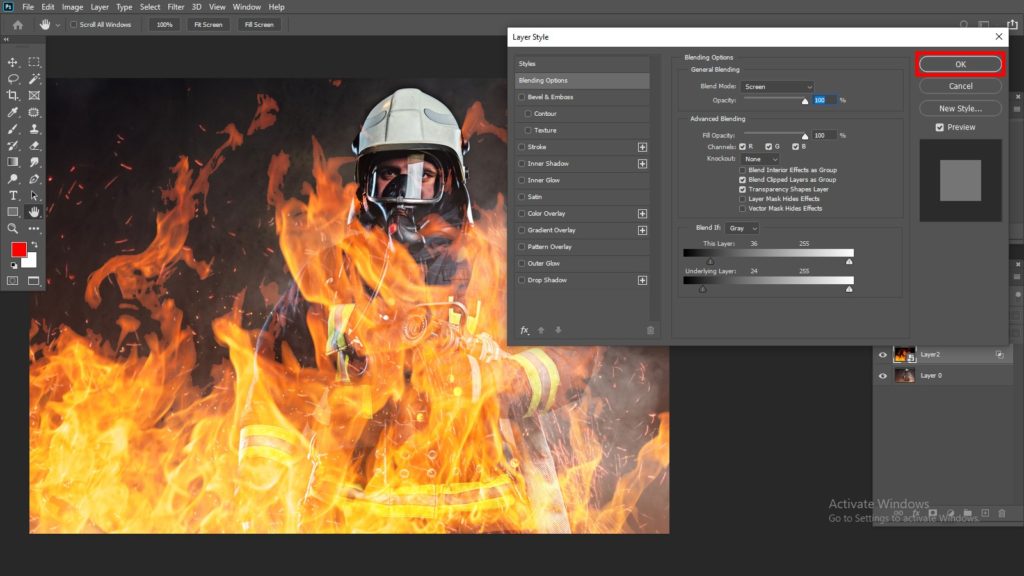
Step 7: See the final output . All the black backgrounds are gone and picture is looking absolutely fine.
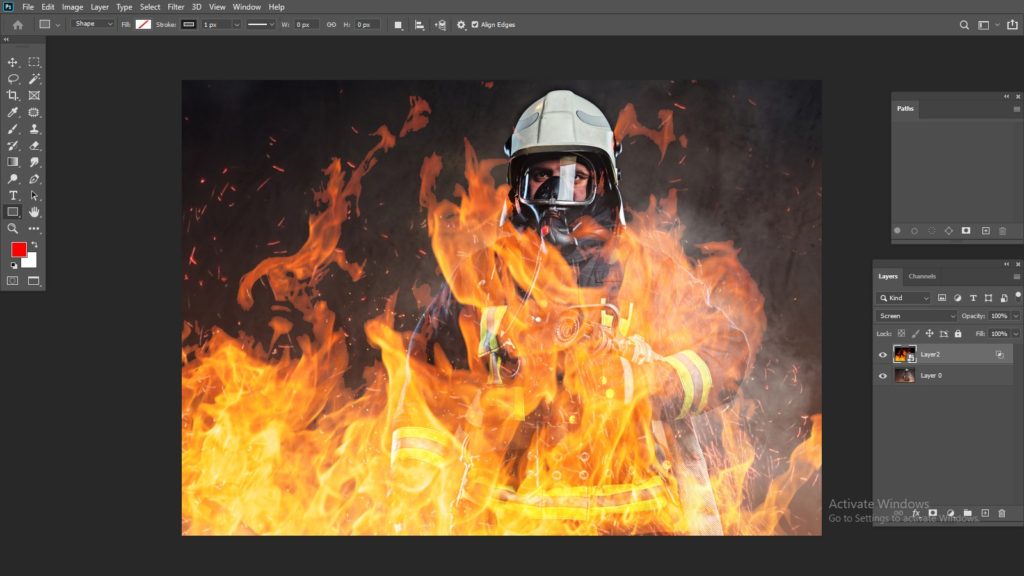
Step 8: Go to the upper side of the screen and select “Window”.
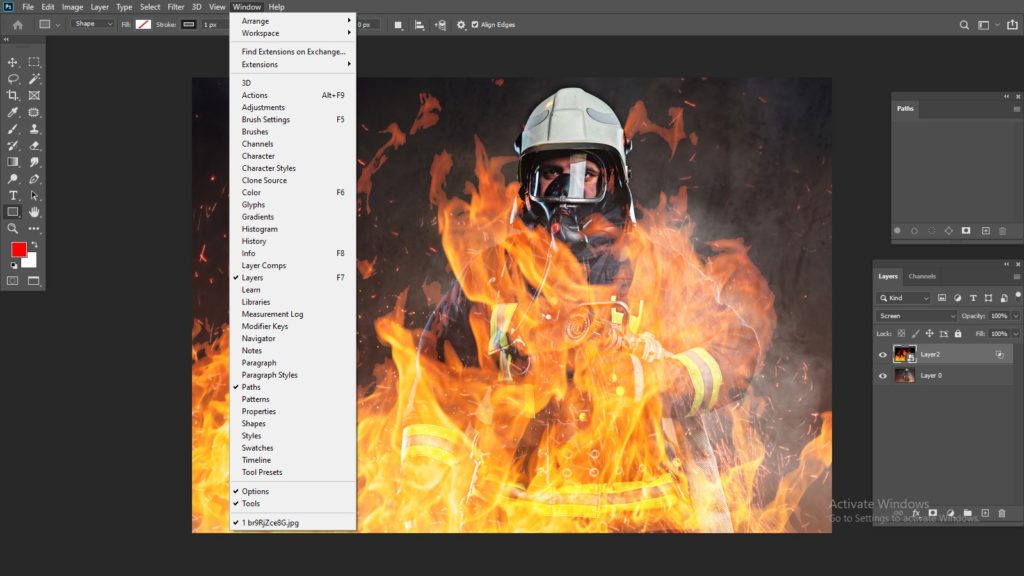
Step 9: After that go to the option named as “History”. And duplicate the whole work and go to the option “Blend if”.
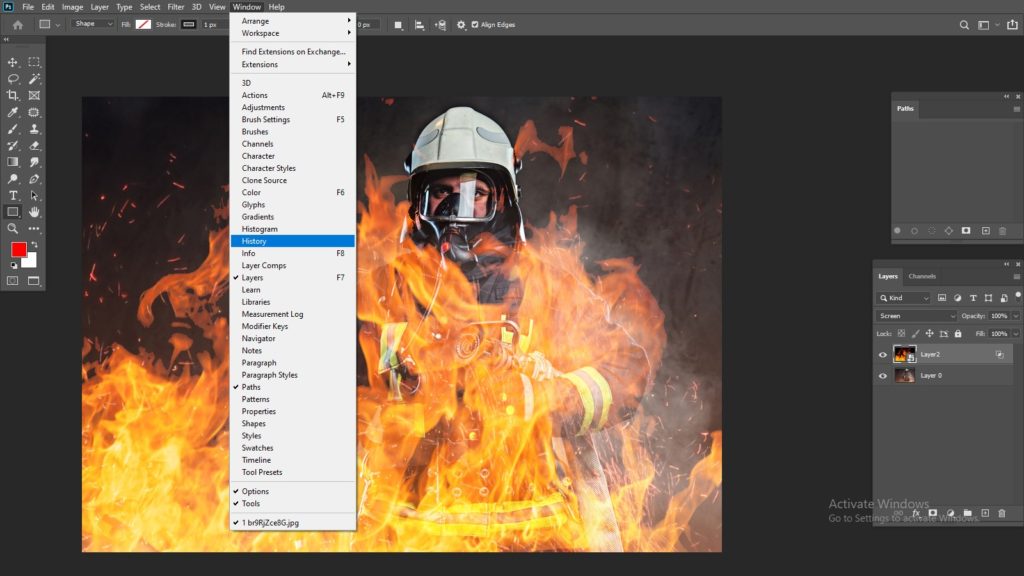
Go to the screen mode and adjust the screen .
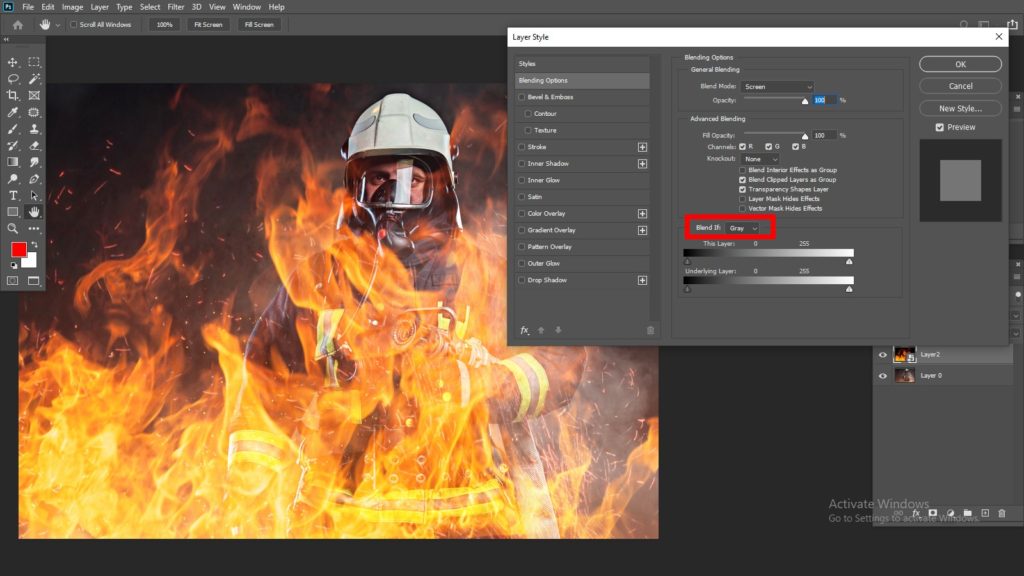
Use the “blend if” method where it is required and it will create more transparent look . Adjust the opacity by clicking double on the picture to make it more vibrant.
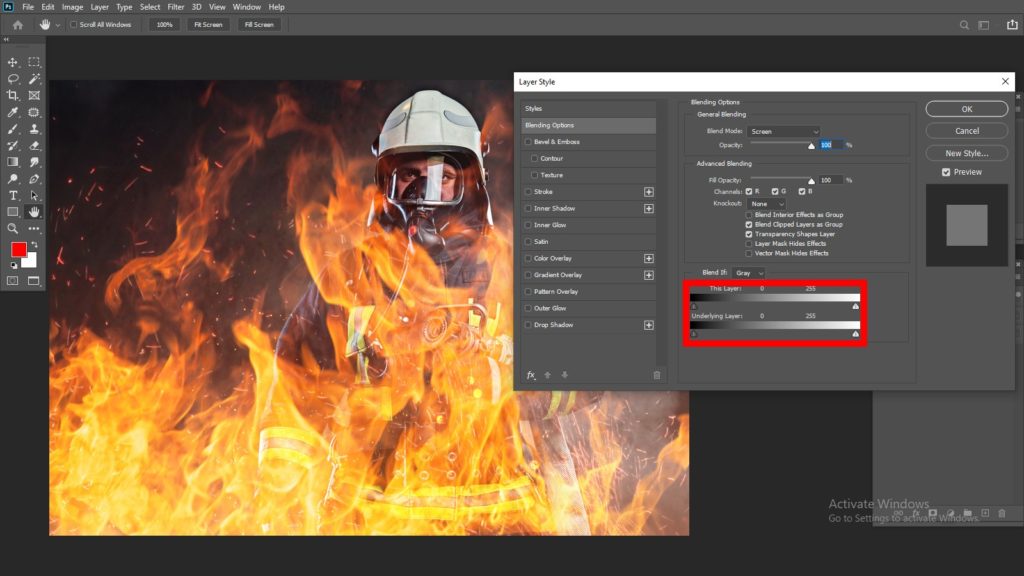
Step 10: Save it and black background is removed from the picture. You can use blend if option the way you want . If you want more transparent look in your picture then you can go to right side of the blend if option and if you want little bit black background then you can go to the left side also . It depends on you how much you want transparency in your photo.
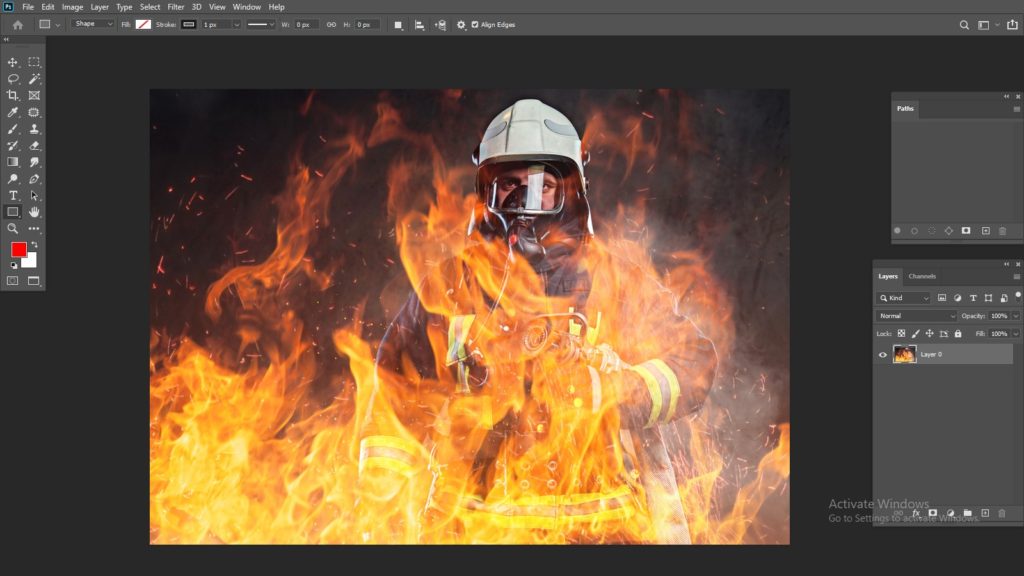
Step 11: Save the file .
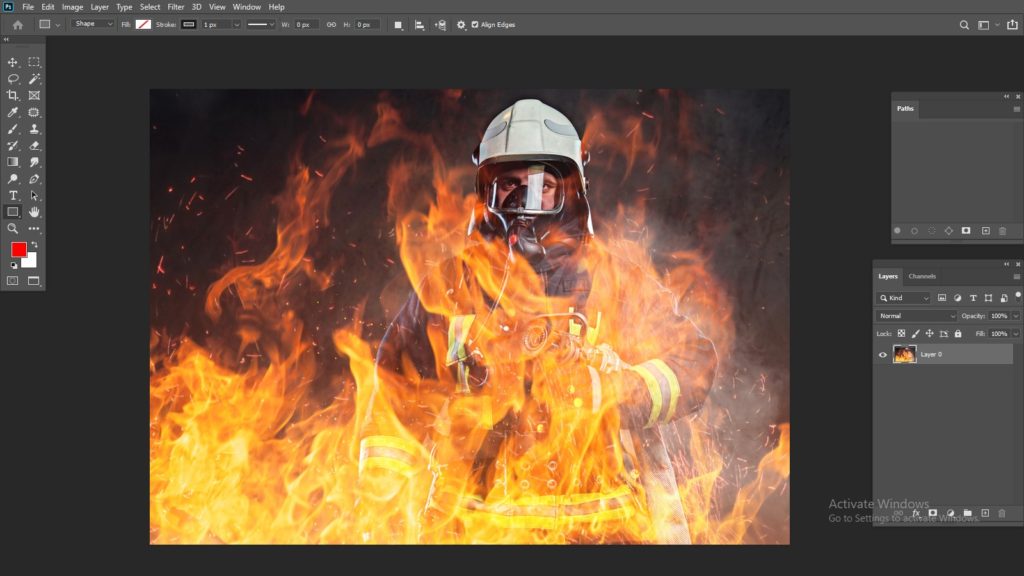
The background is a fine work of art. With the help of the right choice of background, we can highlight our product. It can increase our sale. Black background is very classic but sometimes black background does not look good especially when the product is deep black color or the product is too white color. We need to adjust it. If we keep the black background on these types of photo, it will not focus on the product photo. And the customer will not find the product interesting. As a result, the products will not be sale-able. So it is important to remove the black background and apply the white background to focus on the product.