Nowadays, most people save their photos digitally. But previously, people used to save their memories in photo albums and paper form. By doing this, many photos get ruined or damaged because of bad weather or some other reason. But people always want to save their memory as old photos contain so many beautiful memories regarding their life. When we see those old photos we recall so many beautiful feelings. Pictures can be ruined for many reasons like bad weather, scratches, stain, and much other reason. But photo-shop brings so many new procedures and techniques through which we can restore our photos quickly. Thus we can save our old memory. It is really very useful for us.
How to restore photos in photoshop?
With the help of photoshop, you can save your all old memories digitally and you can remove all the imperfections and flaws from your old photos. You can easily re-establish the colors again. It will look exactly like before it was.
Procedure 1: First of all , scan your old photos so that you can save it as a digital copy . To scan your photo, you can use normal scanner or scanner app .
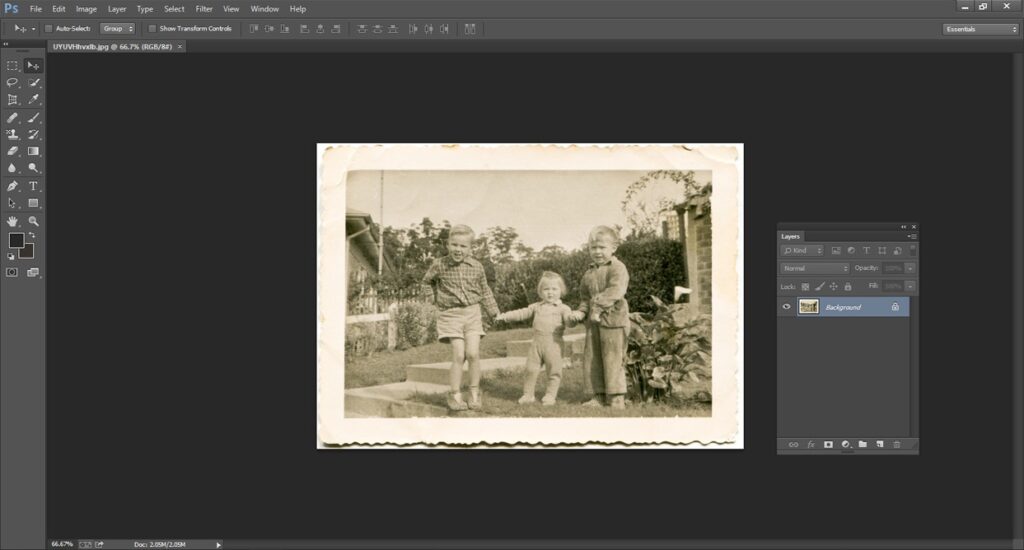
Procedure 2: After scanning all the photos , open your picture in photo-shop . Then make a duplicate layer of that original copy . Just put a new name for new duplicate layer and hit on the OK button . Turn off the left side eye icon for your original copy . Start working with your duplicate layer. If any problems occur , you can still get your original copy by doing this.
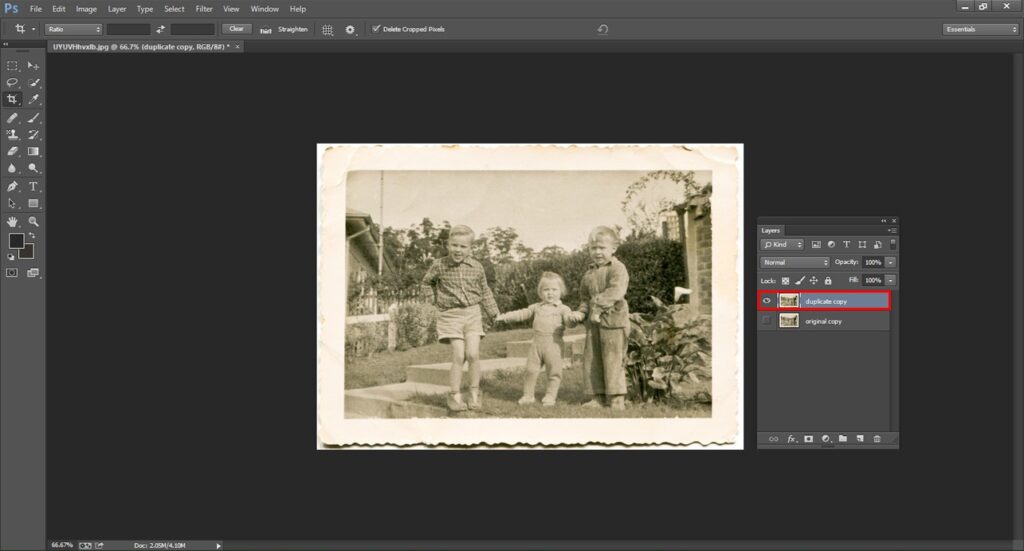
Procedure 3: Now resize your photo before applying any kind of technique on your old photos . If any kind of cropping , rotating or straightening is needed then do it immediately . It is always good to work with perfect size photo. When your photo is aligned and perfect , then task get much easier.
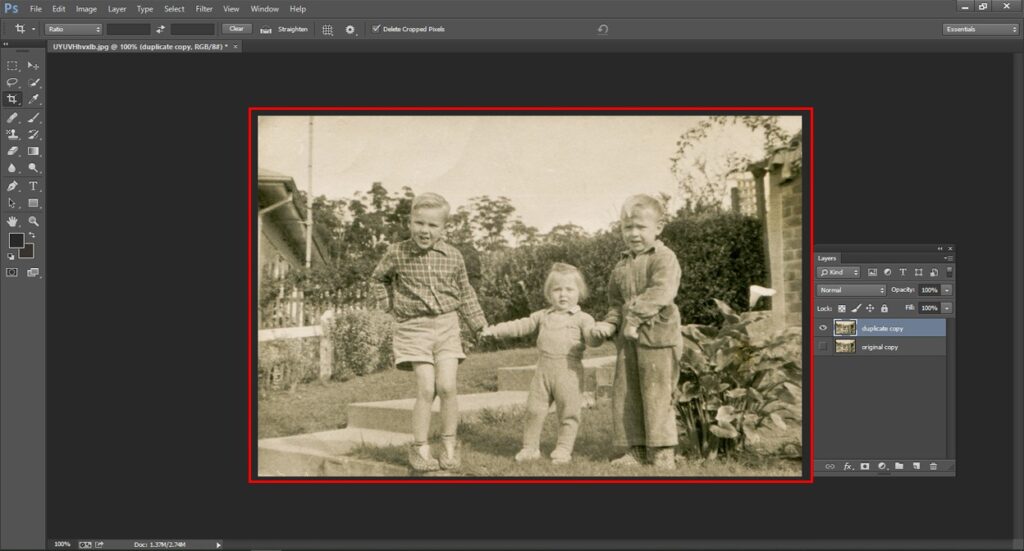
Crop : If cropping is required then hit on the crop icon and crop you photo as per requirement . When cropping is done , hit on the OK button .
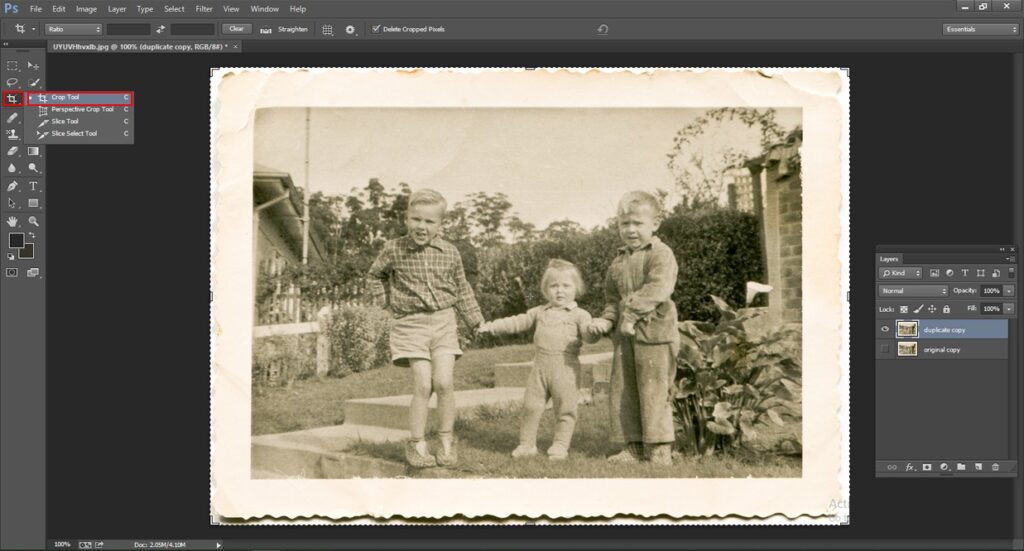
Straight : During scanning if your image gets little bit bent or curved , then you should straight your image in a proper way . To do that , go to the crop option < select the straighten option from the option bar < Draw a line horizontally or vertically (as per requirement ) < when everything is perfectly set , press on the OK button .
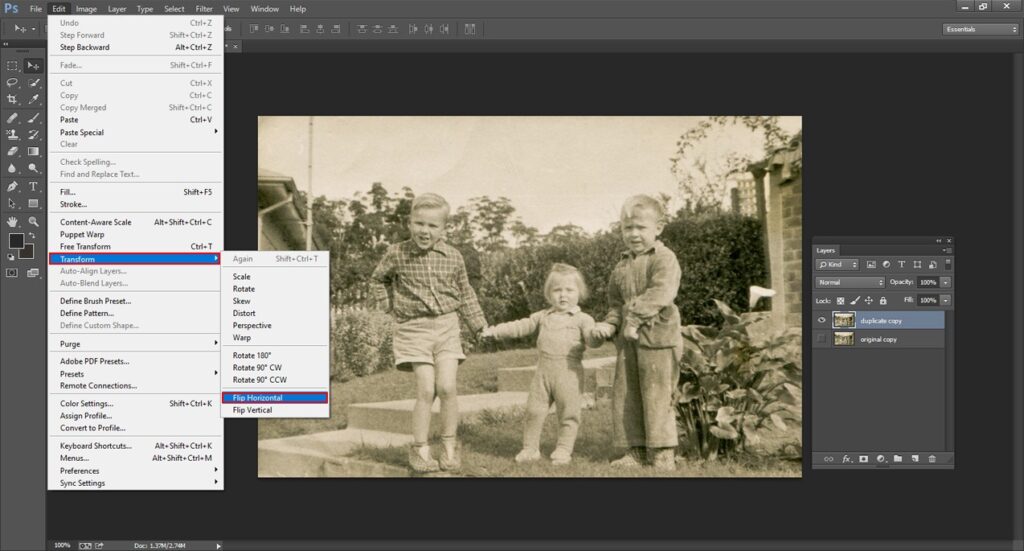
Rotate: From the toolbar , choose the image < apply rotating option < set your desired position < Hit on the OK button .When you have set everything , analyze the whole picture and check if any other adjustment is needed or not.
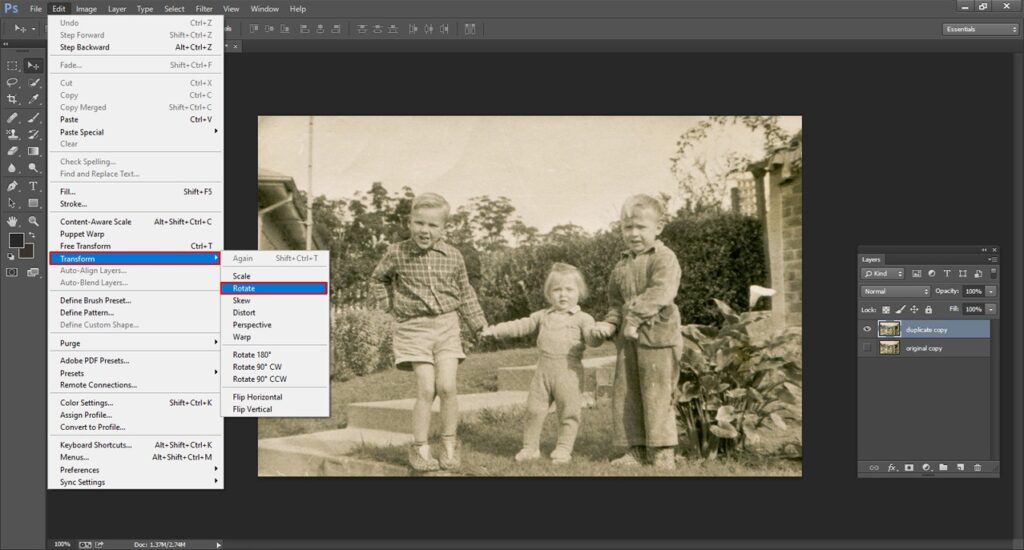
Procedure 4: There are different types of adjustments available in photo-shop . You need to choose what type of adjustment you need for your old and vintage photos.
White balance : If you think that your old photo need white balance thenuse the white balance for your photo so that it looks natural and beautiful.
Image sharpness: with the help of sharpening tool , you can make your image more clear , more alluring , more eye -catchy and obviously it will look like e new photographs in-front of everyone.
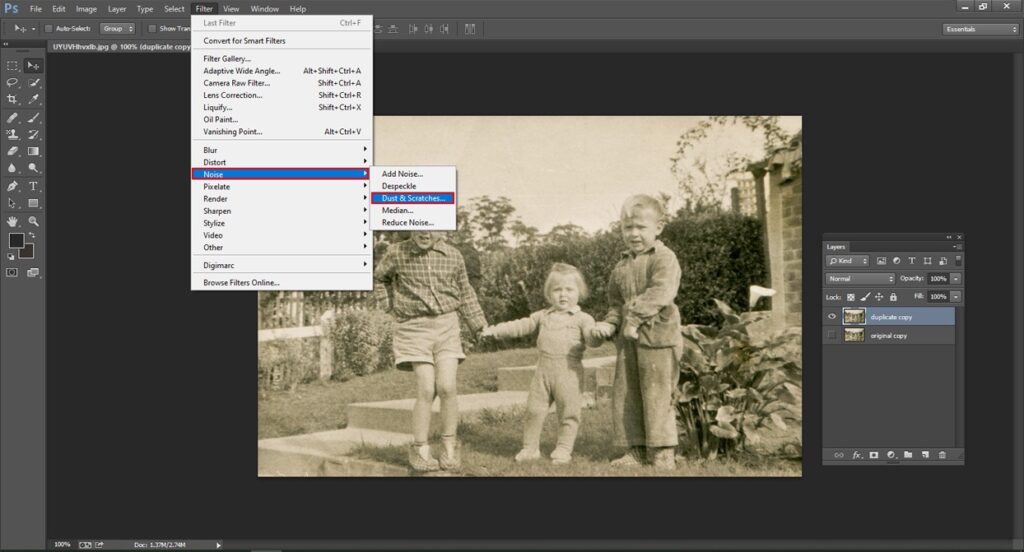
Remove Dust from an old photo: To lessen the dust and scratches from an image , go to the option filter < Press on the noise < select dust and scratches. There will be some other option which is named as threshold and radius . Adjust those slider as per requirement.
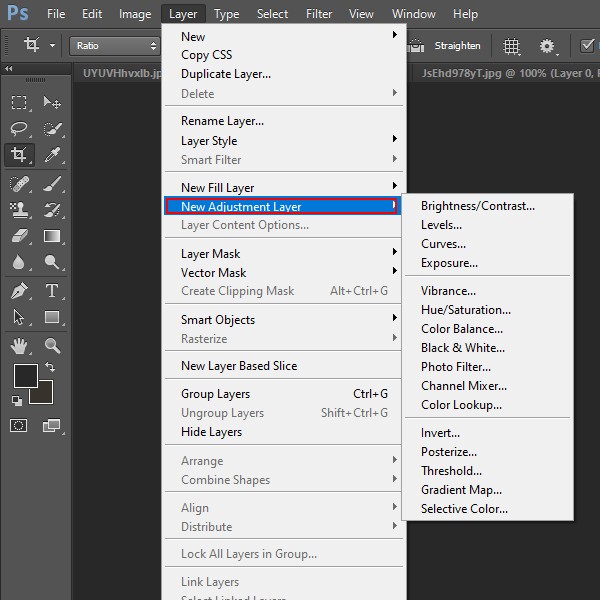
Use Adjustment layer in old photo : Well, it completely depends on you how you want to recreate your old photo. You can use adjustment layer for your image. First of all , go to adjustment icon and click on that . So many options will be appeared . Some of them are :
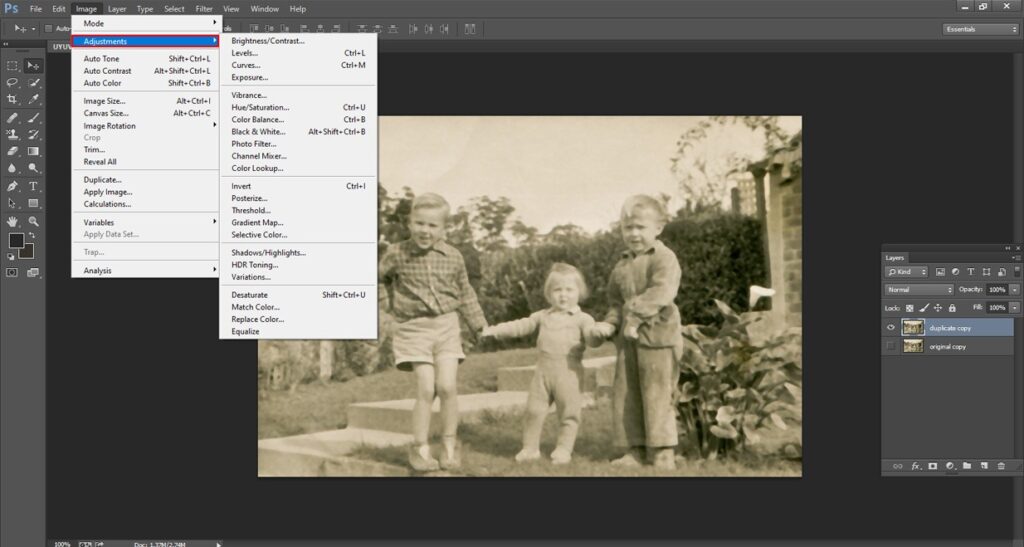
Brightness : Adjust the brightness mode as per your requirement.

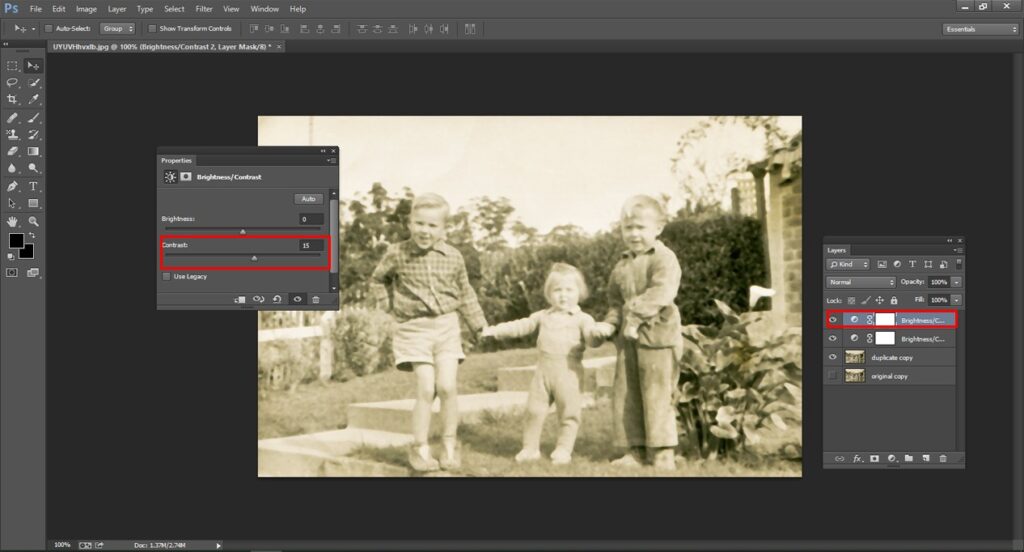
Contrast :Sometimes old photos gets too much bright or faded . You can balance this type of issue using contrast mode.
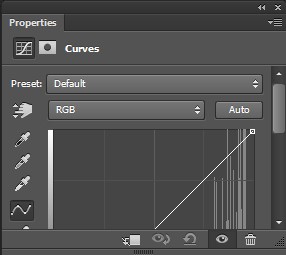
Curve adjustment layer : Now hit on the curve adjustment layer , you can adjust the color beautifully for your photos. There will be three icons and that is called eye dropper icon . The white one contains white balance , the dark one contains dark mode . Inside RGB channel , there will be three individual color named as red (cyan), green(magenta), blue (yellow) . You can adjust all the three colors individually and get the best results for your old photos. Use three eye dropper icon for adjustments and hit the OK button .Use the curve line up and down to see the effect on your photo .
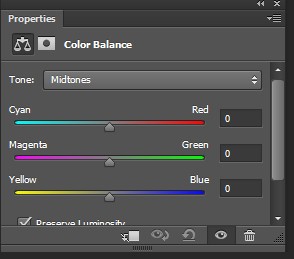
Color balance : Three color will be there . Cyan , magenta and yellow. You need to apply those colors for shadows, mid-tone and highlights. Apply those color and create a perfect color that match with your old photo background and subject perfectly.
Selective color layer : Hit on the selective color icon . A window will be appeared . Adjust the color accurately.
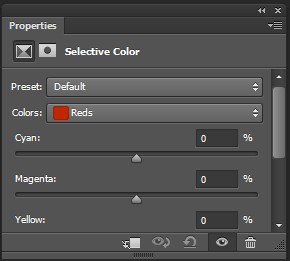
Opacity : to get the perfect look on your photo , adjust the opacity from adjustment layer and get the the best result.
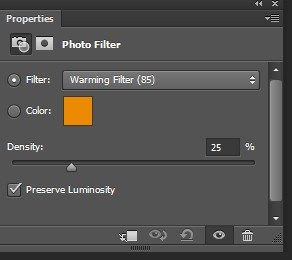
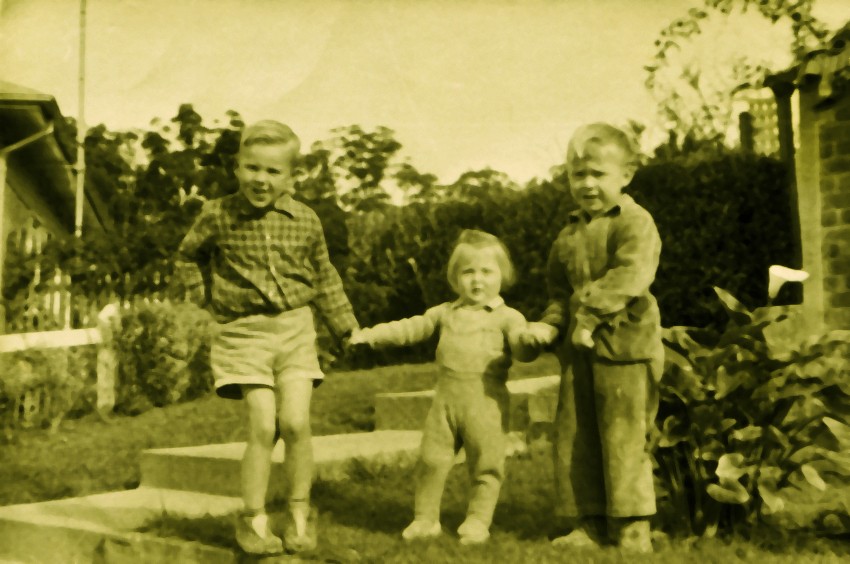
Photo Filter : You can choose the filter and get a fresh look for your old photo. Tick on the photo luminosity to avoid the darkness on your photo. When everything is okay , you can create a group for all the layers and make them into one . See the final photo . You will see a beautiful picture.
How to blend scars and spots of your old photo:In photo-shop , there are so many techniques through which you can remove any kind of scars from an image . Some techniques are : Spot healing brush , clone stamp tool , burn and dodge tool , patch tool etc . Some of them are described below:
Spot Healing Brush Tool :
Step 1 : select Layer < Choose New < Select Layer via Copy. Press double on the new layer and give a name . From the menu bar , select the spot healing brush tool . There are three different types of healing tools are available. And they are : content aware, create texture, and proximity match. Content aware works beautifully with watery image or any kind of complex image that contains reflections in its image body. Proximity match option works flawlessly if the image contains lots of color in its body.
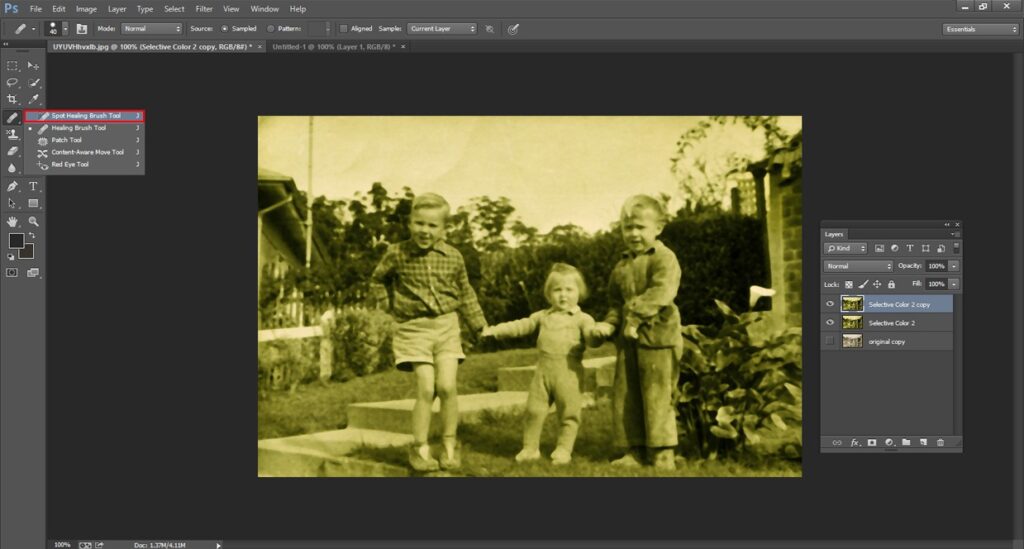
Step 2 : Click on the option that is named as “ Sample all the layers” . As it works with only selected layer.
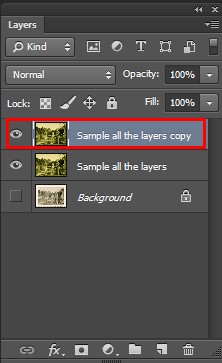
Step 3 : Change the brush size. Start with content aware option . Choose the spots which you do not want to see in your picture. Start brushing around the object or spots to erase it . If content aware option is not available in the option box , then you can choose proximity match option also . It will also produce great outcome .

Step 4 : It is great to select lasso tool to make an outline around the object that you want to remove . It helps to hold the object precisely and after using lasso tool , apply spot healing brush tool over the unwanted object and it will be removed smoothly and also it will leave a natural looks in a photo. If you are working on removing acne or spots then you can directly brush over the spots and it will be removed perfectly. Save your work as .PSD format. Your photo is ready .

Patch Tool : If you want to remove something that looks very disturbing in your old photo then you can use patch tool for removing something (object or any other thing ) . To do this , Choose the patch tool < Choose the section you want to fix < Select your sample area or portion < Balance your selection by pressing on alt ,shift , drag . An outline will be appeared around the thing which you want to detach from your photo. When it is selected , move the object . Your object will be removed . This is how you can remove any kind of distracting object from your photo . Save your work in your desired format .
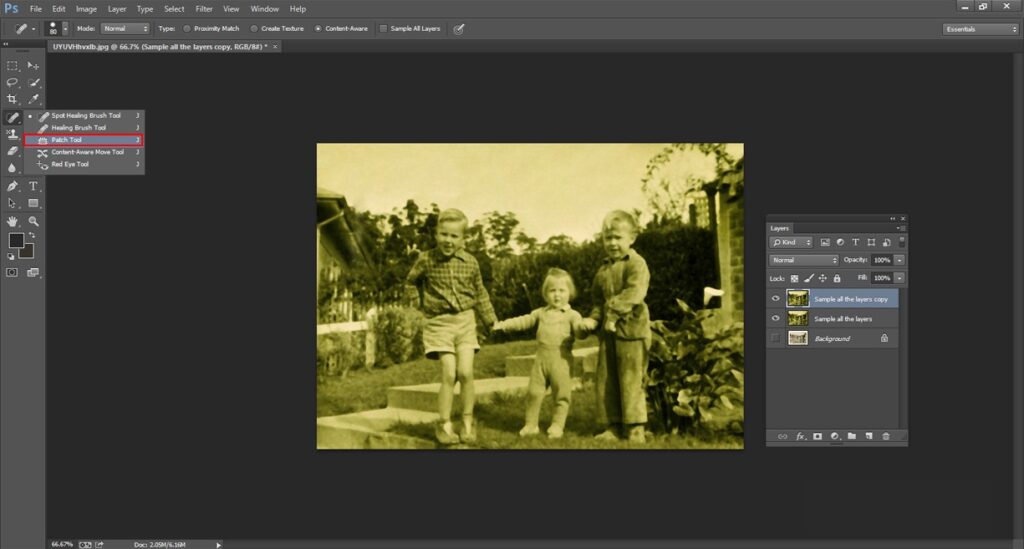
Photo-shop is like a blessing for all of us. It has every problems solution. It has so many techniques and options to repair or fix any type of photo. Without photo-shop , it is really not possible to restore old photo .