For any photo , modifying the skin is the most sensitive and delicate types of work . You need to balance every little things when you are modifying skin texture . If you apply any effects little bit high or low , then the entire image will get ruined . So you have to be very careful about all the details . If you modify the too much then the whole photo will look artificial . You have to apply all the effect in a proper way so that it produces a perfect skin . In photo-shop, Spot healing brush is very popular for smoothing the image . You can enhance the skin quality without affecting the other parts such as : (eyes, hair , nose , lips etc. )
How to smooth and soften skin with photo-shop:
Step 1 : Create a copy of the desired image : Open photo-shop . Load your desired photo.
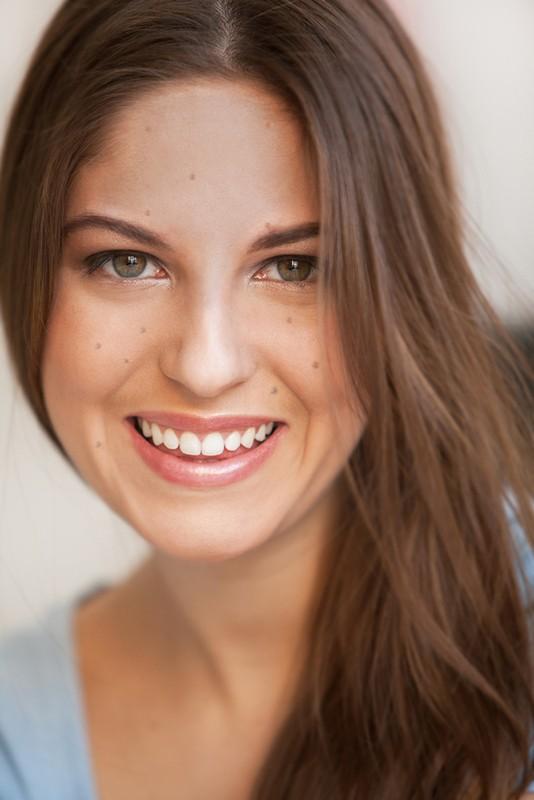
Create a copy of the original image . We are duplicating this image so that we can use this image later if any emergency occurred . Click and hold on the ALT (windows) or Option (Mac) to create a copy of the background layer , press on the backdrop layer and pull it down in the New layer symbol . You will find the new layer symbol at the beneath of the layers panel. Set the duplicate layer name as “Spot healing ” and hit on the OK button.
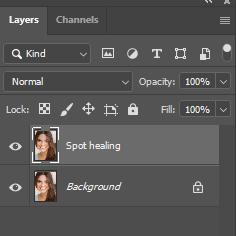
A layer appears upwards of the background layer. Now you can apply all the settings in this duplicate layer .
Step 2 : Pick out the spot healing brush : Go to the options bar < Select spot healing brush from there.
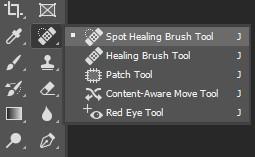
Step 3 : Place the type mode as “Content – aware ”: Check the type mode, whether it is set as “content-aware” or not . If the type mode is not set as content-aware , then set the type mode as “Content-aware”.
Step 4 : Erase all imperfections or flaws from the picture: If you find any type of skin imperfections in the image , then press on that part to erase all the problems. Photo-shop immediately rectifies that flaws . It converts that unwanted areas with perfect skin . To generate finest result , you have to increase your brush size than the flaws . Use right square parenthesis key to increase the brush size and use left square bracket to decrease the brush size.
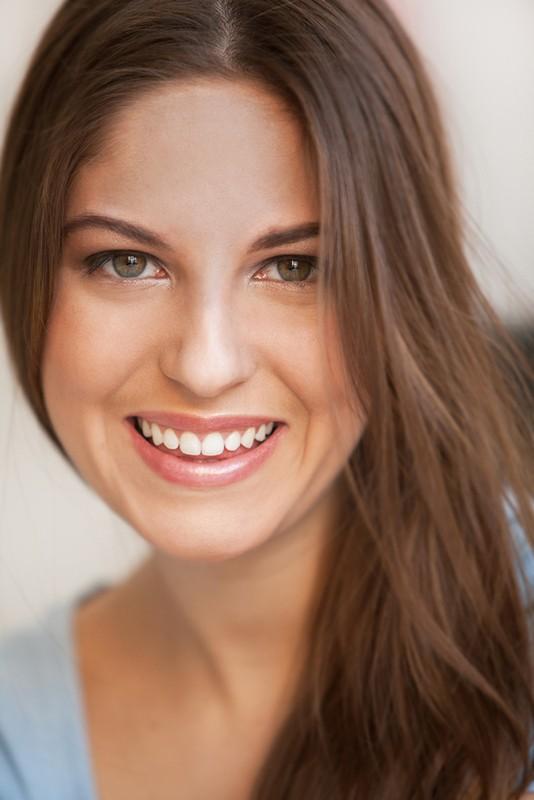
How to use undo option if needed : Use CTRL+Z(windows) Or COMMAND + Z (mac) to undo the process and alter the brush size and then erase all the disturbing portions.
Erase the imperfections not the natural marks : Our main goal is to make the skin very soft and smooth . You can enhance the skin texture , can erase the pimple from skin , can erase the wrinkles also . It would not be great if you erase birth mark or mole . This type of permanent marks or spots reveals who they are . If anyone have permanent marks on their face then nevererase permanent mark from their face.
Finish the primary skin clear out process : Keep an eye on the photo and check out if there is still any flawsin the image or not . Remove every imperfections from the image . Using spot healing brush tool , you can easily remove all the flaws from the image within a very short time.
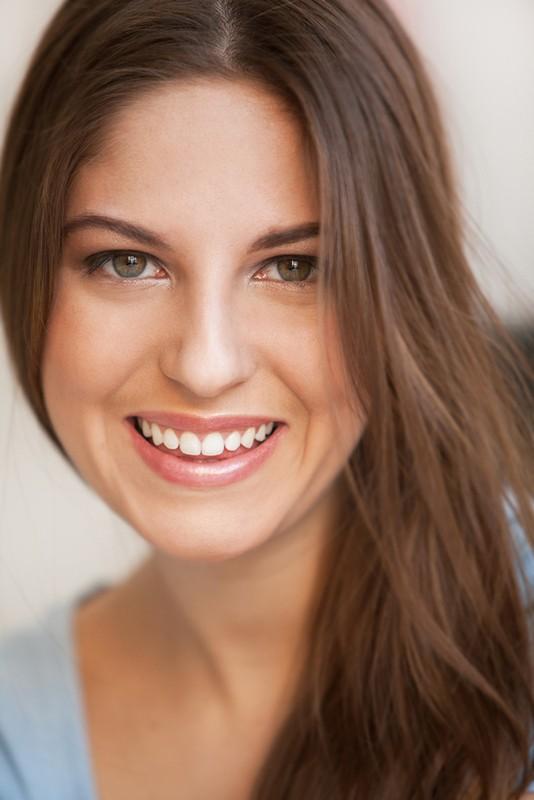
Step 5 : Now duplicate the spot healing layer : When all the flaws are removed from the photo , then it is high time to smooth and soften the skin. Always try to create individual layer . It helps you to get the satisfactory results .
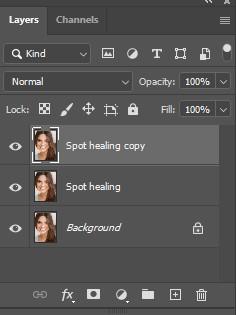
So create another copy of spot healing layer . Click and hold on the ALT key (Windows) or OPTION Key (For mac) and select the spot healing layer and try to pull it down on the new layer symbol. A window will be appeared for the duplicate layer . Give the layer name as “Smooth Skin”. Hit on the OK button. Original image named as background layer. You can find the smooth skin layer upward of the spot healing layer .
Step 6 : Now select the high pass filter and use it : Go to filter < select “Others” < Select “High pass”. By doing so, you can smooth the skin .
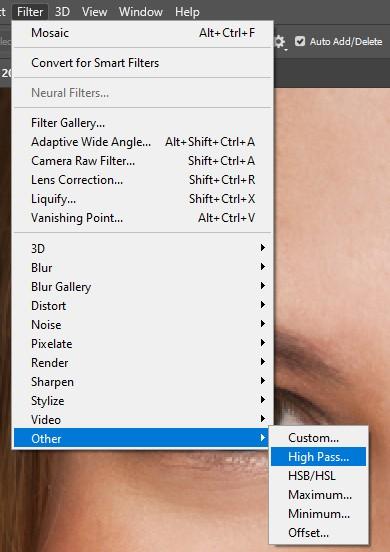
Why should you choose high pass filter to smooth the skin : High pass filter is quite similar to sharpening filter . There are many procedures which are similar like image sharpening filter . High pass filter helps to determine the edges. It finds the edges in the image and helps to focus on them. Using high pass filter , you can create high contrast portrait also . Here we are using high pass filter to smooth the skin gorgeously without highlighting the edges.
Set the Radius value carefully : High-pass filter determines the edges and spotlight them. There will be a high pass filter value box. Set all the values precisely. Modify the radius value .
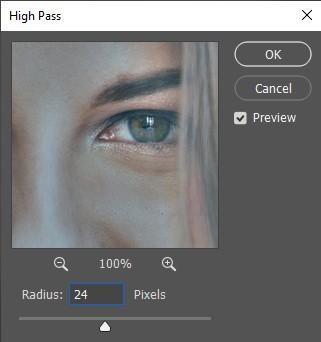
Radius mode manages the density of the edges. It is great to set the radius value high to get a perfect effect on the image. Set the radius in a way so that you can divide the value by 3 . It is very important. For higher resolution of image , set the radius value 24 px and for lower resolution of image , set the radius value between 12 to 18 . Tick on the preview option and press OK. High pass filter covers the whole image with light-toned gray .
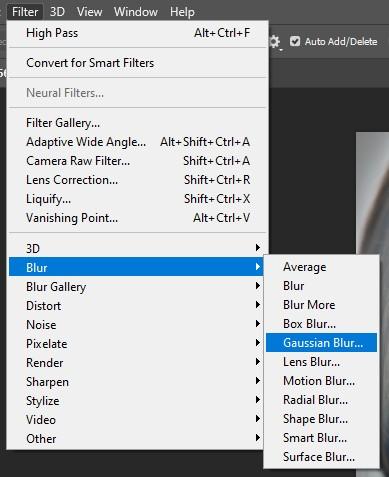
Step 7 : Now use the Gaussian blur filer : Applying Gaussian blur filter , you can produce perfect skin tone . Go to filter < pick out blur < Pick out Gaussian blur. Gaussian blur value box will be appeared . Place the radius value of the Gaussian blur filter one third of the high pass filter radius value. For example , if you set the high pass filter radius value 12 px , then set the Gaussian blur filter radius value 4 PX . After setting the Gaussian blur filter , high-pass effect looks more smooth and more accurate.
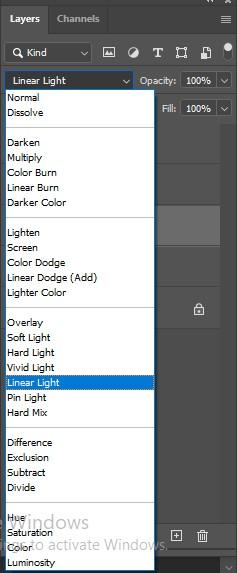
Step 8 : Set the layer blend mode as “Linear light ”: Go to the layers panel < select the “Smooth skin” layer < alter the blend mode as “Linear Light ”. It generates high contrast effect , extreme sharpened effect. No need to get tensed. You can correct all the issues.
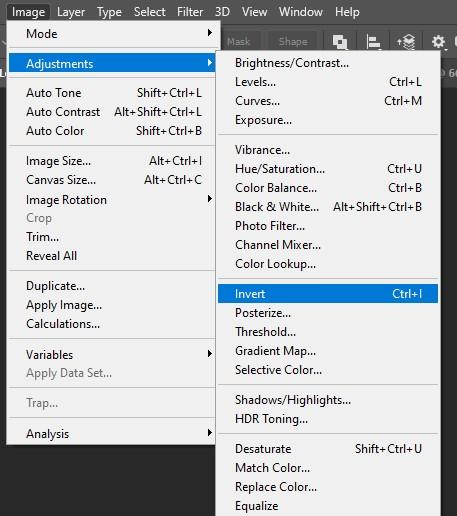
Step 9: Use the Invert option : Go to the image < pick out “Adjustments” < select “Invert”. The entire image looks very hazy and unclear . To decrease this effect Press on the layer style symbol or press fx. Select “Bending option” from the category.
Step 10 : Manage the Blend If mode : You will find the “ blend if ” option in the layer style value box. You will find two groups there . One is “This layer” and the other one is “Underlying layer ”. Use the first layer which is labeled as “This layer” . With the help of this slider , you can create smooth effect on your image. These sliders manages the how “ smooth skin layer” mixes with the picture. To blend the dark portion of the layer , use Left slider . To blend the bright portion of the layer , use right slider.
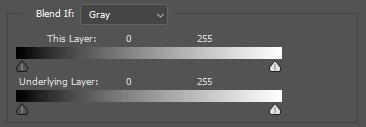
Decrease the left slider :Look at those slider. The slider is divided into two parts . Press and hold on the ALT(windows) or option(mac) key to divide the slider into two equal parts. Use half of the sliders to get the finest result . Pull the slider into left side if you want to decrease the brightening effect . Click and hold on the ALT (for windows ) or options(mac) Key and press on the slider and pull out the slider into left side . When you pull the slider into left side then the lighter parts are vanishing.
Decrease the right slider : Press and hold on the ALT(windows) or option(mac) key to divide the slider into two equal parts. Use half of the sliders to get finest result . Pull the slider into right side to if you want to decrease the dark effect . Click and hold on the ALT (for windows ) or option (mac) Key and press on the slider and pull out the slider into right side . When you pull the slider into right side then the darkest parts will be vanishing.
Step 11 : Include a layer mask : If you want to control the smoothing impact on the skin , include a layer mask. Click and hold on the ALT key (windows) or Option key (mac) and select the add layer mask symbol . You can view a Black layer mask thumbnail which arrives on the Smooth skin layer . This conceals the smoothing impact. But you can paint again if you want.
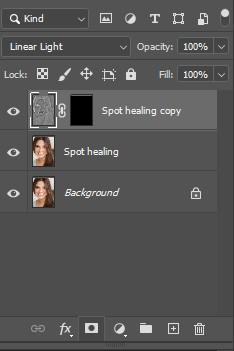
Step 12 : Choose the brush tool : From the toolbar , choose brush tool. Photo-shop selects the forefront color as the brush color. So Place the forefront color as white. You can see the forefront and background color in the color swatches . Top color is set for forefront color and bottom color is set for background color.
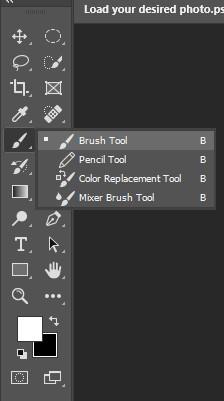
Step 13 : Paint on the top of the skin : Mode should be set as “Normal” , opacity 100% and flow mode 100 %.

To show the smoothing effect , start painting throughout the skin. Adjust the brush by using left and right parenthesis key . Using left bracket key , you can decrease the brush size and using right parenthesis you can increase the brush size . To smooth the brush , click and hold on the SHIFT key and click on the left key and use shift key + right parenthesis key for solid brush effect.
If youmistakenly paint on some invalid area then click on the X key and exchange the forefront and background color . By doing so , you will be able to adjust the brush color as black . Start painting where you have done some mistakes . Then click on X key and place the brush color as white and smooth the skin thoroughly .
Layer mask thumbnail :If you want to see what you have actually done with your image then click and hold on the ALT (windows) Or Options (MAC) key + select the layers mask thumbnail. It will display your whole work to the layer mask. There are some white portions as well as some black portions in the image. White parts are those where smoothing effects are used. If you forget to apply the smoothing effect on some portions, then you can fixes those parts only by viewing the layer mask. You can immediately paint on the mask if it is needed. Return back to your image by clicking on the ALT Or Option KEY and Click on the layer mask thumbnail also.
Decrease layer opacity :when you are smoothing the skin , sometimes the effects goes very extreme. Thus , the entire image looks really weird and super artificial. To avoid such things, Decrease the opacity of the Smooth skin layer . After this , the image will be perfect .
This is how you can smooth and soften an image with the help of photo-shop.
White wash lemon detergent