Sometimes , the whole picture may look awful only because of yellowy teeth . Yellow teeth snatches the whole beauty of a picture even though the whole picture looks gorgeous . This type of picture can not be used for any purpose . But no need to worry , we have photo-shop. With the help of photo-shop , you can make the teeth more brighter and even more whiter . And your image will draw everyone’s attention . One thing you need to understand before whitening the teeth and that is, you need to create the natural color on the teeth . The teeth must not look artificial . Sometimes , it is seen that people whitens the teeth too much and snatches the natural looks . No one likes this type image . Focus on that and start your work carefully . In this article , I will describe how to whiten teeth in photo-shop ..
How to whiten teeth in photo-shop:
First of all , observe your photo . Go to photo-shop . Open your desired photo . Use the zoom tool and focus on the teeth .
Step 1 : Go and choose the lasso tool : Go to the tool bar < Choose the lasso tool .
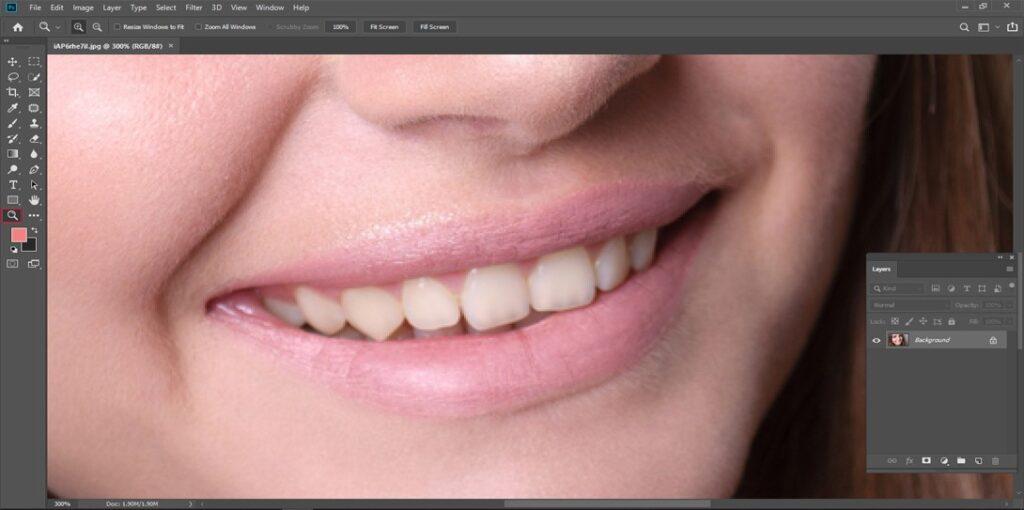
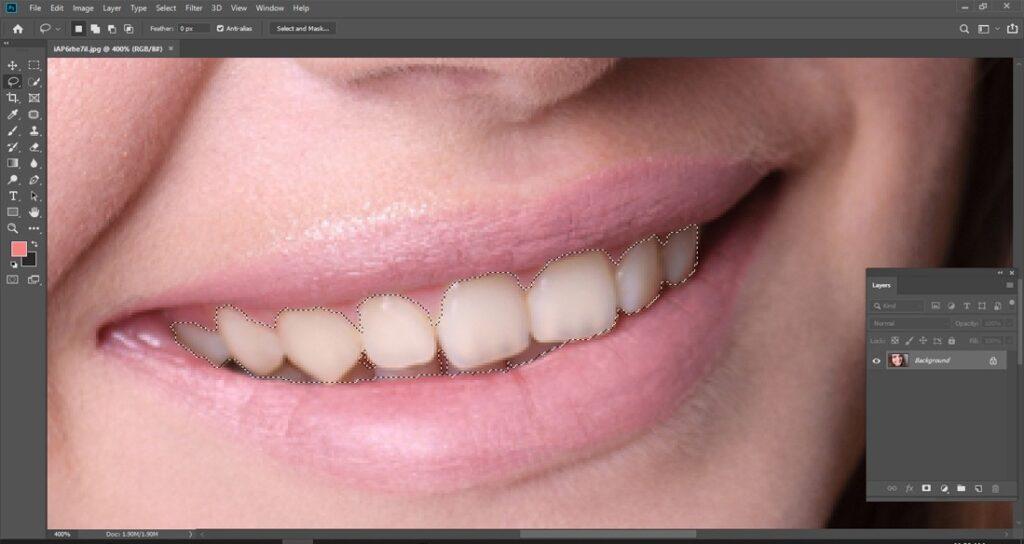
Step 2 : Make a selection throughout the teeth: If the photo contains more than one people then it is important to create whitening effect on everyone’s teeth . But it would be a great idea if you work with one person’s teeth at a time. If you do so , you can get the finest results. If you whiten everyone’s teeth at the same time then the final result may not be satisfactory. Create a selection throughout the teeth . You do not have to create perfect selection but make sure you have covered the maximum portions of the teeth .
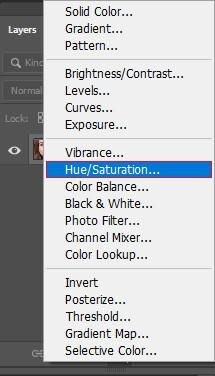
Step 3 : Use Hue / saturation mode : Go to the layers panel < go to downwards < press on the new fill symbol or adjustment layer symbol < Pick out the hue/saturation mode . You will be able to see that the hue/ saturation adjustment layer arrives upward of the backdrop layer .
Step 4 : Modify the Edit mode and set it as yellow: Go to the properties menu . You will get all the settings of hue / saturation adjustment layer. Edit mode is set as “master ” by default . As the edit mode is set as master, the hue / saturation option effects the entire picture equivalently. To remove the yellow effect from the teeth , you need to work with yellow option . Modify the edit option and set it as “Yellow ”.
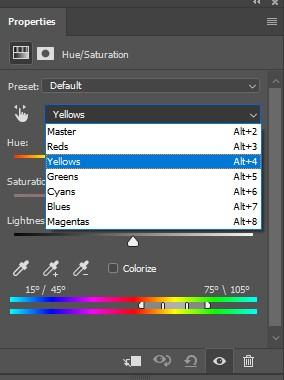
Step 5 : Decrease the saturation of the yellow mode: You can control the saturation mode using the slider . Decrease the saturation value . We are decreasing the saturation value because we want to erase the yellow effect from teeth . Use the slider and pull this slider into left side . But do not decrease the whole saturation value . If you do so , then the teeth will look artificial and extremely white . Notice your image and use the slider in a way so that your image look perfectly fine and teeth looks whiter and natural .
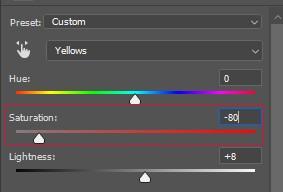
Step 6 : Observe the difference : To check the whole work, you can compare them . Go to the hue / saturation adjustment layer < select the visibility symbol < turn it off and view the original image and turn it on and see the changes that you have made.
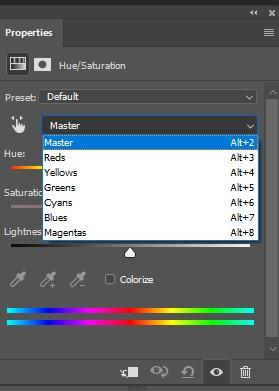
Step 7 : Alter the edit option and set it as master : After completing the whitening part , it is time to put some brightness effect on the teeth . Go to the properties menu < go to edit < set the edit mode as master .
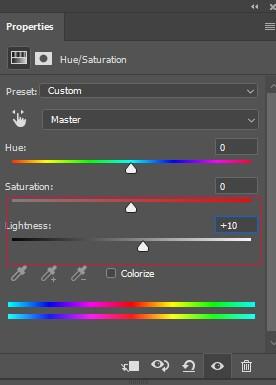
Step 8 : Increase the lightness mode to give brightness effect on the teeth: Press on the lightness slider and increase the value of it . Pull out the slider into right side to increase the value. Notice your image and adjust the slider in a way so that it produces a perfect brightness effect on the teeth .
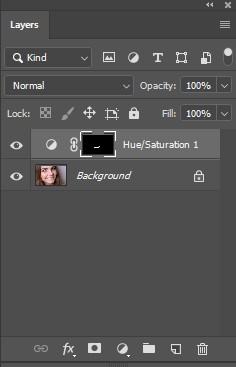
Step 9 : Now pick out the Brush Tool : A great characteristic in Adjustment layer is that they contain already fixed built-in layer mask . Go to the layers menu . There is a layer mask thumbnail for the hue / saturation layer . But it is completely covered with black . But there is some white portion inside the black but the portion is very very small. Black is meant for the Part which is not being changed by the adjustment layer. White part is the part which will be changed.
When you are working with the whitening part and brightening part , sometimes the other parts get affected around the teeth . It creates bad effect . You need to clear all those disturbing things . One way to clear all the disturbing portions throughout the teeth and that is painting. Paint over the layer mask . You will be needed brush to paint. From the option bar , choose the brush tool.

Step 10: Place the forefront color into black : If you want to erase the awful and disturbing parts around the teeth then start painting over that disturbing part . And photo-shop selects the forefront color as the brush color . That is why , you need to place the forefront color as black . You can see the forefront and background color in the color swatches . Top color is set for forefront color and bottom color is set for background color . But , click the D key from your keyboard . It changes the both forefront color and background color as default . First set it like default and then exchange the color . Click on the X key from your keyboard and place the forefront color as black .

Step 11: Start painting throughout the teeth to clear the unwanted part : Paint throughout the areas where you find some unwanted things . Adjust the brush by using left and right parenthesis key . Using left bracket key , you can decrease the brush size and using right parenthesis you can increase the brush size . If you want to smooth the brush , click and hold on the SHIFT key and also click on the left or right parenthesis key .

Important things needs to remember : If any error occurs or if you mistakenly painted on top of the teeth not the surrounding area then click on the X key and exchange the forefront and background color . By doing so , you will be able to adjust the brush color as white . Start painting where you have done some mistakes and retrieve the whitening part again . Then click on X key to place the color as black .
Step 12 : Balance the brightness of some certain teeth : Despite everything being fine , sometimes you will find little error in the teeth . Some of the teeth may look extremely brighter or extremely dull and pale . You need to make a balance between all the teeth otherwise the whole teeth looks will get ruined . Decrease the hue / saturation adjustment layer for that particular teeth if you want to amend all the problems . Start painting and cover up the errors . And decrease the brush opacity value as well . Set the brush color as black . Color over those teeth which looks artificial . Get back the original effect . When everything is okay , then go to the menu bar and set the opacity value again as 100 %.
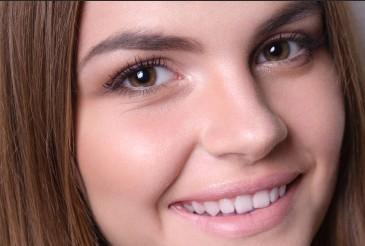
What if the image contains many people and you want to apply whitening technique for everyone’s teeth :
If the image contains many people and you want to apply whitening technique for everyone’s teeth, then you have to create hue / saturation layer separately for each person and follow the whole procedure . Follow the same procedure for whitening.
Go and choose the lasso tool : Follow the same procedure as before < Make a selection throughout the teeth < Use Hue / saturation mode < Modify the Edit mode and set it as yellow < Decrease the saturation of the yellow mode < Alter the edit option and set it as master < Increase the lightness mode to give brightness effect on the teeth< Now pick out the Brush Tool and clear all the disturbing things throughout the teeth < Compare it with original picture and observe the results . This is how you can whiten everyone’s teeth in an image .