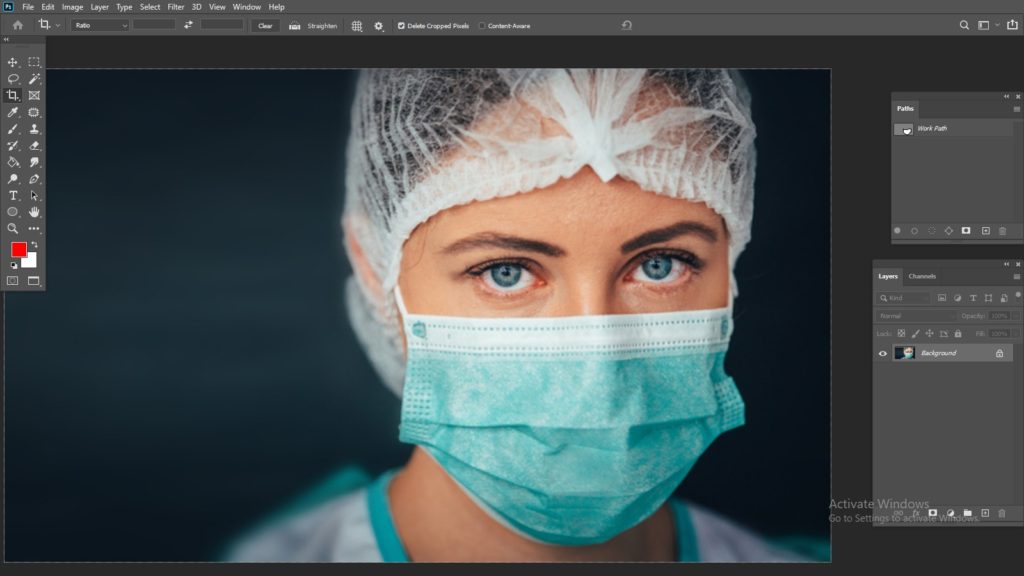
After the Covid-19 attack, we are becoming adjusted to the new normal life. Putting on a face mask is an obligatory part of our daily life. We cannot think of a single day without a face mask and hand sanitizer. As a result, these effects have turned into Photography also. Wearing a face mask is absolutely normal nowadays for the designer. Let’s talk about pandemic product photography: How to put a face mask in Photoshop?
It is absolutely normal that you need to wear a face mask on your model to protect him from this heinous pandemic. Other than that, he also needs some protective gear to be safe from this pandemic attack. The photographer who is responsible for portraying this scenario should wear this face mask as well as the Model. At the initial stage, it might seem boring to you but there is no other way of doing that.
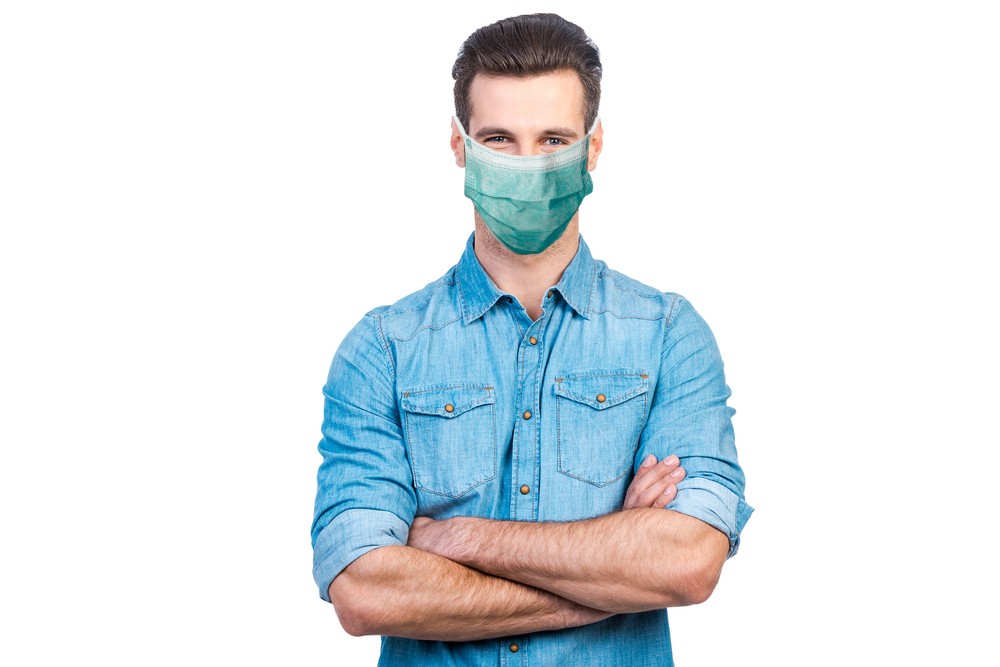
Tutorial on: How to put a face mask in Photoshop?
Stay with us and enjoy this step by step tutorial for adding a face mask to a model. Hopefully, it will be helpful for you.
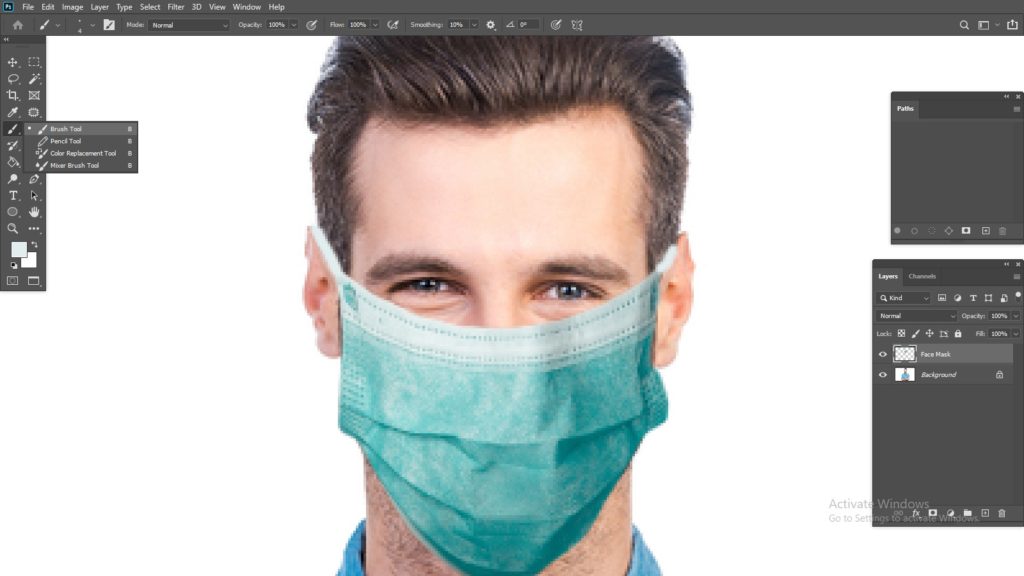
Select an image of a face mask
Firstly, you have to choose a face mask and the image quality of this mask should be up to the mark. It must contain an amazing image quality with proper brightness and hue. Another important thing that is necessary here that, the image must match up with the model here. Otherwise, all the attempts will have ended in the smoke. If it is not possible to shoot the face mask, then you can have it online for free. Sometimes it might need mannequin service for cropping the face mask but if you have it with proper color and shape then directly use it on to the picture.
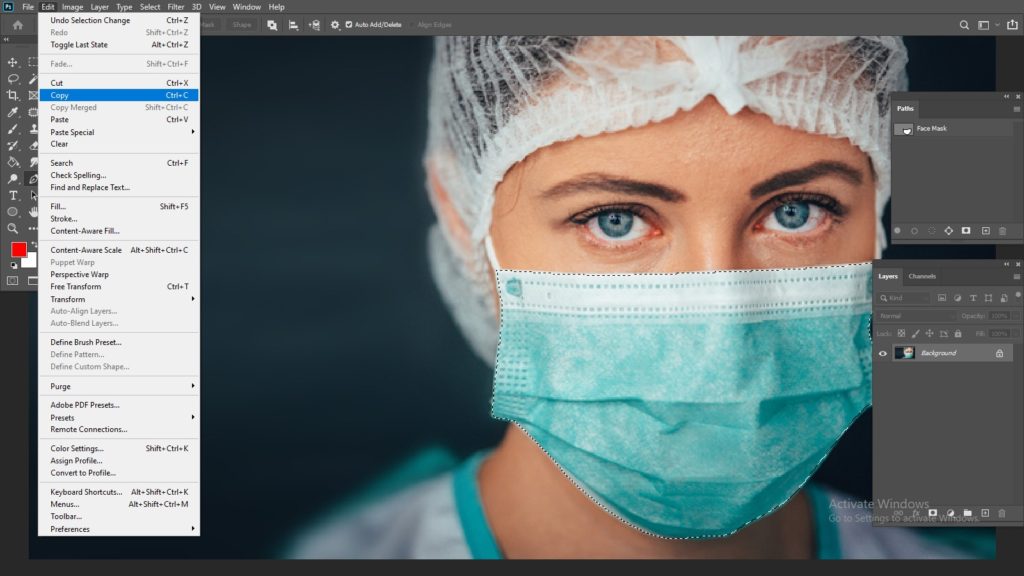
Cut the face mask from the photo
Now your task is to cut the face mask and then replace it with another picture and it is the challenging part here.
In that case, you have to use some tools to do that perfectly. We do use the Photo pen tool in this perspective and sometimes the magic wand tool could be effective too. While using the Photoshop pen tool, be sure that it is set to the path. The path operation should be set up to exclude overlapping shapes.
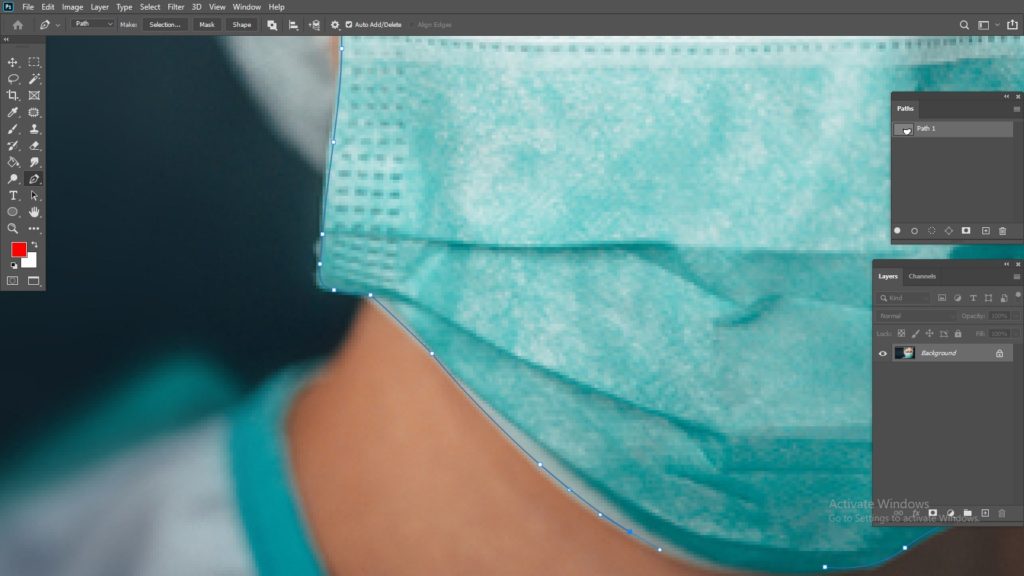
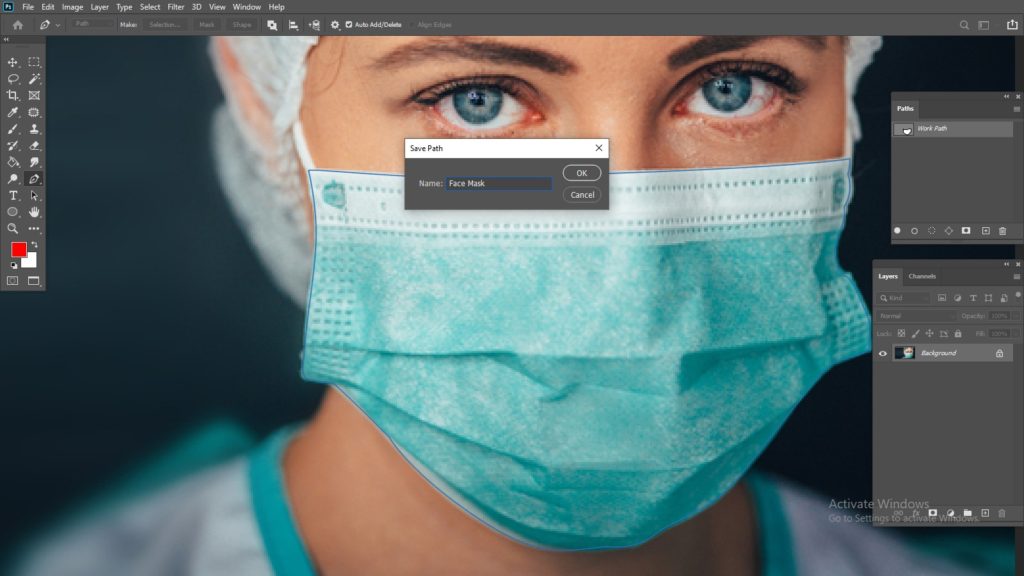
Now you can start the clipping task around the mask and do it with the pen tool, you can use the magic wand tool also but the pen tool is more perfect than others. Do not cut more than 1 px around the image then there is the chance of destroying the shape. Cover the shape of the mask and complete the clipping task.
Eliminate the mask background
In this portion, your task is to eliminate the mask from the background just select it and remove the background you can also cut the mask to the new background. In this case, we are suggesting you use a transparent background so that it might easily fit with another model.
Now paste the Mask on the Model’s face and do the retouching service
This is one of the most challenging tasks here. You must have to put on the mask accurately. Otherwise, all the attempts will have ended in the smoke.
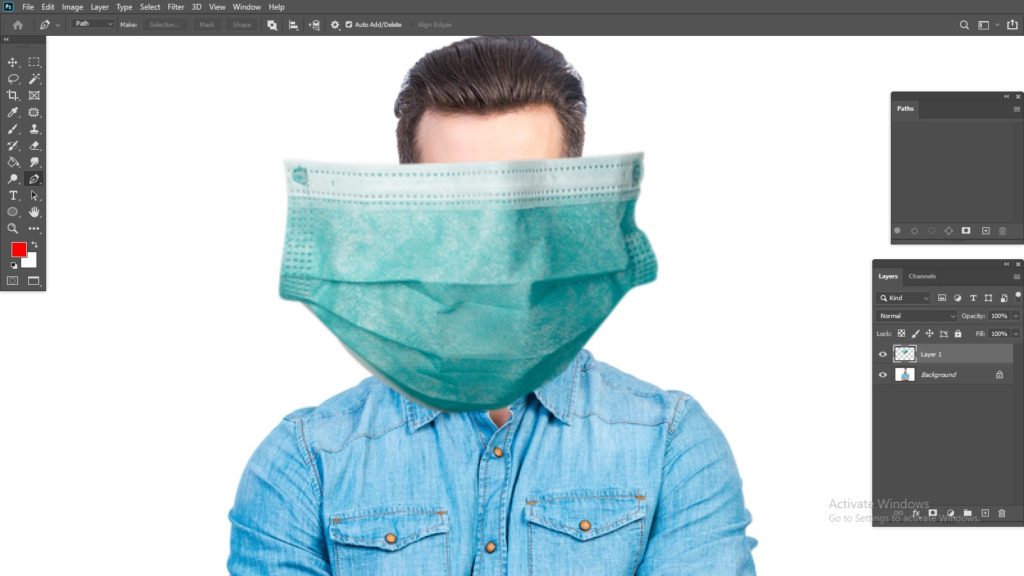
Firstly, place the mask on the face of the model. The shape of the mask should be appropriate to the face of the model otherwise; it needs to be resized. Now you need retouching service the face color should be adjusted to the mask and put it in the way so that it might look natural. Now, the mask rope should be adjusted to the ear and you need to place it behind the air. For balancing the color, you can choose:
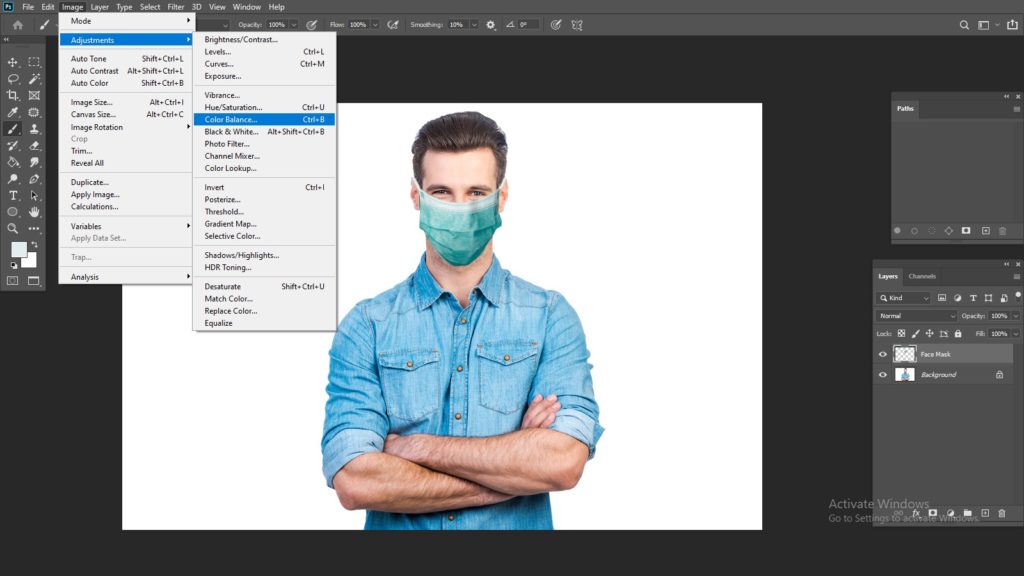
Image> Adjustment>Color Balance.
There are three basic colors: red, green, and blue. Fix all of them up and finalize the color balancing task.
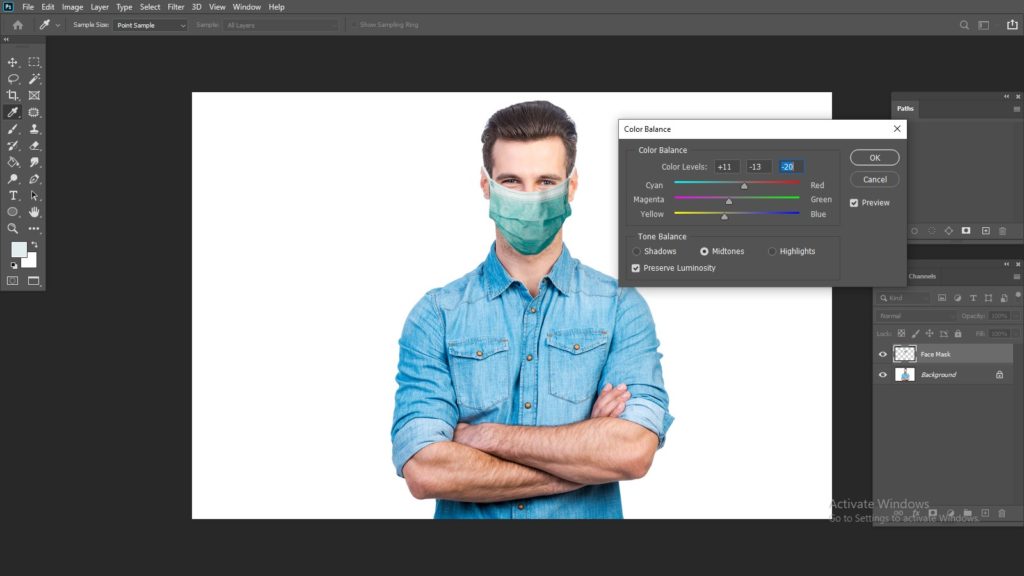
Sometimes you need to create shadows and darken the face to adjust the brightness of the image. You can set up the face brightness by burn and dodge tool in Photoshop. They are helpful. Sometimes you need to darken some areas whereas we might need to enlighten the color on the other side. Now balance the color for the entire image and try to find out is there any imbalance of color or not? If you didn’t find that then your editing is done.
Final few words
This is a new term that needs to be implemented in the photo editing industry. Thanks a lot for being with us. Have a great day!


