Now a days , people wants to do so many things with their photo. And photo-shop is like a blessings for all of us . Photo-shop has plenty of features. And we can apply those features on our desired photo to make it more beautiful and alluring in-front of potential viewer’s. Among these features , refine edge tool is really very useful in order to make any selection. This is much more perfect when we use it on furry things . If you want perfect selection of any portions in your picture , then you need to use refine edge tool for better outcomes.
Photo-shop contains so many selection tools and they are : lass tool , quick selection tool , object selection tool , pen tool and many more . But from all of these , refine edge tool is really very fast for making any selection and it is very convenient to use .
What is called refine edge tool ?
In photo-shop , many times we need to select any area or any portion from a photo . But it becomes very complex when we need to select any furry things . So In such case , we can use refine edge tool to select hairy or furry things very accurately. You can select any portions by the help of refine edge tool. Besides these , you can include fresh original background so that your picture looks much more alluring. When you are dealing with sensitive and complicated areas , then you need to use refine edge tool as it gives best output . Other tools are also helpful but those takes much time to accomplish their work . But refine edge tool is very fast serving tool .
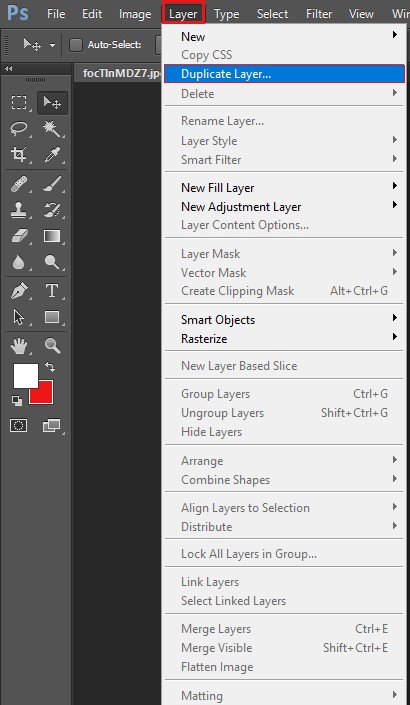
Step 1: Open photo-shop. Load your desired pictures . Create a duplicate layer . Click on the image and Press on the right side of the mouse and select duplicate layer. It is always good to create a duplicate layer so that no harm can occur in your actual picture.
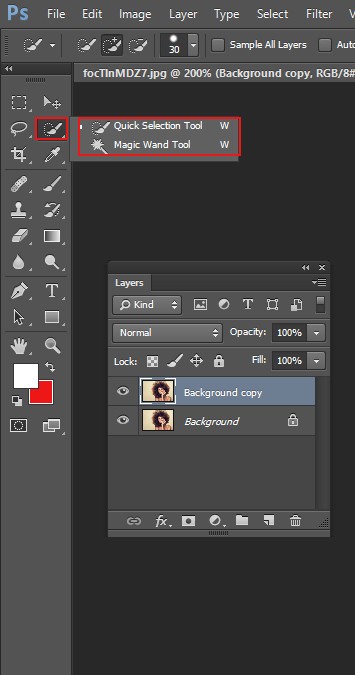
Step 2: Form a selection : On the left side , a selection tool icon will be there . So , go to the selection tool . Choose any one of them such : magic wand tool, quick selection tool, object selection tool . Before applying refine edge tool , you need to select any one of these.
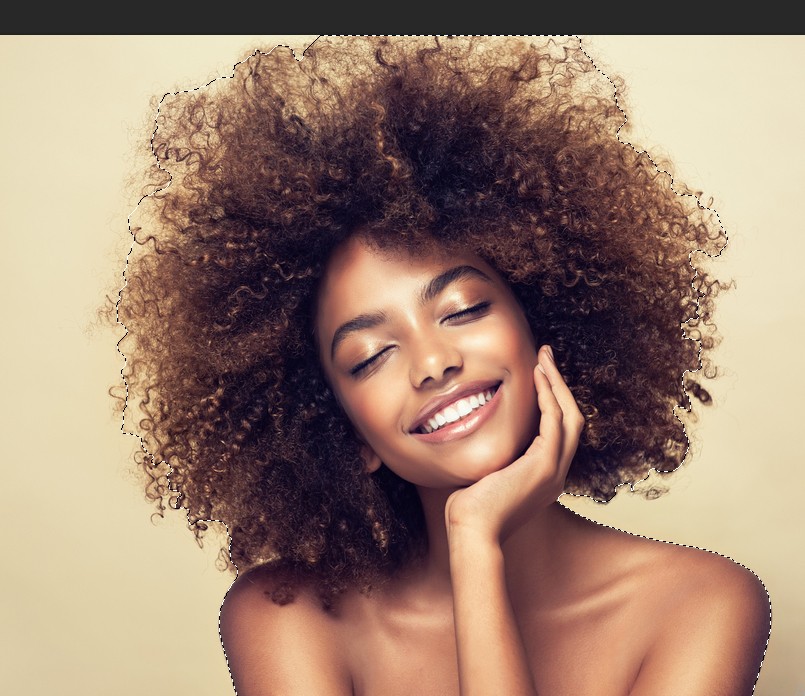
Step 3: Lets start with quick selection tool . You can use magic wand tool or object selection tool here . There is no mandatory rules for choosing tool . Start using this tool on your desired image . Run the tool on the spot or area that you want to select. An outline will be appeared on that area. Select the area as much as possible . Ensure that you do not leave any significant part of that area.
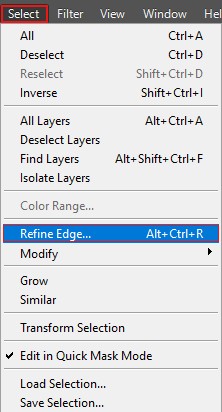
Step 4: After doing this things , you will not be able to discover that refine edge tool easily. So what you need to do ? Go to the option which is named as “ Select ” < choose the option “Select and mask ”.After hitting on that button , refine edge value box will be arrived.

Step 5: Pick out view mode : At the top, there will be available an option named as “View mode”. Hit on that option . Select a color that matches with your photo texture. Apply various colors and see what is perfect for you. Always try to experiment more than one view mode . It will help you to understand what is best for your picture.
Step 6: Re-arrange the measurements:There are so many options are available . You need to set each option’s value properly so that you can receive the best results. If you have any uneven edges on your image , then just go to the edge detection option and adjust the option by using sliders . You can increase or decrease the sliders as per your requirements. There are many other options and they are : radius , smooths, feathers , contrasts , shift edges . Balance the pointers for all of the options. Radius options helps to create more lively pictures. Smooth option’s allows create a flawless and polished edges. The option which is named as “feather” , it allows to merge the selection perfectly. Contrast allows to include extra sharpness in your image. But make sure that you use this option a little bit. If you use this option too much , then you will get a bad effect on your picture .
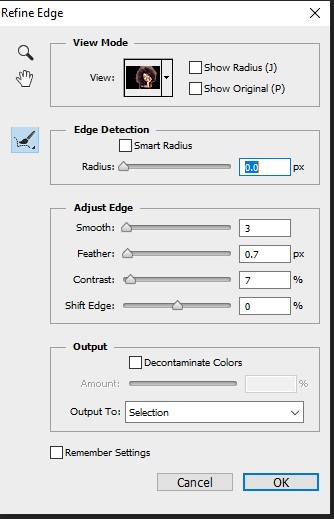
Step 7: Now you can Choose the refine edge brush tool . Apply the brushes on the portions which you want to refine. You can choose any size of brush . You need to check that the Decontaminate colors option if it is enable or not . If it is not, you just click on that option and enable it . It helps to lessen the color elements.

Step 8: Output: Go to the option named as output. There will be a drop-down down button . Click on that drop-down button . Choose any one of these . But it will better if you choose the option named as ‘New layer with mask ’. Hit on the OK button .
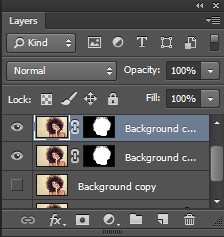
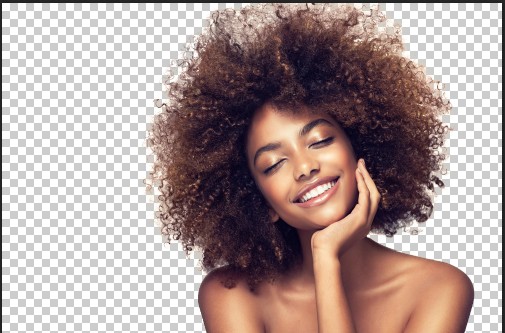
Step 9: See the final result and match it with your original photo.
Extra Modification:
Tune Up: If you find out that some hairy things or furry things look artificial on your photo then you need to do some extra modification. If you want to make hairy portions like undamaged or If you want to tune up your images more , then change the forefront into black color . Choose the brush and apply it over the areas where you find some faults.
What if someone wants to apply bold and rigid color for their background: Go to the option select < Choose New fill layer < Choose solid color. Also you can hit on the option Fill and Adjustment layer < Press OK < choose your desired color from color picker . It is done . Solid color will be appeared on your background.
Last but no least , refine edge tool is really very effective for hairy , furry things selection. It is a time saving tool . Also you can get varieties of background. So try and attempt with different pictures using refine edge tool and see how efficiently it works. Use the zoom option so that you can work very precisely and perfectly.