Photographing and editing ghost mannequins can be a fascinating yet intricate task, blending the realms of photography, fashion, and digital editing. These “ghost mannequins,” also known as invisible mannequins or hollow mannequins, are commonly used in clothing photography to create a seamless and professional look for garments. In this guide, we’ll explore the process of photographing and editing ghost mannequins in detail, covering techniques, equipment, and software used in the industry.
Part 1: Photographing Ghost Mannequins
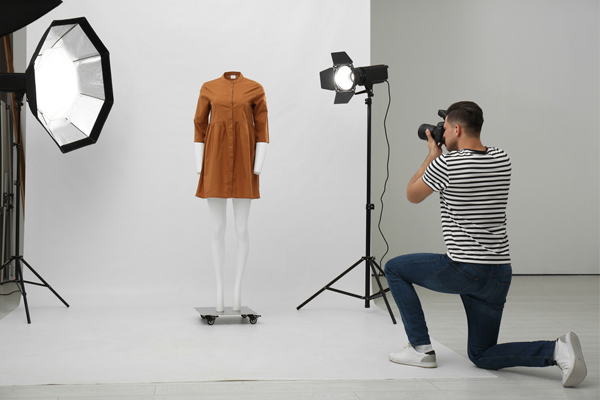
1.1. Setting Up the Studio
Before you start photographing, ensure your studio space is well-prepared. Here’s what you’ll need:
- Mannequin: Choose a high-quality ghost mannequin that fits the size and style of the clothing you’re photographing.
- Backdrop: Use a clean, neutral-colored backdrop to ensure the focus remains on the garment.
- Lighting: Set up soft, diffused lighting to minimize shadows and ensure even illumination.
- Camera and Tripod: Use a DSLR or mirrorless camera with a tripod for stability and consistency in your shots.
- Styling Tools: Use clips, pins, or tape to adjust the garment on the mannequin for the desired fit and shape.

1.2. Positioning and Framing
Position the ghost mannequin in a way that highlights the key features of the garment, such as the neckline, sleeves, and hemline. Ensure the mannequin is centered and straight to maintain symmetry in your shots. Experiment with different angles and perspectives to capture the garment’s details effectively.
1.3. Shooting Process
- Shoot in RAW: Capture images in RAW format to retain maximum detail and flexibility during the editing process.
- Multiple Angles: Take photos from various angles, including front, back, sides, and close-ups of intricate details.
- Focus Stacking: For maximum sharpness, consider using focus stacking techniques, especially for close-up shots.
- Consistency: Maintain consistency in lighting, exposure, and framing across all shots to ensure a cohesive look in your final images.
1.4. Post-Processing Considerations
While the primary focus of ghost mannequin photography is to capture the garment accurately, some post-processing may still be necessary to refine the images:
- Color Correction: Adjust the white balance and color saturation to ensure the garment’s colors appear true to life.
- Contrast and Sharpness: Fine-tune contrast and sharpness to enhance the overall appearance of the garment.
- Retouching: Remove any distractions or imperfections in the background or on the garment itself.
- Cropping and Resizing: Crop images as needed and resize them to fit the desired dimensions for online or print use.
Part 2: Editing Ghost Mannequins
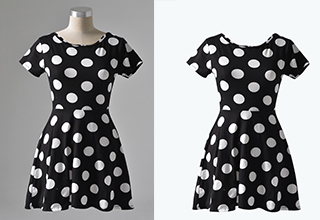
2.1. Removing the Mannequin
The key aspect of ghost mannequin editing is removing the mannequin while retaining the shape and structure of the garment. This process typically involves several steps:
- Image Selection: Choose the best images from your photoshoot for editing, ensuring they capture the garment from all necessary angles.
- Layering Technique: Utilize layering techniques in image editing software such as Adobe Photoshop to combine multiple images seamlessly.
- Masking and Clipping Paths: Use masking tools or clipping paths to carefully isolate the garment from the background and the mannequin.
- Content-Aware Fill: In areas where the mannequin was present, use content-aware fill or cloning tools to fill in the missing areas with surrounding textures.
2.2. Shaping and Styling
Once the mannequin is removed, you may need to adjust the shape and styling of the garment to ensure it looks natural and appealing:
- Reshaping: Use warp or liquify tools to adjust the shape of the garment if it appears distorted after removing the mannequin.
- Smooth Transitions: Blend any visible seams or edges to create a smooth transition between different parts of the garment.
- Styling Touch-Ups: Make any necessary styling touch-ups, such as smoothing wrinkles or adjusting folds, to enhance the overall appearance of the garment.
2.3. Final Touches
- Color and Tone Adjustments: Fine-tune the color and tone of the garment to achieve the desired look.
- Detail Enhancement: Enhance the details of the garment, such as textures and stitching, to make them stand out.
- Quality Check: Conduct a thorough quality check to ensure there are no visible artifacts or inconsistencies in the final images.
- File Export: Save the edited images in the appropriate file format and resolution for their intended use, whether it’s for online product listings or print catalogs.

Conclusion
Photographing and editing ghost mannequins requires careful planning, attention to detail, and proficiency in both photography and image editing techniques. By following the steps outlined in this guide and honing your skills through practice, you can create professional-looking images that showcase garments effectively and attractively. Remember to stay patient and meticulous throughout the process, as the end results will speak volumes about your craftsmanship and expertise in the field.

