In this article , I will describe how easily you can save , load and reuse layer styles in photo-shop . Photo-Shop layer styles are very useful . It is an impressive way to make enthralling photo effect . Also you can make eye-catchy text effect . You do not need to be an expert photo editor to work with photo-shop layer . With some basic knowledge you can use photo-shop layer and can create amazing photo . You can save the modified layer styles and can again use those layer styles for another work . By doing so , you can save your valuable time . Here I will describe how can you create a simple photo frame with the help of layer styles . When creating photo frame will be completed , then you can save it to use it later. And you can use the same photo frame on another photo also immediately .
Remember one thing , creating frame is not the center of attention . Our main objective is to describe how easily you can save , load and re-use your layer styles .
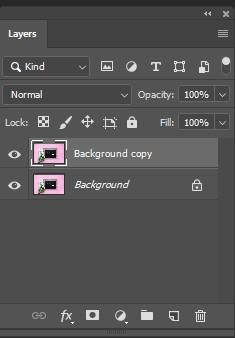
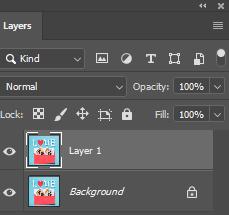
Step 1 : Make a duplicate layer : Before doing anything else , you have to create a duplicate layer . See the layers panel and notice that you already have a layer which is named as “Background” . This “Background” carries the actual picture. It is always a great idea to duplicate your image so that no harm can effect your actual image . And if needed , you can still get the actual image later and can work with your actual image. Layer style symbol will be appeared as gray color because photo-shop does not permits us to use the layer styles for the background layer . The layer style icon will be in a deactivated mode. Make a copy of the background layer and sort out this problem. Go to the top and select the layers option < Select “New” < Select the “Layer via copy” option. Also you use some shortcut command for creating a duplicate layer. For windows system >> Click on the CTRL + J command and if you are using MAC System then use this shortcut command >> COMMAND + J. Go back to your layers palette and notice it . You will see a new layer there. New layer will be appeared upward of the background layer . Duplicating layer is done . Now you can work with this new copy and can easily include layer styles.
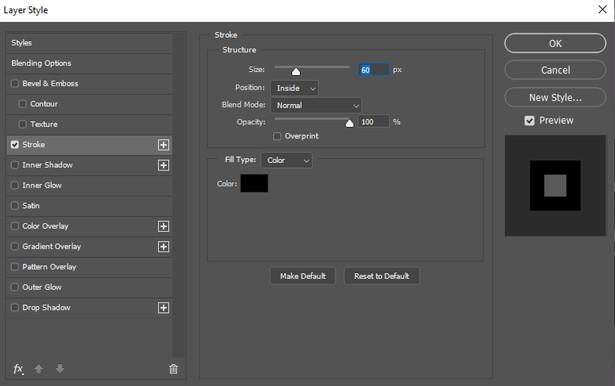
Step 2 : Use a black stroke for your layer : As we are designing a normal photo frame , so we will start our work with creating a black color borderline throughout the margins of the photo. Go to the bottom < press on the “Layer styles symbol (fx)” < Now pick the “stroke” option. Layer style dialog box will be appeared . Now alter the stroke’s color . Press on the color swatch and color picker window will be appeared . Set the R (0) , G(0), B(0) value . Also you can move your mouse cursor to set the color as black. Press OK. Set the “Position” option as “Inside”. This option helps to set the whole stroke inside the margins of our picture. You can increase or decrease the size value by pulling the slider right or left. How wide you want to see you frames it totally rely on the size . Set the size value as 60 px. Or you can set the size value as per your wish also.
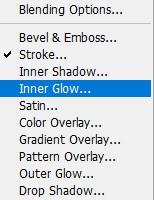
Step 3 : Include a inner glow option and select white for it : Include a white borderline on the inside of a black border. But sadly , you can apply a specific layer style one time for each layer . Already we have created a black border line using “stroke” option . So you can not create a white borderline by using this option . To create a white borderline , you have to again make a new layer. In photo-shop , there are different types of procedures are available to create stroke effect. You can use “Inner glow option” for this . Go to the left side of the layer style dialog box , press on the “Inner glow option”. Do not select the box . You have to press on the “Inner glow” name . If you press on the box , then it will make the layer style mode active but it will not lets us obtain or examine the options . Straightly , press on the layer styles name. Inner glow dialog will be appeared. Alter the color as “white” . Press on the color swatch option and color picker window will be displayed. Set the RGB Value as 255 to set the white color. Set the “opacity” value as 100 %. Set the “Technique” mode to “precise”. Now adjust the “Range” option and drag the slider into left side and set it as 1 %. You can set the value as per your wish . If you want to see the white borderline exactly same density of black borderline, then set the size value double of the black borderline . For example , you have set the black borderline “size option value as 60 px”. Now in order to create white borderline , set the size value 120 px. No matter what the value is , You just need to set the white borderline value double of the black borderline in the “size” option.
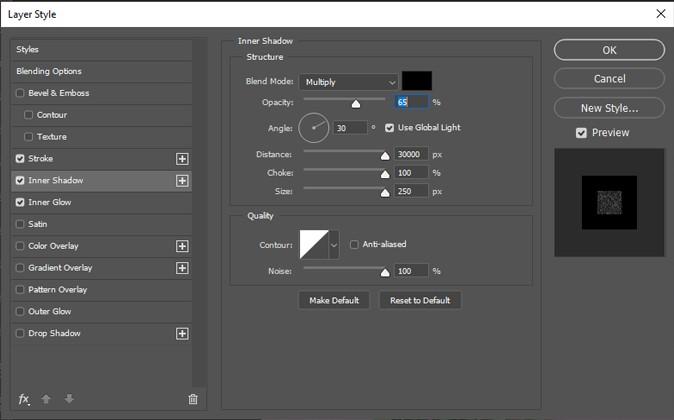
Step 4 : Include Inner shadow option : Go to the layer style dialog box < select the “Inner shadow” option. Just press on the “Inner shadow” . Do not press on the box. Otherwise , you will not have the authority to modify the options. Set the “distance” option as 0 px. Adjust the choke option and place the value as 65% . You can use some other value as well. Place the “size” value 100 %. A ultra fine shadow will be appeared on the inside of the black borderline.
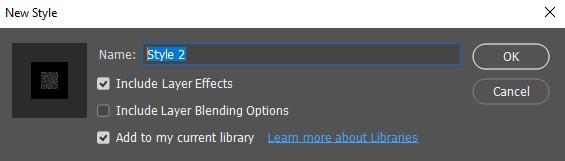
Step 5 : Save your layer style: Creating frame is done . Now it is time for saving your work . From the right side of the layer styles dialog box , press on the “New style” to save your work. New style dialog box will be appeared. Set a new name . You will see some other options. Photo-Shop automatically selects one option by default. “Include layer effects option” tackles if we want to add the inner glow effect or inner shadow on our image or not .
Step 6 : Now open another photo : Now open your another new photo and Apply the previously saved photo frame on your new photo.
Step 7 : Make a duplicate layer of your background : As we already know that photo-shop does not permits us to use the layer styles for the background layer . So duplicate the background layer. Go to the top and select the layers option < Select “New” < Select the “Layer via copy” option. Also you use some shortcut command for creating a duplicate layer. For windows system >> Click on the CTRL + J command and if you are using MAC System then use this shortcut command >> COMMAND + J. A new layer will be appeared upward of the background layer.
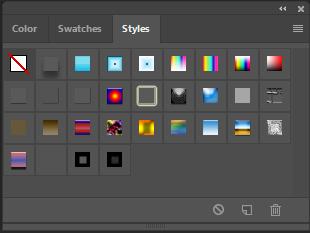
Step 8 : From styles palette , press on your layer style :Style palette is enclosed with “color palette” and “swatches palette”. To work with the style palette , select style palette tab . The styles palette carries all the thumbnails of layer styles that are inserted in the photo-shop. When you move your mouse on the thumbnail, it shows the name of the layer style . Whenever you save a new layer style , it shows in the styles palette category. The frame we have created a while age , it will appear in thumbnail. Click on that photo frame thumbnail to use it on your new photo. Photo-Shop immediately applies the photo frame on the new image.
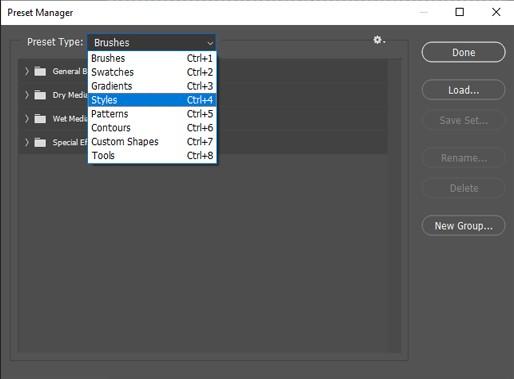
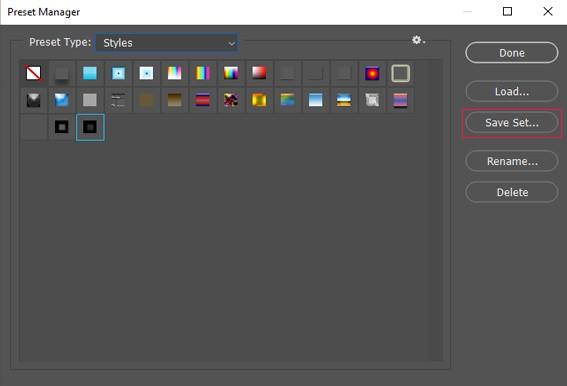
Step 9 : Use the preset manager option: Sometimes we have to re-install the photo-shop for some reason. If we do not want to lose our previously created layer styles then you can Apply the “Preset Manager” option to save any layer style permanently . It remain in photo-shop even if you re-install the photo-shop . You will still get that layer style . Go to the top and select edit < select “Preset manager ”. Preset manager option permits us to choose which layer style we want to save.

Step 10 : From the preset type option , Choose Styles : In preset manager dialog box , you will see an option called “preset type”. Set the preset type option as styles.
Step 11 : Save your layer style: When you choose the “styles”from the category , all the layer styles will be appeared. If you want to save the photo frame style then press on the photo frame thumbnail . It will be selected. A black borderline will be appeared on your selected thumbnail. If you want to save other layer style also then press on the CTRL (for windows) or COMMAND key from your keyboard and choose various layer style at the same time to save. Then press on the “Save set” button . A window will be appeared . Place a new name . For example set the name as “simple photo frame .asl ”. Then press on the save button . You can make a folder and can use any location of your computer to easily access this layer style.
Step 12 : Go to the styles palette and choose “Load styles” option : If any time you need to load the layer styles in photo-shop, you can do this with the help of styles palette. Press on the palette menu symbol which is situated at the right side . Select “Load styles” option from there.
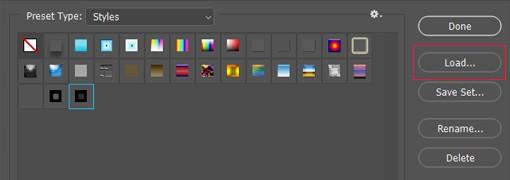
A window will be appeared . You can select any layers style from there. When you select your desired layer style , then press on the “load” button. Your desired style will be appeared again .


