After taking photographs of scenery or any model, we always do some modification with the help of photo-shop. Sometimes the raw images may not be so sharped. So in such cases, we need to apply a sharpening effect on our photo with the help of photo-shop . But you can not sharp the hazy image by using sharpening effect . A hazy image will always remain hazy. Applying the sharpening technique on the photo, it looks really very alluring. But many of us use the unsharp mask effect or smart sharpen effect for sharpening their images . But high pass filter is also great for image sharpening . In this article , I will describe how to sharpen image in photo-shop with the high pass filter .
Why do we need to sharpen our image ?
Why should we use high pass filter rather than using unsharp mask or smart sharpen technique ?
There are so many benefits of applying high pass filter on our photo . Some of them are really very popular and they are:
How to sharpen images in photo-shop with the high pass filter ?
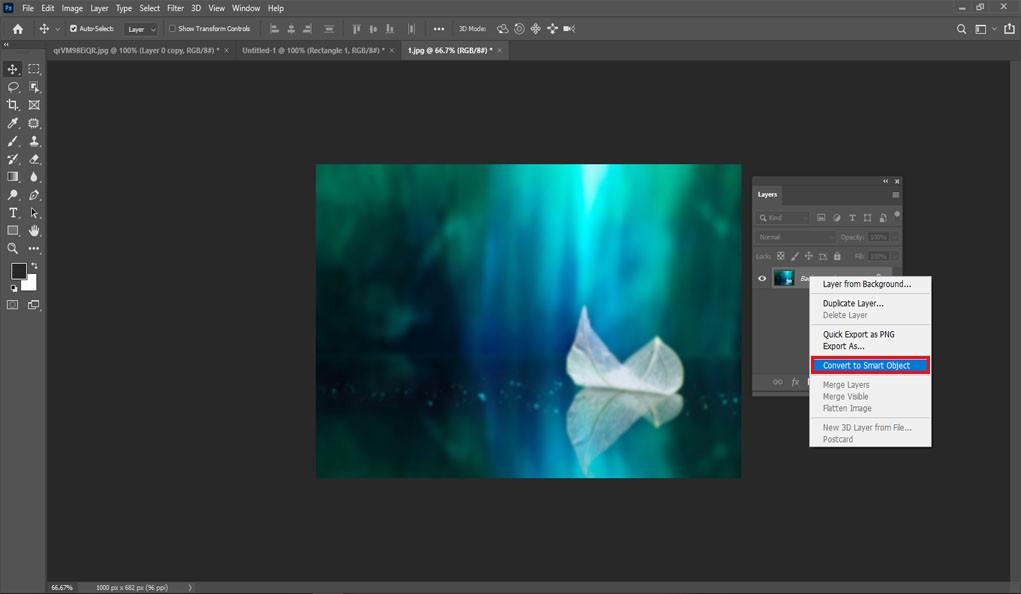
Step 1 :Apply smart object option : Open photo-shop . Load your desired photo for giving sharpening effect. Now switch the backdrop layer into smart object. We are following this method so that we can work in a non-corrosive way . To change into smart object , go to the layers panel < hit on the menu which is situated at the right side corner < select the “Convert to smart object option ”. When you will hit this option , a symbol will be arrived at the bottom right of the preview thumbnail. It means that the image has turned into smart object. Now you can include high pass filter . It will be applied on smart object . It will not destroy your actual image .
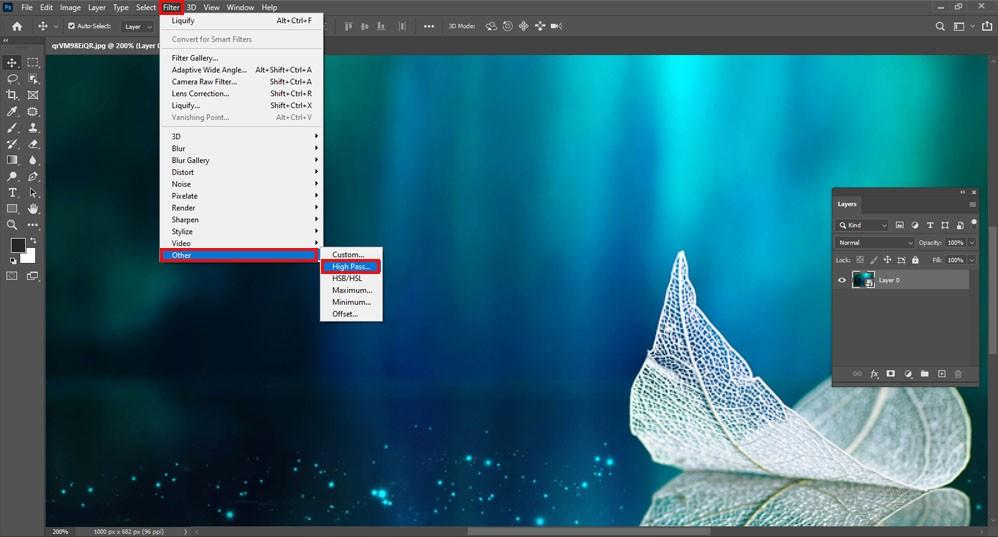
Step 2 : Choose the High Pass Filter : Go to the filter menu < select “ other ” < Select the High pass option. Once you have selected the high pass filter option , your image will become gray . It will contain gray all over the area.
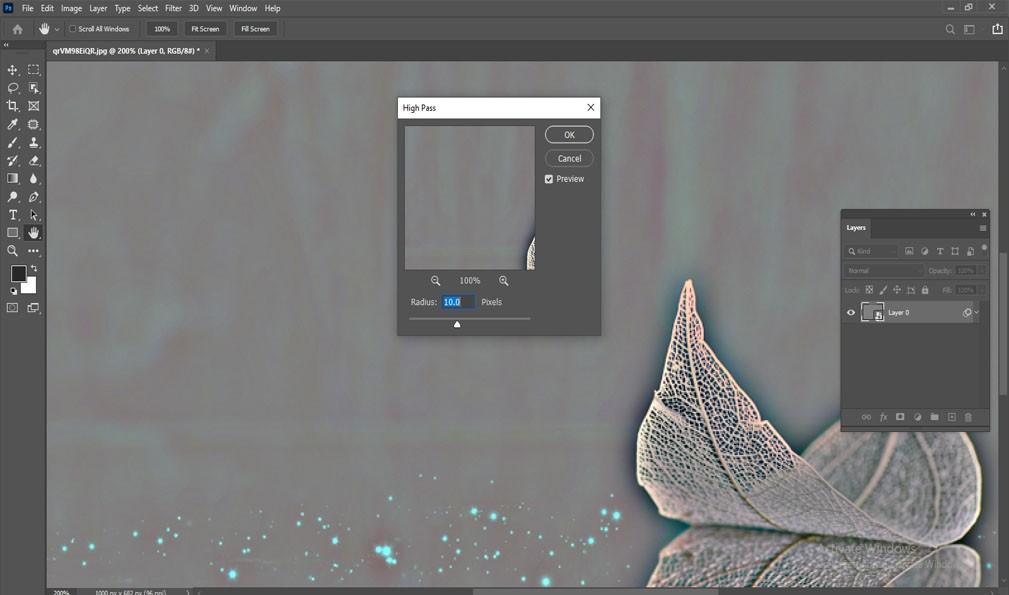
Step 3 :Set the value of radius option : There will be a high pass filter value box. You have to set all the values precisely to get a beautiful and sharp picture . Modify the radius value and see how it works. Tick on the preview option . High pass filter covers the whole image with light-toned gray . After this , it will start its work . It will search the edges in the image and it will point up them by producing the light part of the edge more light colored and the deep part more deeper . Edge-less portions will continue gray. The value of the radius option also modify the width of the boundary . Radius option affects the diameter of the edge . It has the controlling power over the amount of pixels . Radius value makes highlight over the edges.
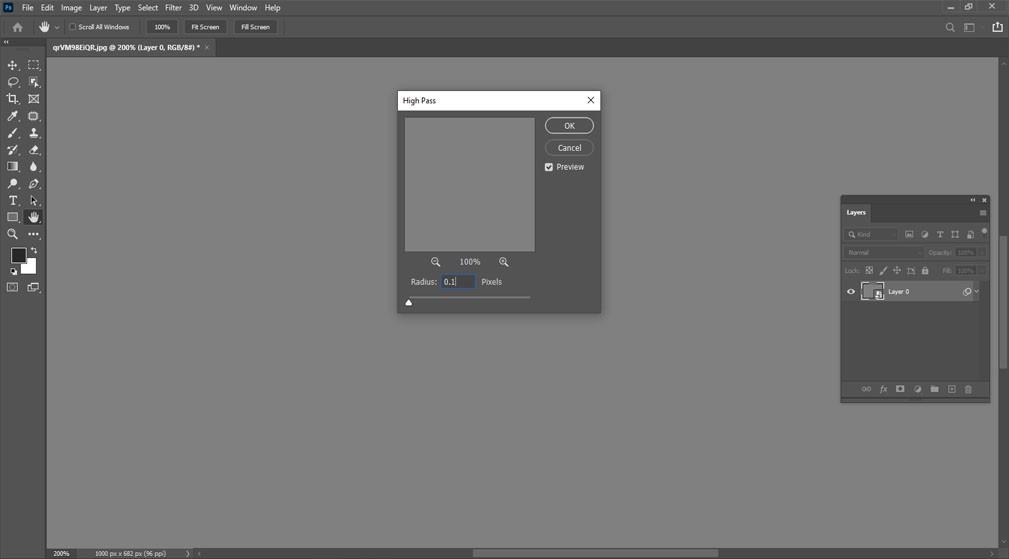
Step 4 : Which radius value is perfect for image sharpening : Small radius value produce perfect effect on image . And the simple method to find the accurate radius value for the image is to begin by pulling the slider into left side . Use lowest value as much as possible . You can set the value into 0.1 px as well. But if you set the value very small , then the whole image will turn into gray . You will not be able to see any edges there . Do not think that there are no edges . There are edges but it is not visible because you have set very low value . So try to increase your radius value . You can increase the radius value by pulling the slider into right side . When you will set the value little bit higher , then you will be able to see the edges . Non edges sections will remain as gray . When you will increase the value , edges will be more clearer.
What will happen if you set the radius value too much high ?
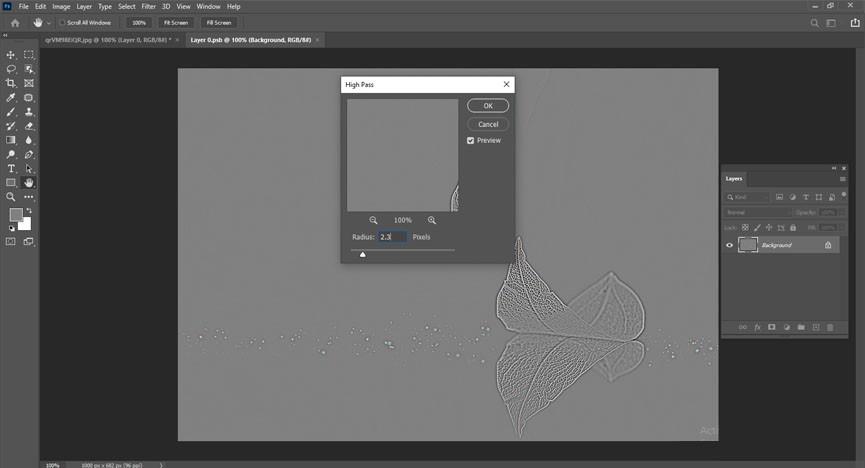
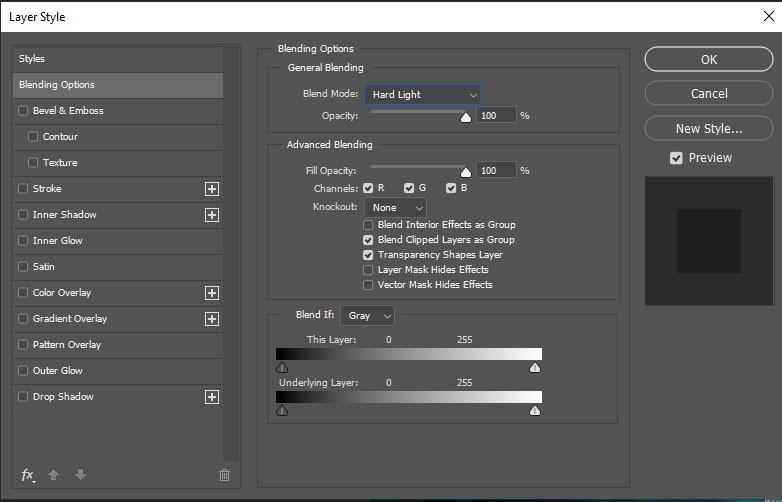
Step 5 : Start sharpening : As your edges are highlighted now , so you can sharpen your image . Press twice on the blending mode symbol . A window will be appeared . Switch the high pass filter into blend mode .
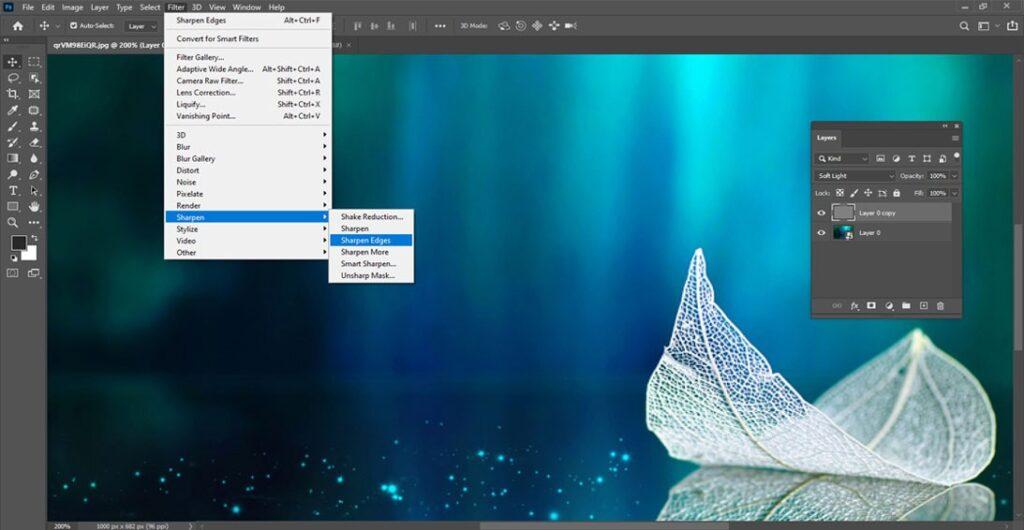
How blend modes works for image sharpness?
Apply Overlay and soft light blend mode for sharpening : These two are highly used for image sharpening . Overlay generates excessive contrast effect. It helps to create perfect and accurate sharpening. On the other hand , soft light blend mode generates less contrast effect and create ultra-fine sharpening.
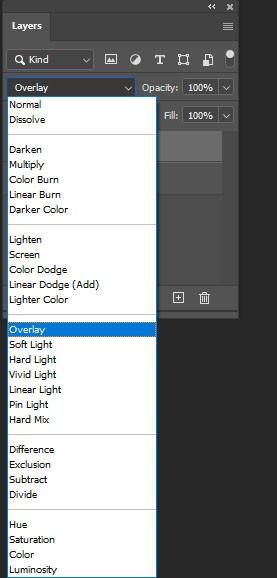
Apply linear light blend mode and hard light for sharpening : If your image still looks not so good even after applying overlay and soft light blend , then you have to apply linear light and hard light method . These two create so powerful sharpening effect on image . These two procedures works best if you want to produce sharpening effect perfectly.
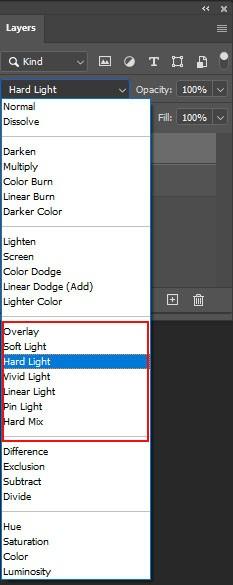
Step 6 : Set the Opacity Value perfectly : After selecting blend modes for your image , you need to set the opacity value precisely for your image . Manage the opacity value of the high pass filter . Here is a important thing you need to know . If you decrease the opacity value then the sharpening effect will also decrease. It depends on you how much sharpening effect you want to apply in your image . Set the opacity value as per your requirements. When everything is done , press on the OK button . Blending Option window will be closed .
Step 7 : Go through the whole process and see the difference : You can compare both pictures . Use your original picture and your sharpened picture . See the differences . To see the differences , there is an icon next to the high pass filter .
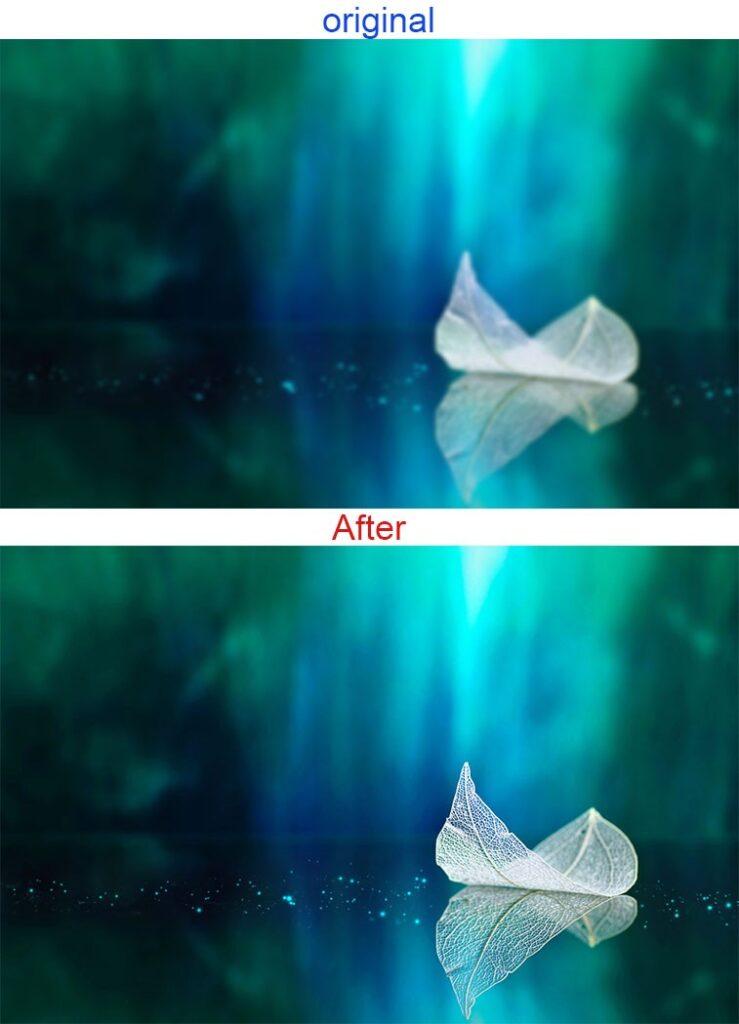
Just press the high pass filter icon . Turn it on and off . See the changes you have created. When everything is okay , then press the OK button . It is ready . This is how you can sharpen images in photo-shop with the high pass filter .