When we are dealing with a professional project like travel photography or any other subject which contains a different object in a single image and it is tough for the cameraman to capture all the ingredients in the right shape. In that case, we might need the help of Photoshop for straightening and cropping the image. In this blog, we will make a deep discussion on this topic “straighten and crop images in Photoshop CS5” Let’s go for a detailed discussion.
When there are multiple objects in your image sometimes there might be some difficulties to capture this image at the right angle. In that case, we need the help of different photo editing software and Adobe Photoshop is one of them. In Photoshop CS5, you have some advanced options which will reduce our time and we can do this job simply by following some tricks. It is done for commercial purposes. While we are walking on the street or traveling in a bus and noticed a beautiful picture and then capture it. So there is a certain chance that the picture will not be a straight one and in that case, we need the help of a professional image editor to solve this issue.
To go for this journey, we must need the help of the ruler tool and you will have it from the tool menu at the toolbar. You will have it on the list of eyedropper tools. Just click the eyedropper tool and from the dropdown, the menu bar chooses the ruler tool.
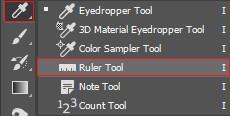
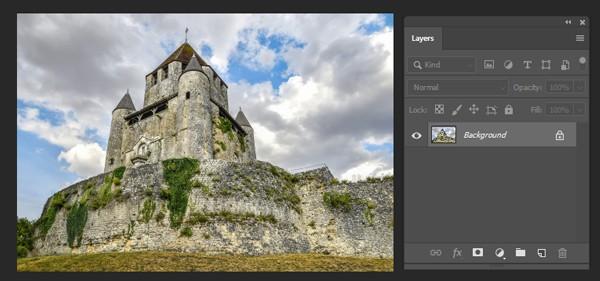
Figure: This image is angled a little bit and we will solve this issue
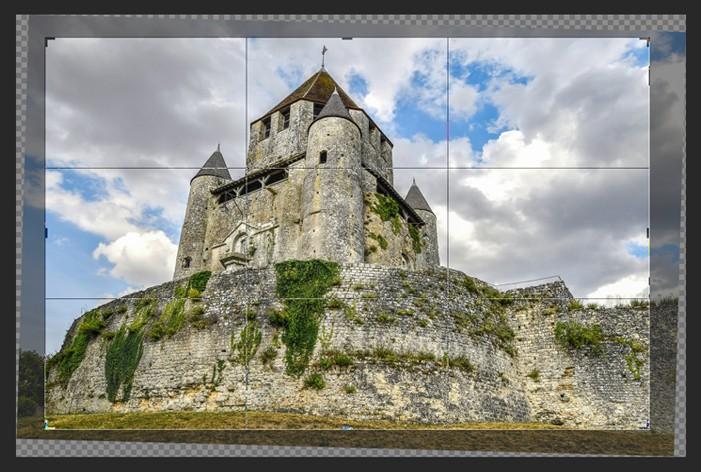
So we have the ruler tool to implement it on the targeted image. Pick up the position where we need straightening service and later on we will implement them. We will make something straight here either horizontally or vertically. In this picture, we have taken a portion of New York City and somehow the picture is angled a little bit. So we put the cursor in the mid of the image and trying to solve this issue. By a simple press, we are straightening this image. While going on this journey, please keep in mind that the proportion of the height and weight of this image should be accurate while we are doing this operation.

While we are checking the proportion of the image and all its measurements this time we will click the straighten button and fix this issue. From the option bar, we need to click the straighten button and complete the journey.
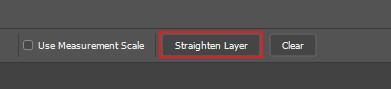
As soon as we click the button Photoshop will do the straighten task according to the ruler that we have done in the second step.
This time our task is to crop the image according to the headline but if we notice the history panel then we can see the crop is already done. Yes! You can just simply click CTRL+H to see the history panel and from the drop-down menu, you will notice that it is already done. Now if you have any doubt that what is done here then you might go back like press CTRL+Z and then see when they straightening this image already they have done the cropping part.
The blank area is the material behind the picture. Since the photograph has been rotated, it no longer fits appropriately inside the elements of the archive window and we wind up seeing the material behind it. In Photoshop CS4 and prior, we would have to physically trim away the blank area with the Crop Tool, which added an entire other advance to the fixing cycle. There’s no compelling reason to do that in Photoshop CS5, however. With a solitary snap of the new Straighten button in the Options Bar, Photoshop deals with the fixing and editing for us!
If, for reasons unknown, you’d prefer to crop away the void area yourself after Photoshop fixes the picture, hold down your Alt (Win)/Option (Mac) key while tapping the Straighten button in the Options Bar. This advises Photoshop to just pivot the photograph, surrendering the editing to you.

Thanks a lot for being with us. I hope you got the steps. If you do like to know more follow our blog section and here, you can know more. Thanks a lot for being with us.


