Here is Top 5 Photoshop Tips And Tricks For Beginners:

  1. Crop the picture to enhance composition.

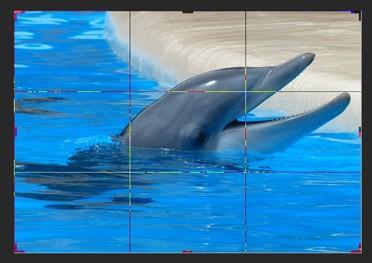
Often, a simple crop can make a significant effect. Out of all the image editing tricks available to you, basic cropping is the easiest one that can effectively do wonders for your image’s composition. It permits you to eliminate pointless components, put more spotlight regarding the matter, and make more dramatization for greatest effect.

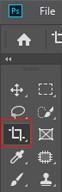
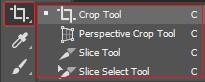
How to use the crop tool in Photoshop:

  • Choose the crop tool from the toolbox.
Choose the crop tool from the toolbox
  • Choose any aspect ratio by clicking on the drop-down menu and selecting from Unconstrained, Original Ratio, or the Preset options. You can likewise enter your own favored measurements in the content fields next to the menu.
 crop tool
  • Drag the corners or the edges of the photograph to accomplish your ideal crop.
  • Press Enter or snap the check symbol to settle the crop.
settle the crop
  1. Correct the exposure:  Fortunately, on the off chance that you realize how to edit pictures, this can without much of a stretch be fixed. These tools can be gotten to by tapping on Image (on the Menu Bar) and choosing Adjustments starting from the drop menu.
Correct the exposure
  • Brightness/Contrast
Brightness/Contrast
  • Levels
Levels
  • Curves
Curves
  • Exposure
Exposure
  • Shadows/Highlights
Shadows/Highlights
  • HDR Toning
HDR Toning

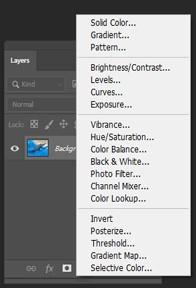
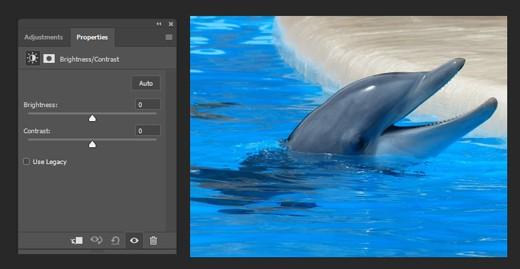
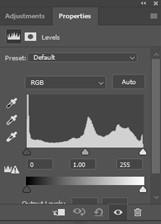
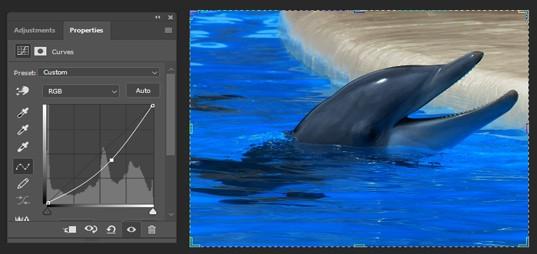
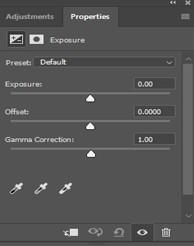
In the event that you’ve never utilized these instruments, Brightness/Contrast, Exposure, and Shadows/Highlights are on the whole lovely clear — you should simply move the sliders to one side or right to adapt. Changing the Levels and having the right Brightness and Contrast in your photographs can feature explicit subtleties in your subject just as give it greater lucidity and profundity.

  1. Make color adjustments if needed.

In the event that you’ve appropriately changed the white equilibrium on your camera, you shouldn’t need to do any shading amendments on the subsequent photographs. Utilizing wrong white equilibrium will bring about a shading cast, and that can drastically influence the vibrance, immersion, and difference of your photographs.

Make color adjustments if needed

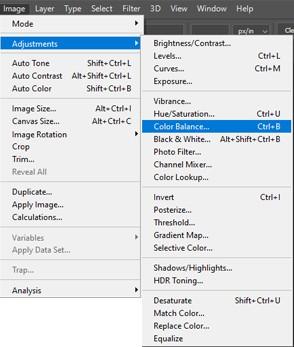
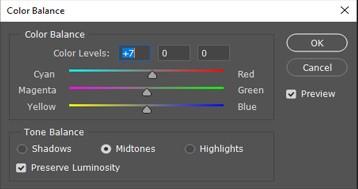
How to use Color Balance in Adobe Photoshop:

  • Snap on a photograph in the Menu Bar, click on Adjustments, and afterward Color Balance.
Color Balance
  • Choose which tones in the photo you want to change (shadows, midtones, or highlights).
  • Then check the Preserve Luminosity box.
Luminosity box
  • Again check the Preview box to look at your adjustments in real time.
  • Move the sliders to achieve desired color balance.

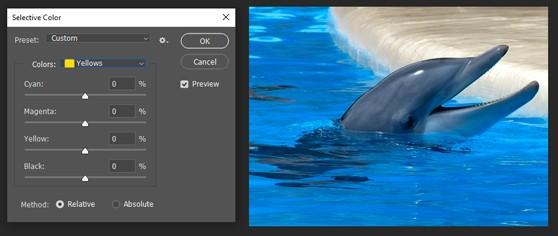
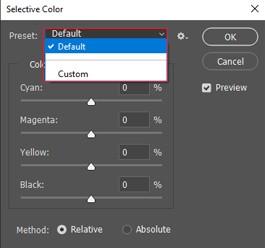
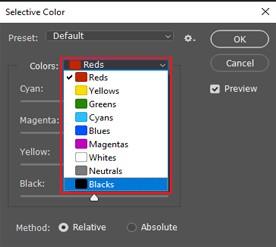
How to use Selective Color in Adobe Photoshop:

  • Click on photo in the Menu Bar, then Adjustments, and Selective Color.
  • To see adjustments in real time, check the Preview box.
Preview box
  • Select from Relative or Absolute.
Relative or Absolute
  • Choose the color from the drop-down menu that you want to adjust.
drop-down menu
  • to increase or decrease the color cast from your chosen color move
increase or decrease

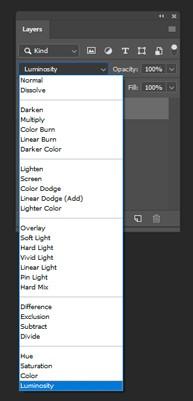
You can likewise utilize Vibrance, Hue/Saturation, or Channel Mixer (under Adjustments) for shading remedy. On the off chance that that wasn’t sufficient, you can likewise picture how you need the shadings in your picture to appear as though utilizing the Color Wheel Color Picker. This report on Photoshop CC 2019 permits you to see and pick specific tones, from agreeable gatherings to correlative and similar colors. To do this, choose the color wheel alternative from the Color board fly-out menu.

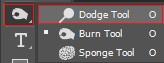
The Dodge and Burn devices, then again, permit you to feature or obscure explicit regions in your photograph to give it extra surface or character.

How to use the Dodge and Burn Tools: 

Dodge and Burn
  • Create another layer and set its mode to Overlay.
  • Check the container that says, “load up with overlay-unbiased shading (half dim).” Doing so allows you to apply, evade and consume changes without controlling the first picture.
  • Choose the Dodge Tool and set brush to a more modest and gentler setting.
  • Paint over explicit regions you need to light up utilizing the Dodge Tool and obscure regions utilizing the Burn Tool.
  1. Remove unwanted spots like sensor dust, blemishes.

Since you’ve amended the shade of your picture, it’s the ideal opportunity for some specific adjustments. To stay away from this issue, try to clean your sensor first. In any case, in the event that you’ve effectively taken photographs with a messy sensor, you can in any case alter them out utilizing Photoshop by utilizing the accompanying apparatuses:

  • Spot Healing Brush Tool
Spot Healing Brush Tool
  • Healing Brush Tool
Healing Brush Tool
  • Patch Tool
Patch Tool
  • Clone Stamp
Clone Stamp
  • Apply sharpening or blurring filters.

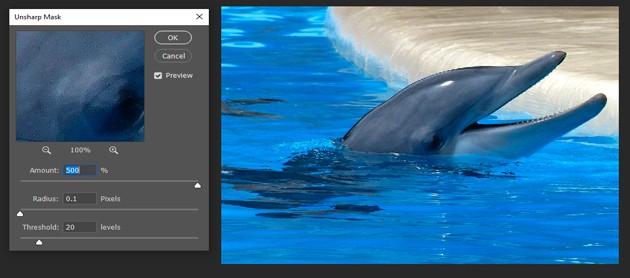
Regardless of whether your picture is in an amazing center, it might in any case profit with a touch of honing for more noteworthy accentuation on the subtleties or to decrease any conditioning.

How to sharpen an image in Adobe Photoshop:

  • Lessen the commotion in your picture.
  • Create another layer of a similar picture (choose Layer on the Menu Bar and snap Duplicate Layer) or make a determination from the picture.
  • Go to Filter, Sharpen, and select any of the Sharpening instruments to apply a honing channel.
Filter, Sharpen
  • You can repeat if you need.
Top 5 Photoshop Tips And Tricks For Beginners