In photo-shop , there are so many tools are available . Some of them are : pen tool , marquee tool , lasso tool and many more. In this article , I will describe how to gain photo-shop’s basic selection tools , how easily you can manage and include to a current selection . Also you will get to know how easily you can intersect two selections and obtain the portion that overlaps each other. Also I will describe how can you deduct any part from a current selection . The moment you will know everything about the selection then you will understand the importance of selection tool . It is really very essential and useful . You can use this selection tool for many reasons and can get perfect result for your work.
How you can you add to anexisting selection :
To make everything easy and understandable , open a basic shape in your photo-shop. Now you can determine this shape with the help of selection tool. In such cases, rectangle marquee tool is very much popular . Go to the tools palette < choose the Rectangle Marquee Tool . Also you can use some shortcut command to get the rectangle marquee tool very easily. Press on the M key from your keyboard to get rectangle marquee tool.
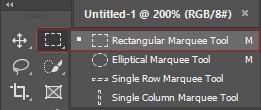
Create a new selection with the help of this tool . We have to be very careful while creating a new selection because it can be complicated . Begin your work by pulling a selection in the region of the bottom half of the shape. Lower half of the shape is selected. But some portions (Top right portions) are still there which are not selected. Produce another selection for the top right portion. Select the upper left corner of the shape and also Hold the SHIFT key from your keyboard to create a accurate square. Whenever you will finish your work for top selecting top right portion , you will see that the previous work has gone . Lower half selection has gone because you have selected the upper right portion. It is common behavior of photo-shop. When you will start your second selection , first selection will be gone. To solve this problem , there aresome techniques to select this shape .
Four major selection options : In the options menu , there are four major selection options. Before selecting the rectangle marquee tool , have a look in the options bar. In the left side , notice carefully. There will be available four small symbols. These four small symbols are very strong . Every individual symbol works for different function. First left symbol is known as “New selection icon”. Second icon is known as “Add to Selection” , Third selection is known as “subtract from selection” , fourth selection is known as “Intersect with selection”. Photo-shop selects the first left symbol (New selection) by default . It works for creating a new selecting line each and every time.
How to use “add to selection”:
Go to the second left icon which is known as “ Add to Selection ” . You can take help from this icon . Using this option , you can select your shape. With the help of this icon , you can create any type of selection and it will be included to any selection that you have made .
We will use our basic shape and we will show how easily we can make any selection using these small icons and it can store all the selections and also new selection can be done . Previous selection will not be removed . Go and press on the “new selection” symbol because we want to pull out the initial selection around the lower half of the shape. Create a selection in the region of the bottom half of the shape. Now you can include another selection . To include another selection, press on the “Add to selection” icon from the options bar. Also you can use shortcut command to bring the “add to selection” icon . Press the SHIFT key and you will see a (+) icon will be appeared at the right side . It declares that we are going to include to the existing selection. Now pick out top portion again .
Press on the SHIFT key and try to pull out another selection in the region of the square portion . If you want to overlap the selection , then try to select some of the section beneath the square . By doing so , second selection will overlap the initial selection . The moment you will start pulling out the additional selections , you do not have to hold the shift key. You can easily leave the shift key when your mouse start pulling out the selection. We have completed the second selection . Leave the mouse button. Second selection has been included into the first selection smoothly. Using “Add to selection” option , we can save our each and every selection very easily.
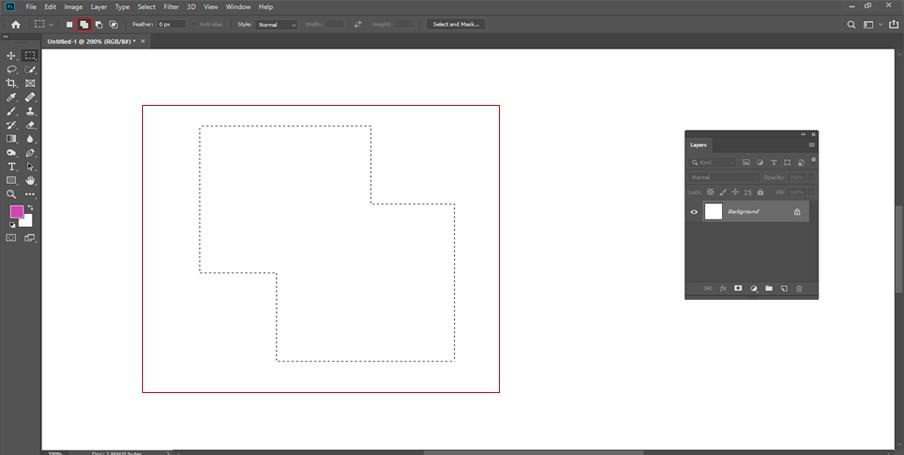
Lets take a real life example for better understanding:
For any photo, eye is one of the things that needs to be selected very carefully. At first, we select one eye and then we go for second eye selection but first selection will be disappeared when we go for second selection . But you can solve this type of small issues by using the “Add to selection” option.
Open photo-shop . Choose your desired photo. Go to the tools palette and choose the lasso tool. Also you can use shortcut command to select the lasso tool very easily . Press on the L key from your keyboard and select the lasso tool . Now start your selection . Go to the left eye and draw out a selection with the help of lasso tool. In general, if you make a selection for the left eye of your photo and then go for the right eye to select , you can lose out left eye selection. It means , the selection you have created for left eye will be gone when you select the right eye. So , you have to use “Add to selection ” option.
Create a selection around the left eye and Now you can include another selection (right eye) . To include another selection (right eye), press on the “Add to selection” icon from the options bar. Also you can use shortcut command for bringing the “ add to selection” icon . Press the SHIFT key and you will see a (+) icon will be appeared at the right side . It declares that we are going to include another eye(right eye). The selection is completed. Besides selecting eyes, you can select any thing such as: Lips, ear , hair and many other things which you want to select using “Add to selection” option.
How to use the “Subtract from selection” option :
Go to the options bar and select the third left symbol from there . Third symbol is known “subtract from selection”. Occasionally, we need to select some difficult shape. When you are selecting some difficult shape , then you can use this option . It is very simple to use . At first , you have to select your entire shape and then subtract from your selection. We will use the same basic shape which we used before to show how to do use “Add to selection”.
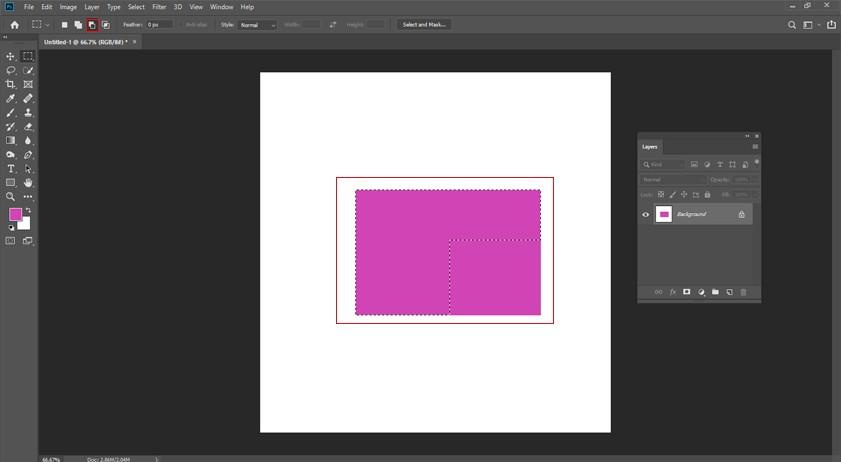
Go to the tools palette and select the rectangle marquee tool and select the whole shape. Just pull a selection throughout the whole item. If your shape contains some empty part , then you can remove those empty section with the the help of “subtract from selection”. In our shape , there is a free space at the top left . We can solve this by the help of subtract from selection option. Hold the ALT (windows) or OPTION (mac) key from your keyboard, you will see a minus (-) icon will be appeared at the right side. Remove the free space with the help of rectangle marquee tool as well as the “subtract from selection” option. Press on the ALT(windows) Or Option(mac) key and draw a selection that you want to erase from your current selection. When everything is okay , leave the mouse button. The empty section will be removed.
How to use “Intersect with selection” option : Go to the options bar and select the fourth left symbol . Fourth symbol is known as “intersect with selection”. To save your valuable time , you can use some shortcut commands to get the this option very quickly. For windows system use this command : SHIFT+ALT . For mac use this command: SHIFT+OPTION. To know how this option works, select a new shape which contains two curvy shapes . The shape contains two half-moons or two curves. One curve is situated at the left side and the other one is at the right side. There is a white section between these two curve and our task is to select that white empty space. Apply elliptical marquee tool here , so that you can perfectly select that empty portion.
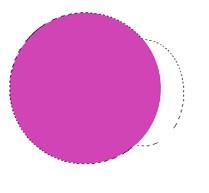
Go to the tools palette and select the elliptical marquee tool. Now go to the left side and make a round selection throughout the first curve shape . Hold the SHIFT Key while you are dragging . This will help you to complete your work with no flaw. Left curve is selected but we want to select the free white space . You can try the “add to selection ” option as well as “subtract to selection” option but you will get nothing using them. Use the “intersect with selection” option to select the empty space that is located between two curves. We already selected the left curve . Use the shortcut command SHIFT + ALT Or SHIFT + OPTION and pull out an another selection on the right side of the shape, generating the section between these two shapes overlaps. Notice the bottom right side, there will be an icon (X) with red circle. Both shape overlaps throughout the white free space. This is the section which we wanted to select. Leave the mouse button . Photo-shop automatically selects the section where our selections intersected.
